



TL;DR
Before deleting photos, identify whether they are in Photos or separate Finder files.
- With iCloud Photos, deleting from the synced library also deletes from other devices using it.
- Back up important photos independently before removal.
- Photos and Finder use different deletion and recovery paths.
Sources: iCloud Photos
For pictures in Photos, open Library, select the images, press Delete, and confirm. For separate image files, use Finder and move them to Trash.
If you only need more Mac storage, check the storage options below before deleting anything.
Before You Delete Photos on Your Mac
Make a separate backup of anything you want to keep. Back up your library with Time Machine or copy it to an external drive.
iCloud Photos syncs changes, so it doesn’t replace a separate backup that survives library deletions.
- In Photos, select the pictures you want to keep before removing them from the library.
- Choose File > Export > Export Unmodified Original. Save the files to your backup destination and let the export finish.
- Open the exported files to check that they’re usable before you delete the library copies. If you want edited versions too, also use File > Export > Export [number] Photos.
The export options distinguish original files from exported edits. If you use Optimize Mac Storage, Time Machine may not contain your originals because some are stored only in iCloud.
Don’t assume that copying a smaller local library has saved every full-resolution photo.
These instructions concern your personal Photos library and ordinary image files. Shared Albums and iCloud Shared Photo Library have different ownership and deletion rules.
The screenshots below come from the original guide and show older layouts, including labels such as My Albums and Bin.
Choose What You Want to Remove
| You want to remove | Use | What happens |
|---|---|---|
| Unwanted photos in your library | Delete in Photos | Moves them to Recently Deleted. iCloud Photos syncs the deletion. |
| A photo from one regular album | Remove from Album | Keeps the photo in your library. |
| An album’s organization | Delete Album | Keeps its photos and videos in your library. |
| Separate image files in Finder | Move to Trash | Removes those files. Check whether they belong to a synced folder. |
| Local storage used by iCloud Photos | Optimize Mac Storage | Keeps full-size originals in iCloud and smaller versions locally when space is limited. |
The consequences above follow Apple’s Photos deletion guide, album controls, Finder deletion guide, and iCloud storage settings. Choose the action by what you want to keep afterward.
How to Delete Photos From the Photos Library
Use the library view when you want a picture removed from Photos itself. Before you confirm, remember that iCloud Photos syncs removals across devices using the same Apple Account with iCloud Photos enabled.
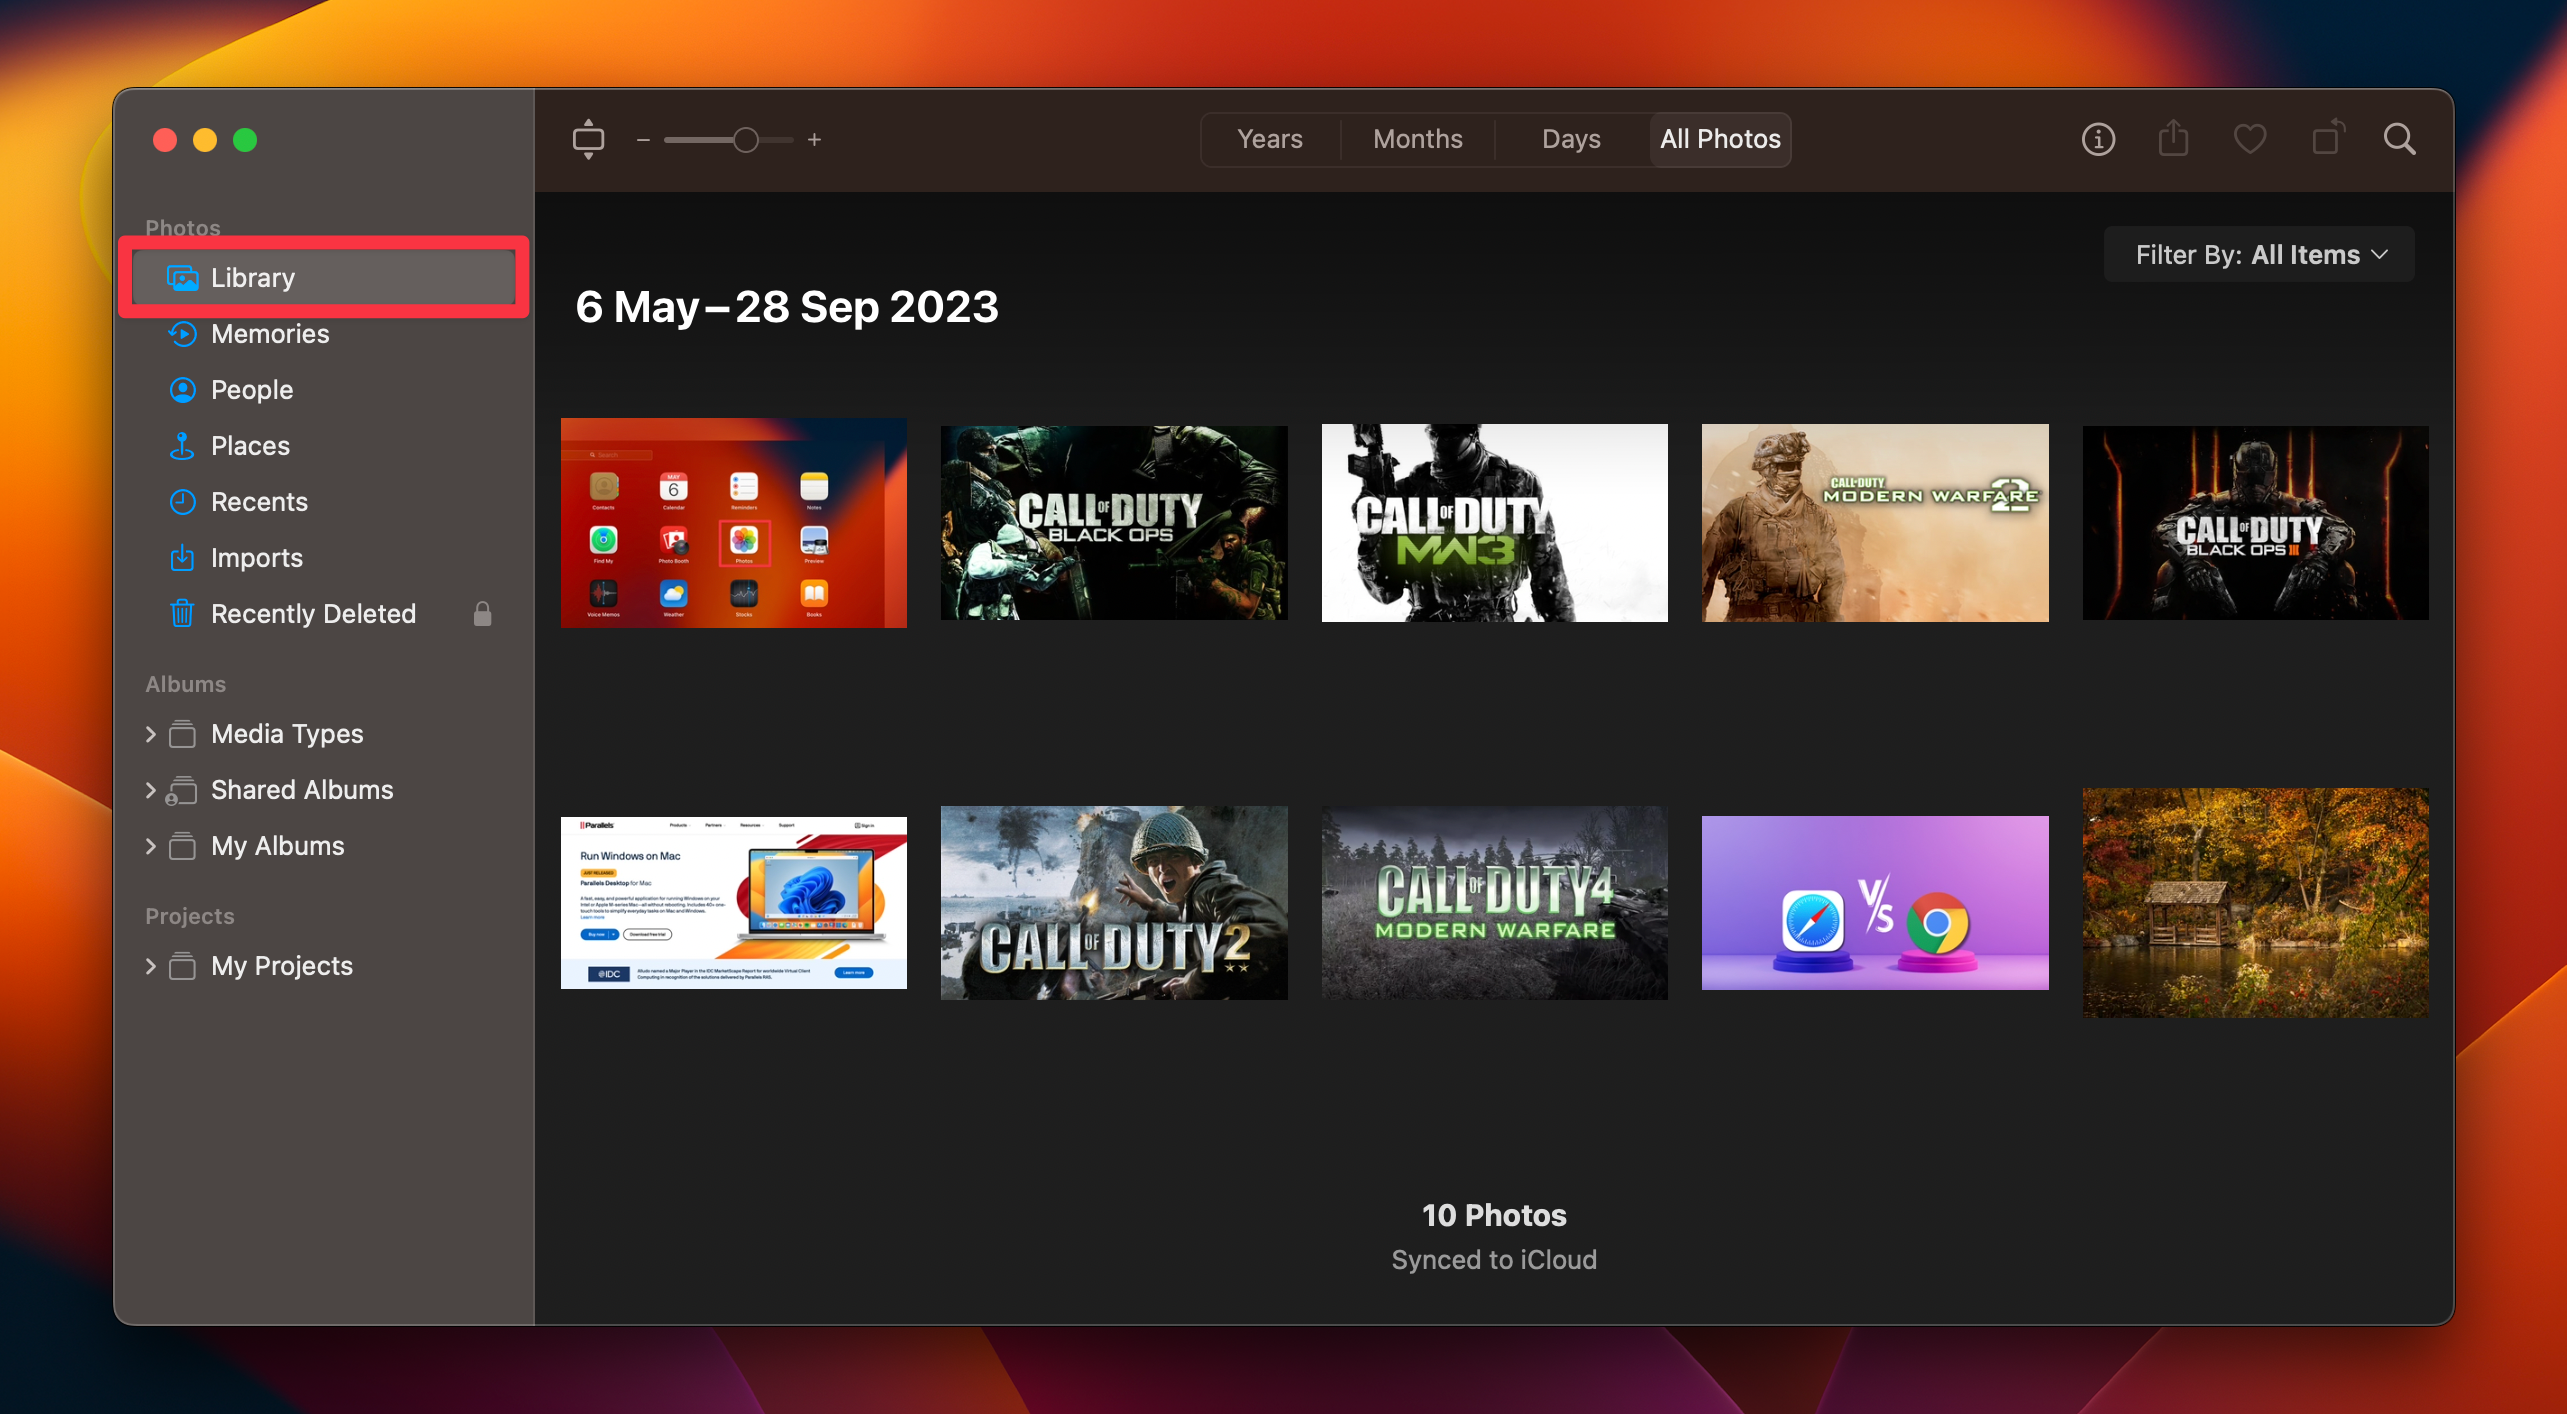
- Open Photos from the Dock, Applications, or Spotlight.
- Open Library in the sidebar. Choose the view containing the pictures you want to remove.

Select One, Several, or All Photos
- Click one photo to select it.
- Hold Command and click additional photos to select pictures that aren’t next to each other.
- For a range, select the first photo, then hold Shift and click the last. Everything between them is included.
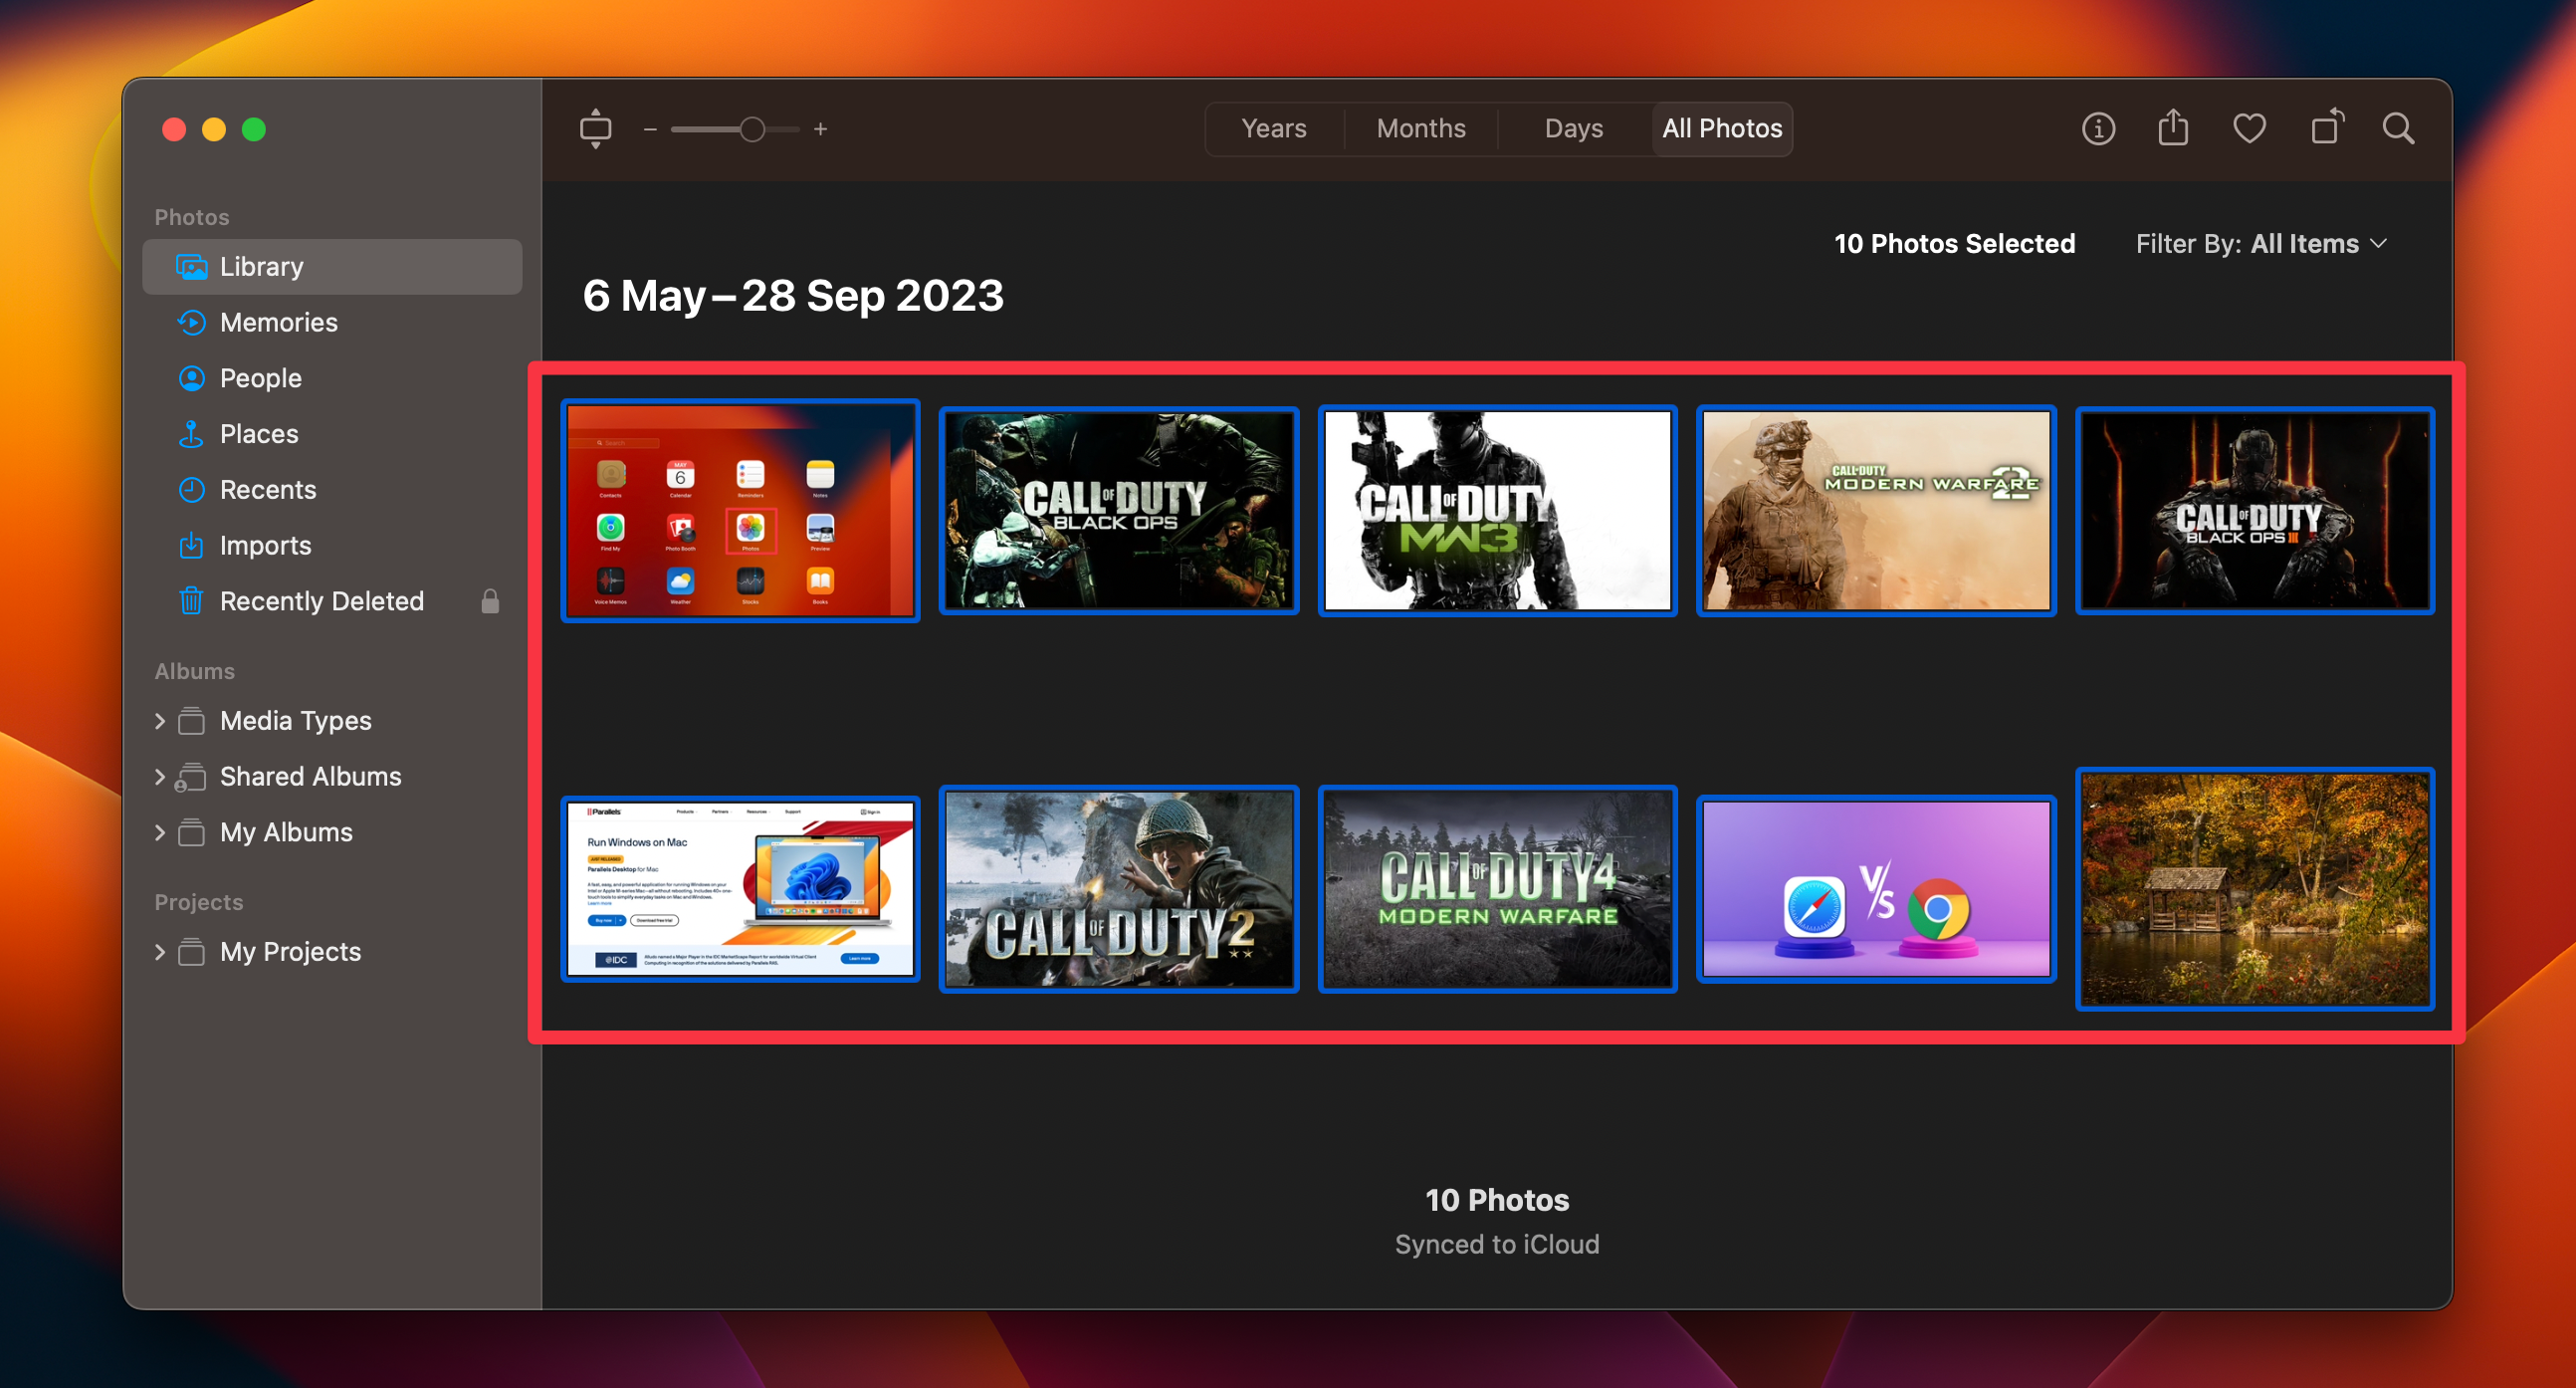
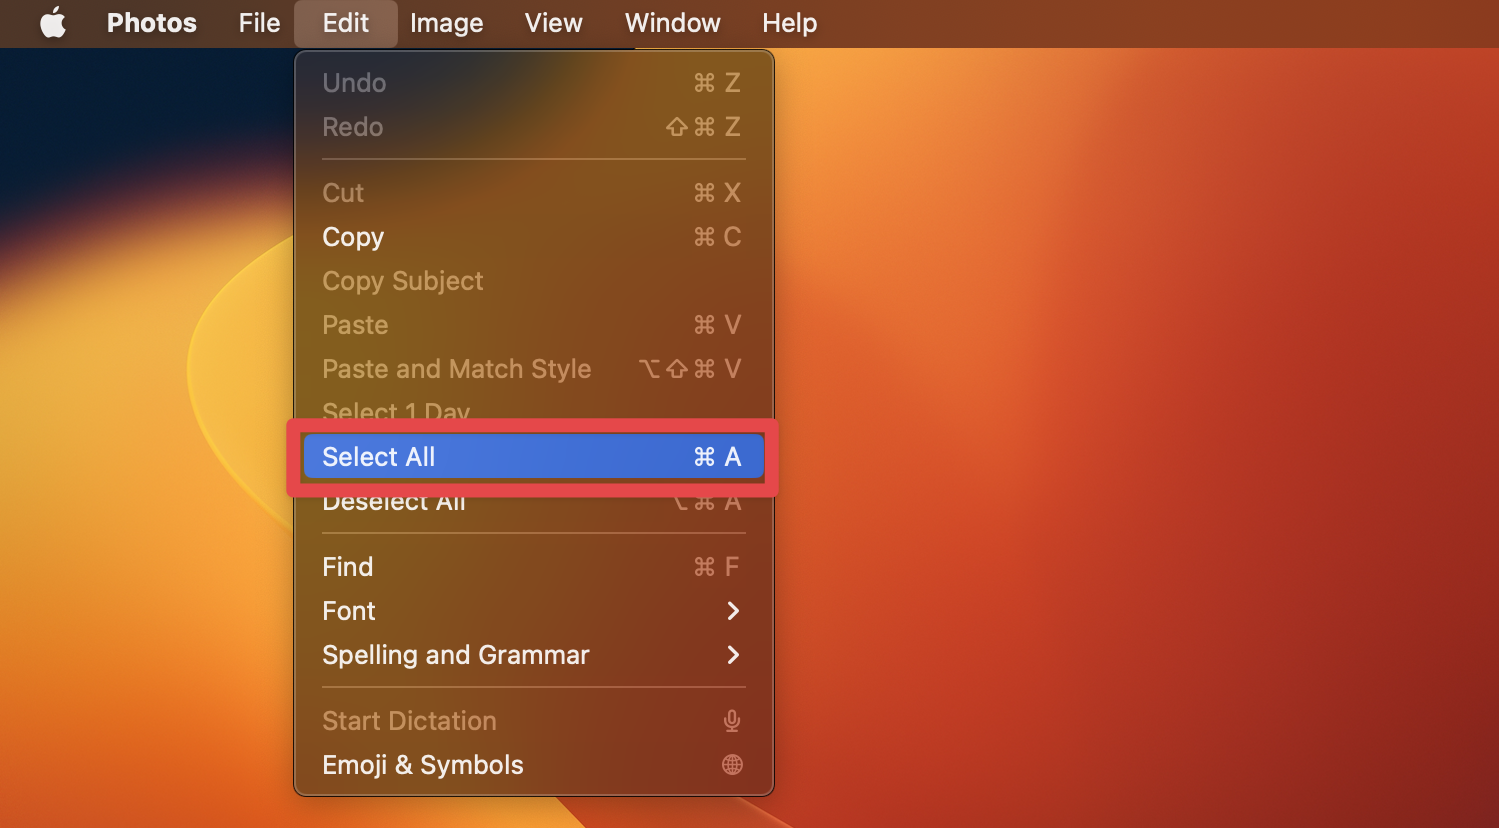
- Press Command-A to select all photos in the current view. You can also use Edit > Select All. Review the selection before continuing.
These Photos selection shortcuts apply to the view you’re working in. Selecting everything inside an album doesn’t mean you’ve selected every photo in the library.

Delete the Selected Pictures
- With the intended library pictures selected, press Delete.
- Check the confirmation message and the number of photos, then click Delete if the selection is correct.
- Open Recently Deleted to check where the pictures went. You can recover them there before permanent removal.

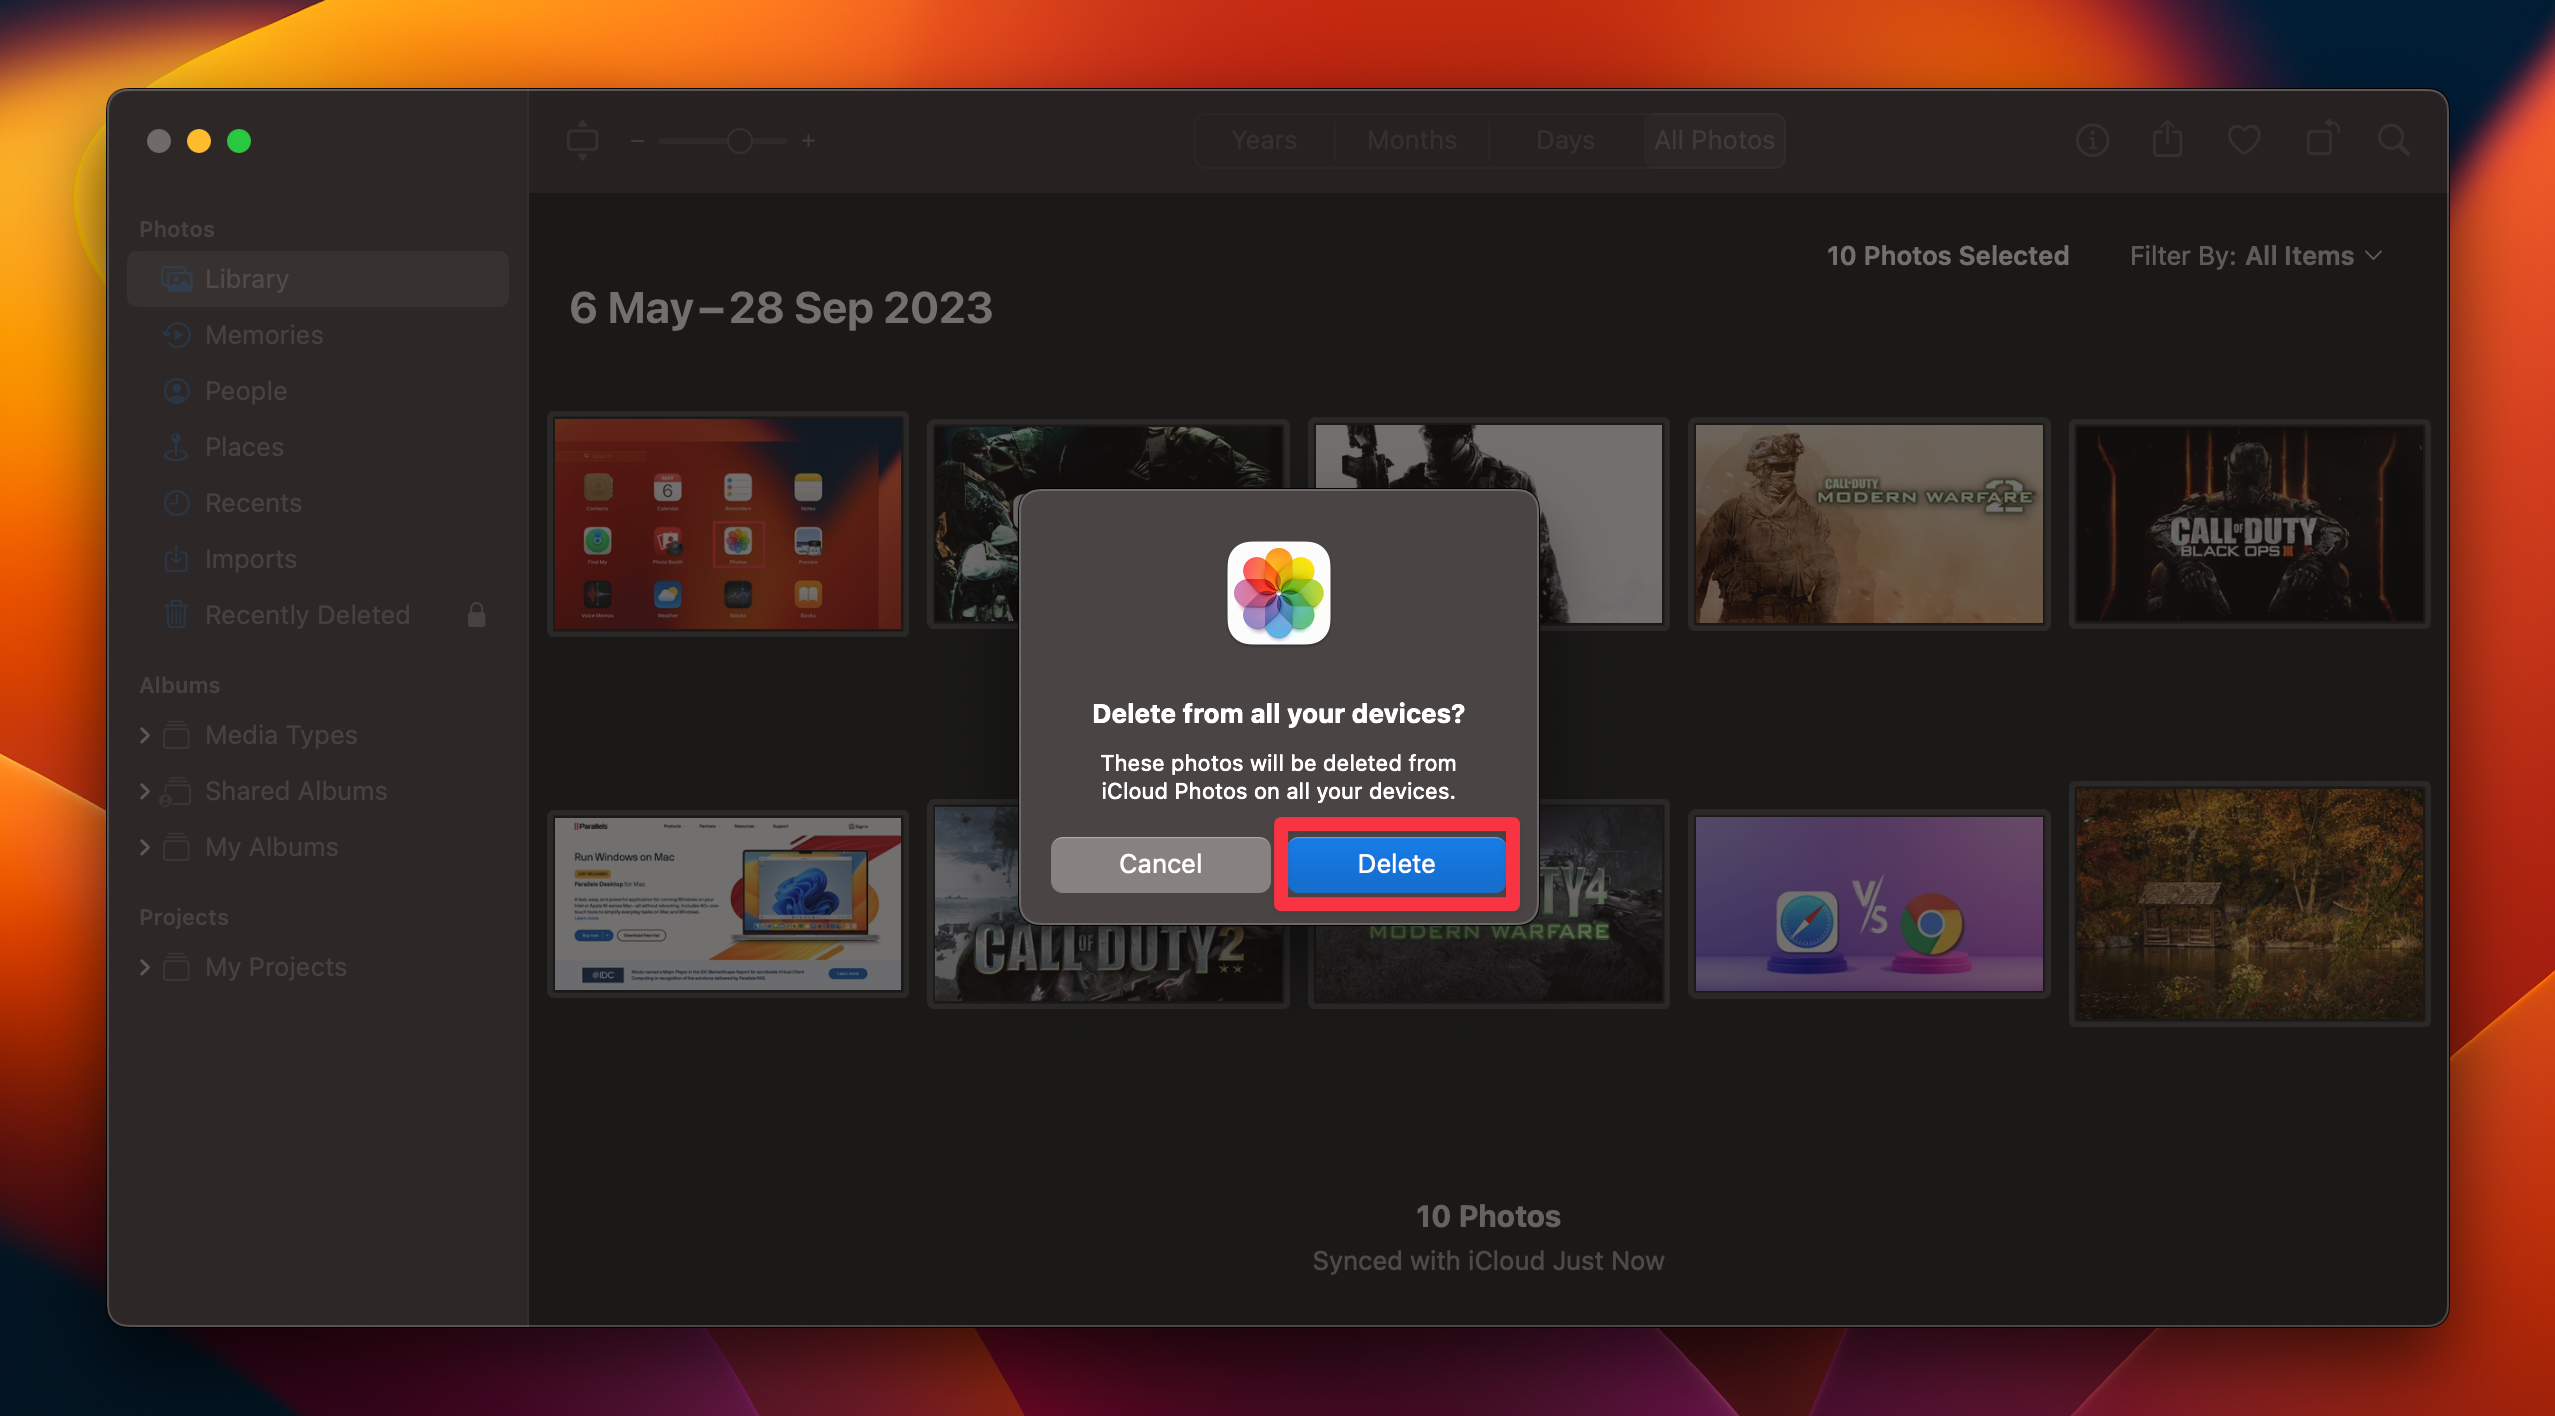
Deleted library items stay in Recently Deleted for 30 days unless you permanently delete them sooner. Emptying Finder’s Trash doesn’t clear Recently Deleted in Photos.
Be careful with Command-Delete. It deletes without confirmation and removes an item from the library. Inside a regular album, Delete removes the photo only from that album.
Use Library and the ordinary Delete key when you want to review a confirmation first.
Remove Photos From an Album Without Deleting Them
Removing a picture from a regular album keeps it in your library and other albums. Open the album, select the pictures, and press Delete, or choose Image > Remove [number] Photos from Album.
If you make a mistake, use Edit > Undo. These are Apple’s album removal controls.
To remove the whole album’s organization, follow these steps. Deleting an album doesn’t delete the photos inside it or free the space those photo files occupy.
- Find the regular album in the Photos sidebar under Albums. Older layouts may say My Albums.
- Control-click the album and choose Delete Album.
- Read the prompt, then click Delete. The photos and videos remain in your library, while the album is removed from your library and iCloud.
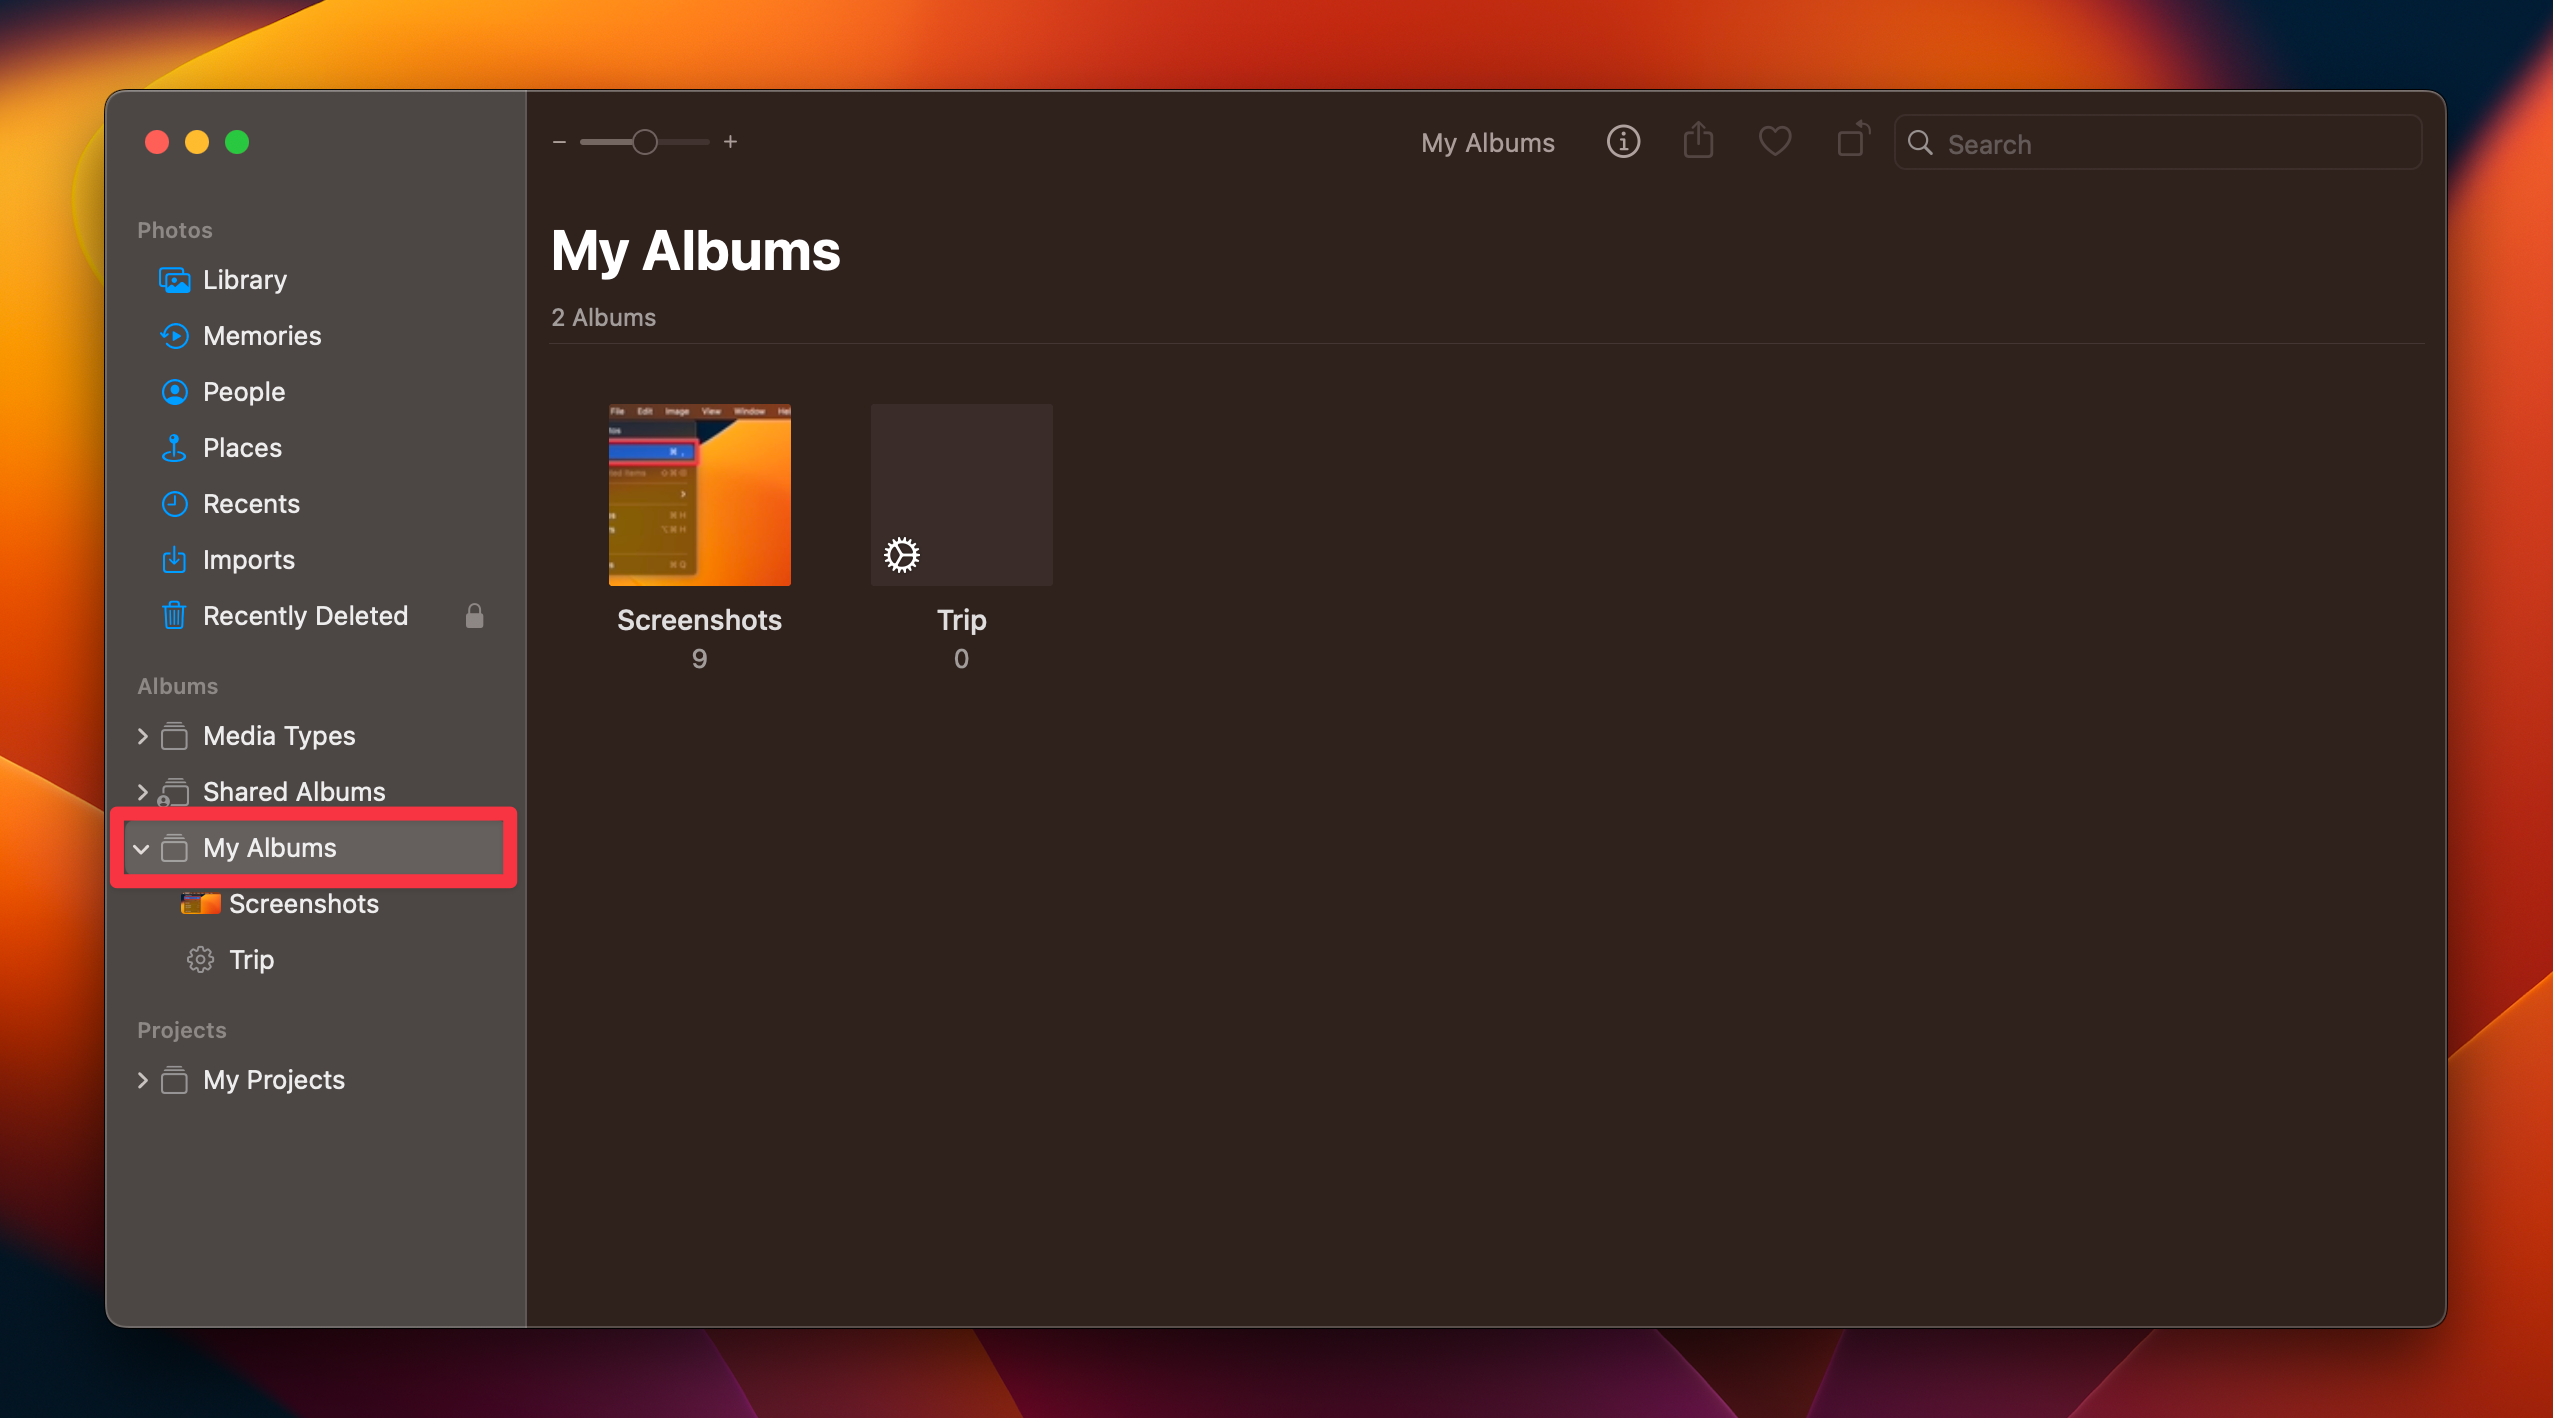
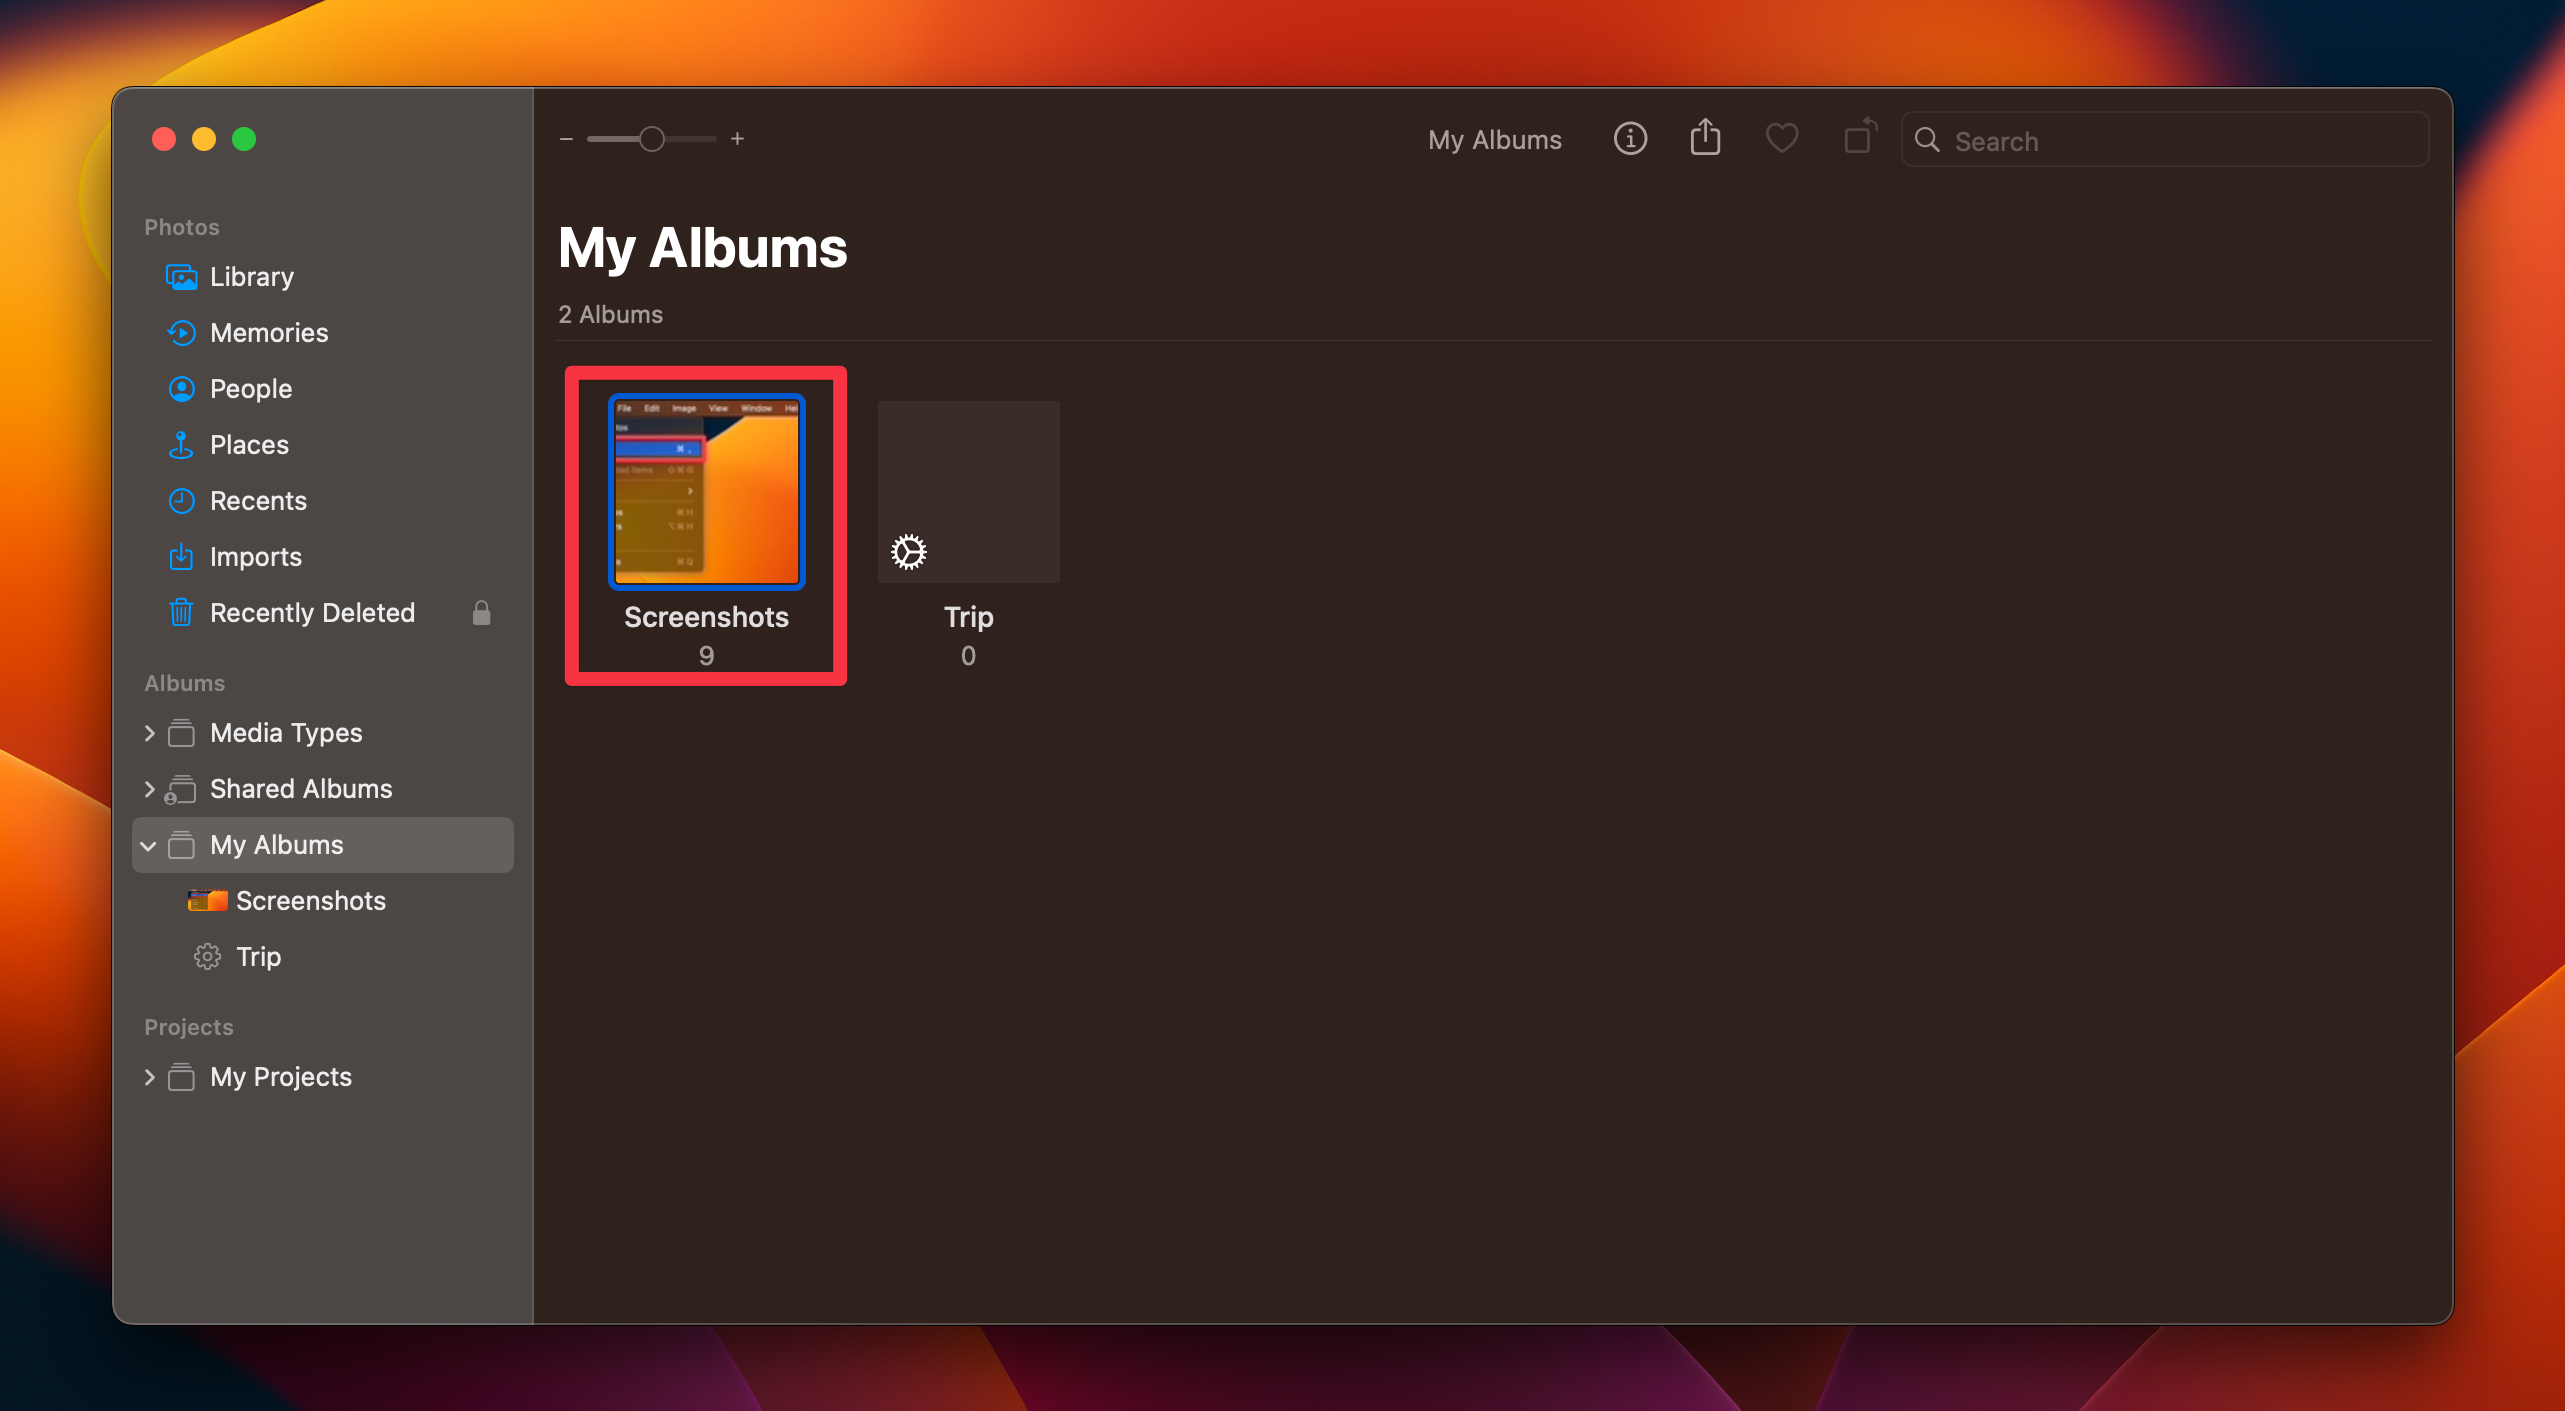
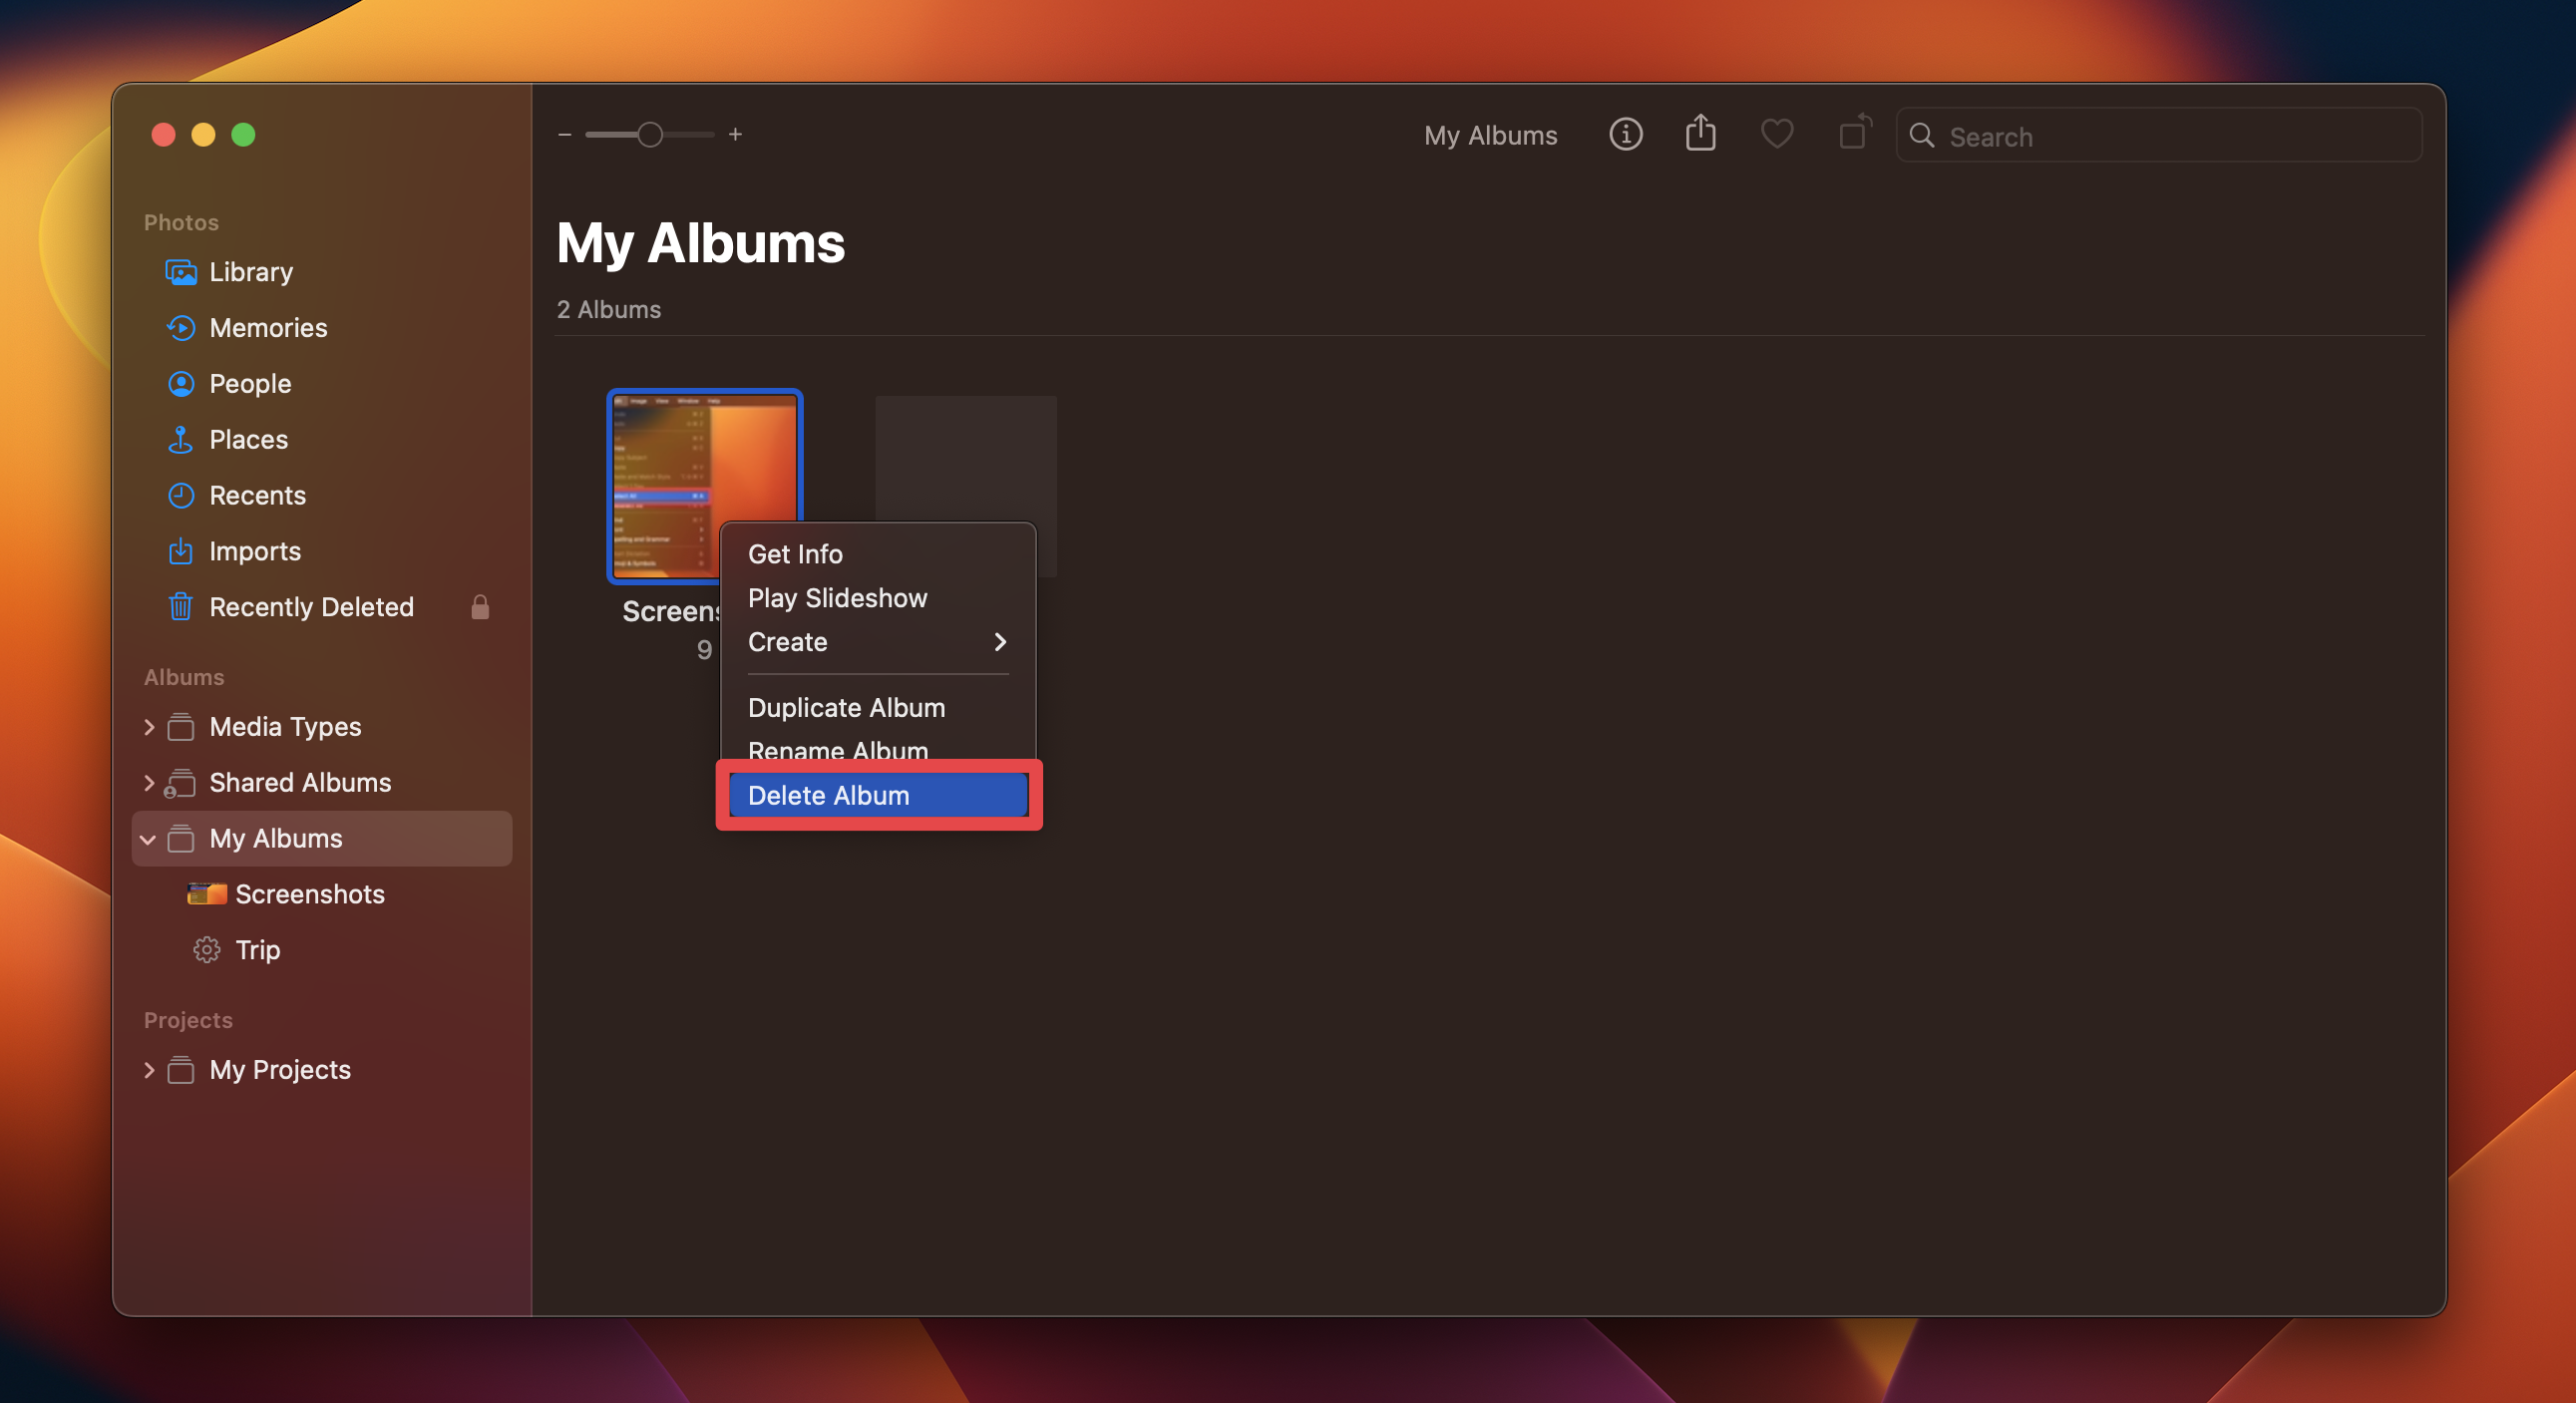
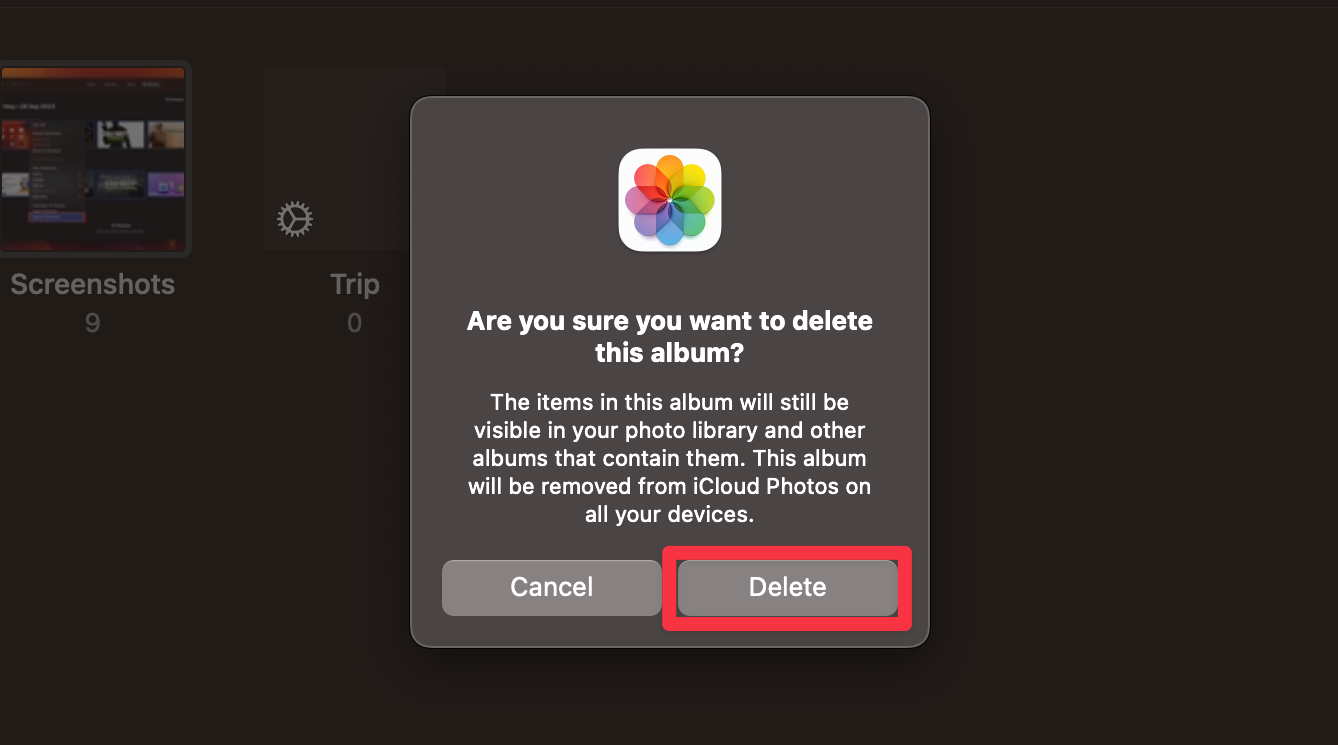
A Smart Album is different. It collects pictures automatically, and deleting its photos deletes them from the library. Check which view you’re in before pressing Delete.
Delete Photos Stored Outside the Photos App
Pictures in Downloads, Desktop, or another Finder folder are files you manage separately. The Photos Library is a package managed by Photos.
Don’t open that package and delete files inside it, or trash the whole library just to remove a few pictures.
- Open Finder and go to the folder containing the unwanted images. If you’re looking in your home folder, use Go > Home, then open the relevant folder.
- Select only the files you’ve identified. Hold Command while clicking for separate items, or use Shift-click for a range.
- Press Command-Delete to move the selected files to Trash. You can also drag them to Trash.
- Before emptying Trash, review its contents. To reverse a deletion, select the file there and choose File > Put Back.
Apple documents Finder selection and Trash and Put Back separately from Photos. If you empty all of Trash, you permanently remove its other contents too. Review those files before using Finder > Empty Trash.

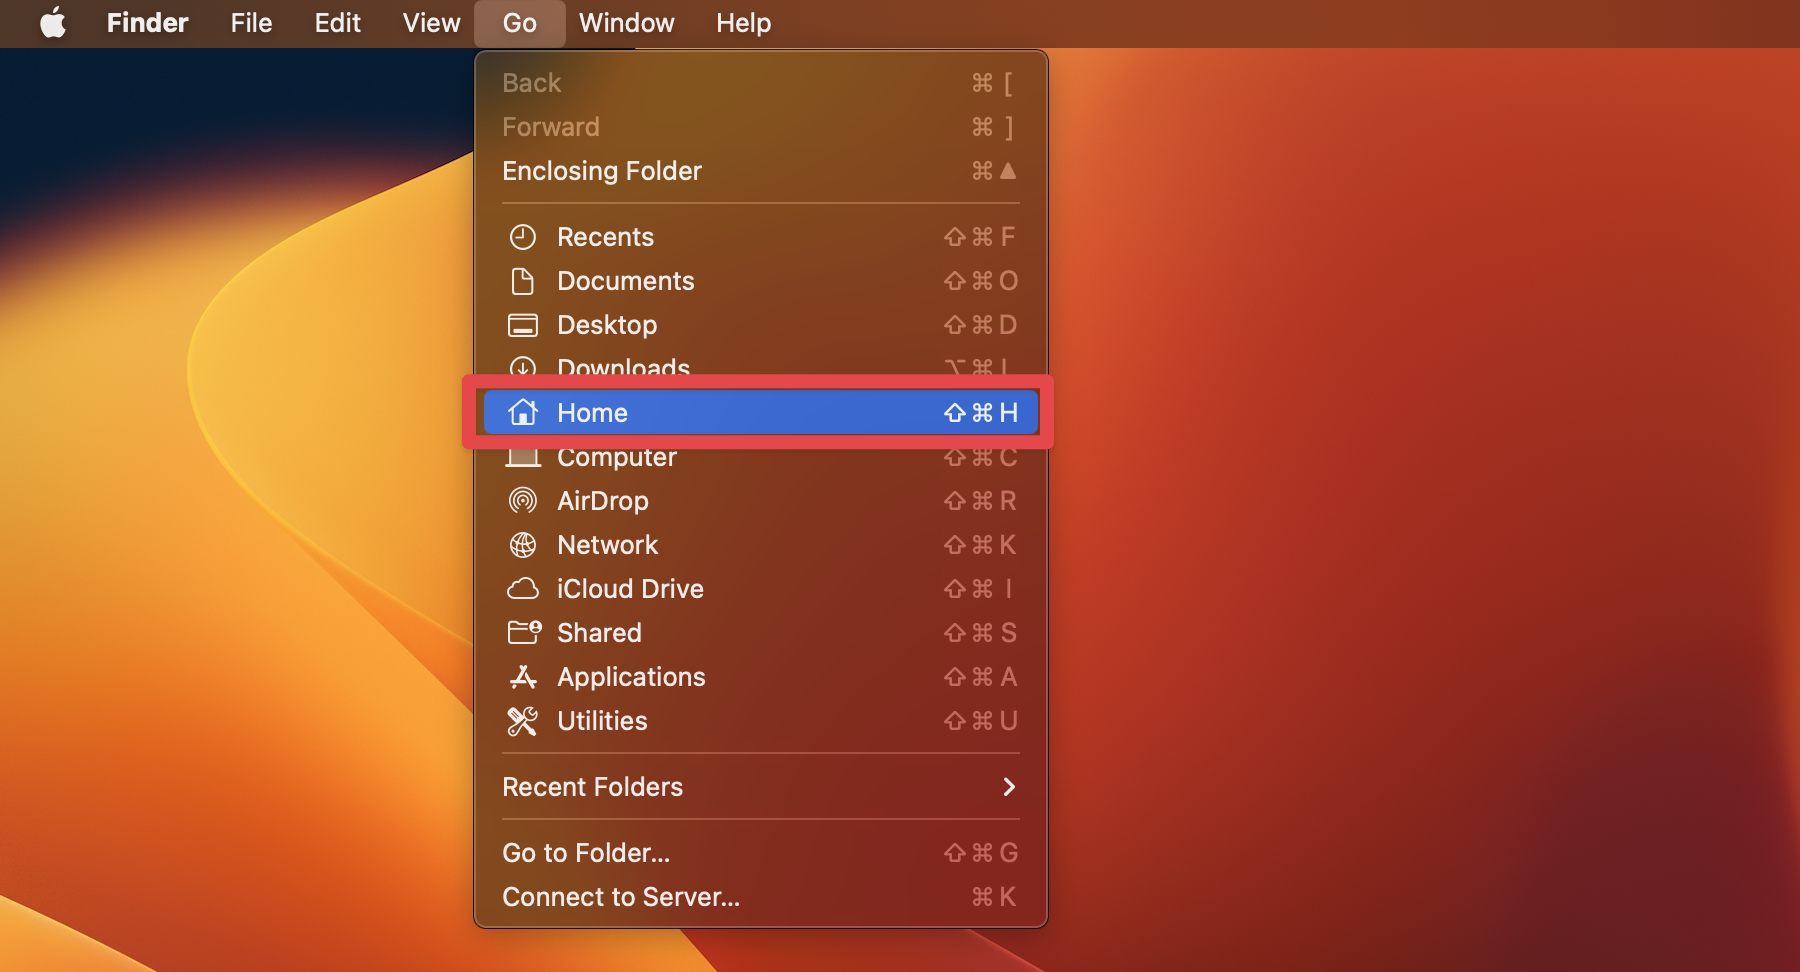


Check the file’s location before deleting it. Files in iCloud Drive follow iCloud Drive deletion rules, so a Finder window alone doesn’t prove a file is stored only on this Mac.
Other synced folders can also have their own deletion behavior.
Also check for referenced files if Photos uses images without copying them into its library. Moving or renaming those originals in Finder can stop Photos from locating them.
An image’s presence in Photos doesn’t prove its Finder copy is safe to remove.
Find Loose Image Files With a Smart Folder
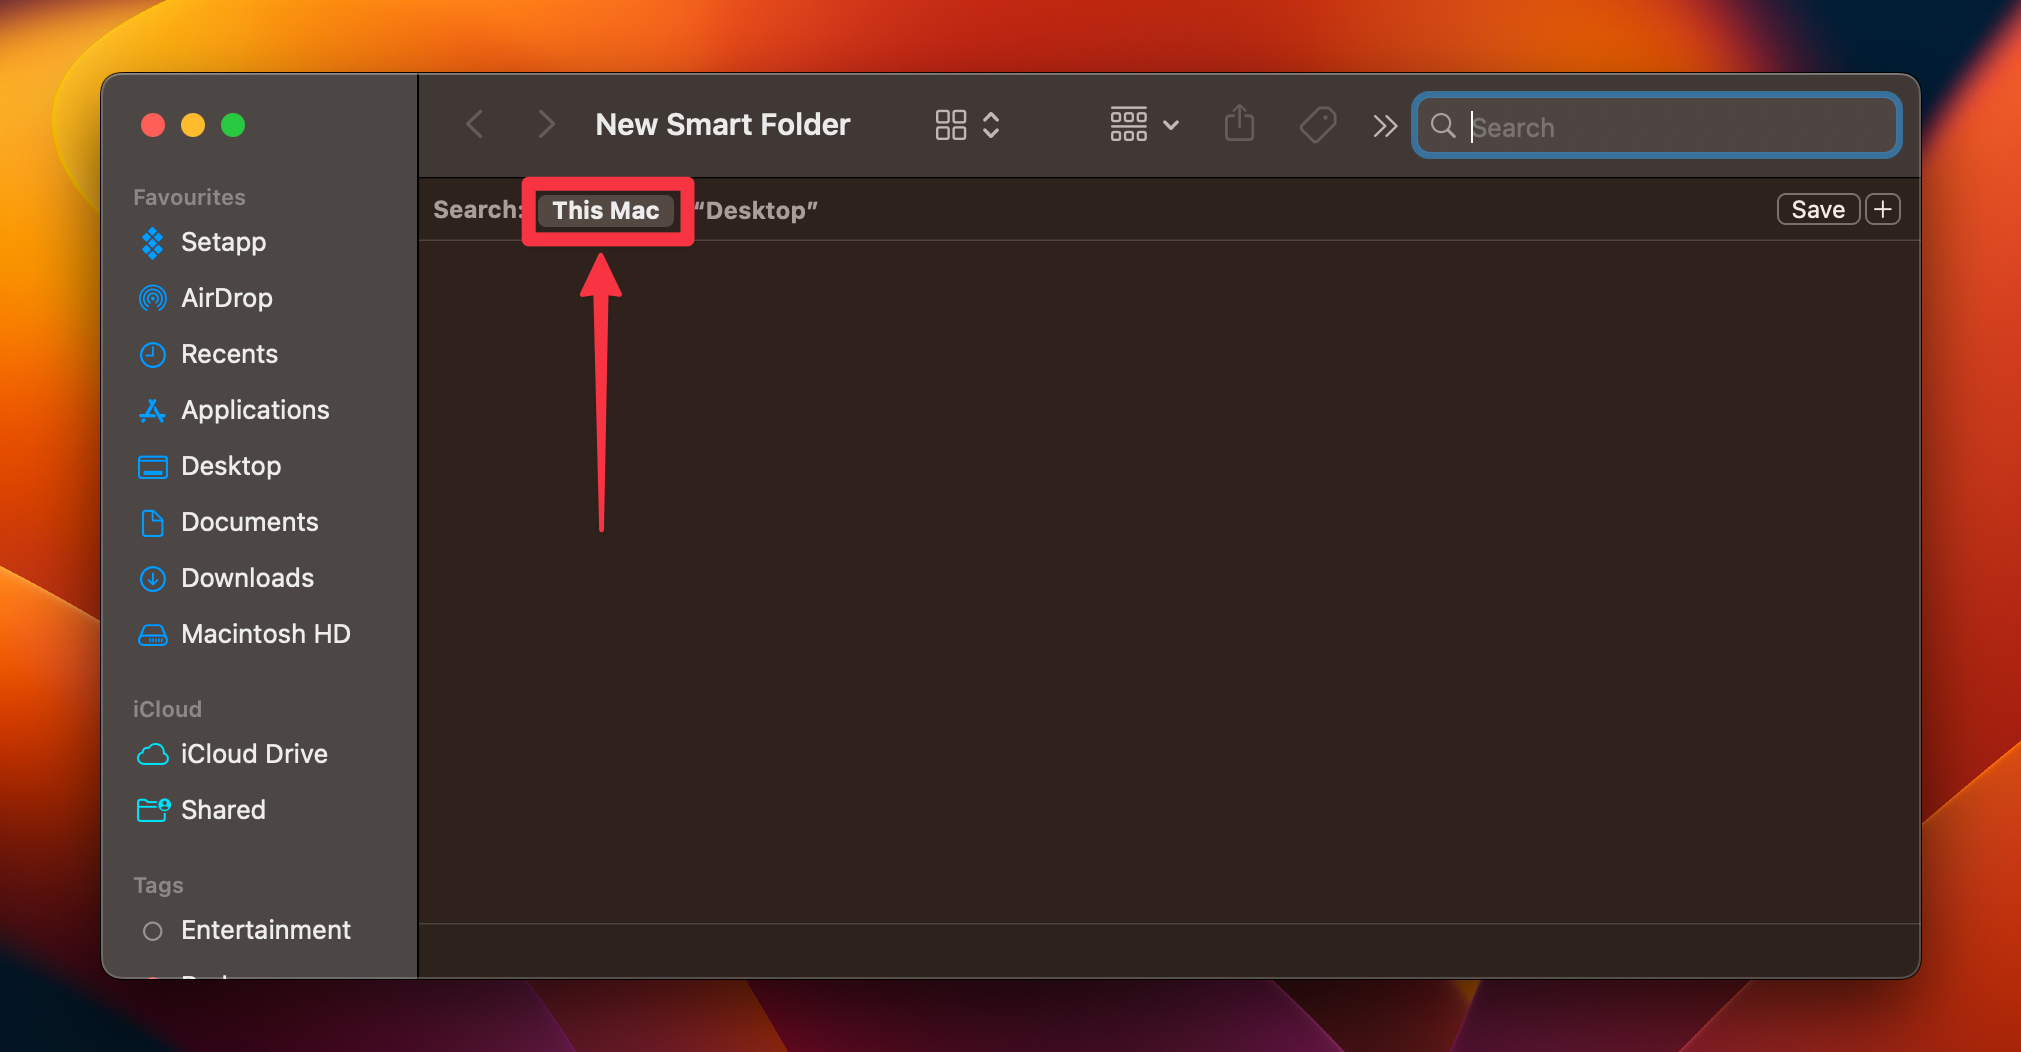
A Finder Smart Folder saves a search for files matching your rules. It’s useful for reviewing loose images, but it isn’t a view of every item inside your Photos library.
Search results still need individual review.
- In Finder, choose File > New Smart Folder.
- Choose This Mac if you want a wider search, or limit the search to the folder you intend to clean.
- Click the + button to add a rule. Choose Kind, then Image.
- Review each image’s location and contents before moving it to Trash. Save the search only if you want to reuse it.



Free Mac Storage While Keeping Photos in iCloud
If you want to keep your pictures on your iPhone and in iCloud, don’t delete them from a synced Photos library.
Use Optimize Mac Storage to reduce local storage use while keeping the full-size originals in iCloud.
- Open Photos > Settings, then click iCloud.
- With iCloud Photos enabled, select Optimize Mac Storage.
- Leave Photos time to manage local storage. It keeps smaller versions when storage is limited, so this isn’t a promise of an immediate amount of space freed.
For a different outcome, you can turn off iCloud Photos on this Mac. In Photos > Settings > iCloud, deselect iCloud Photos. The prompt offers Download or Remove from Mac.
Remove from Mac removes photos and videos that haven’t been fully downloaded, while the library remains in iCloud and on other devices using iCloud Photos.
That Remove from Mac choice has a specific purpose. It isn’t a general “Remove Download” command for selected Photos items, and fully downloaded originals can remain.
Don’t choose Turn Off and Delete from iCloud in account storage management when your goal is only to save space on this Mac. That separate option deletes the iCloud library after 30 days unless undone.
Merge Duplicate Photos With the Built-In Tool
Photos can group duplicate pictures and videos for review. Open Duplicates under Utilities in the sidebar. If the section is collapsed, expand Utilities to look for it.
Duplicate groups can take time to appear while Photos analyzes your library.
- Review the duplicate groups and select the items or rows you want to merge.
- Click Merge [number] Items, then confirm in the dialog.
- Check the remaining original in your library. The removed duplicates go to Recently Deleted, where they can be recovered within 30 days or permanently deleted sooner.
Merging leaves one original photo or video where the selected duplicates were located. It doesn’t mean every similar-looking shot should be removed. Review the groups before confirming, especially when you want to keep different versions.
For more detail, see our guide to merging duplicate photos.
Recover Photos or Permanently Delete Them
Recently Deleted gives you a chance to reverse a library deletion before the 30-day recovery period ends. Permanent removal ends that Photos recovery option, so check your separate backup first.
- Open Photos and click Recently Deleted under Utilities in the sidebar. Expand Utilities if needed.
- If it’s locked, click View Album and follow the unlock instructions.
- To restore pictures, select them and click Recover.
- To permanently remove only some items, select them and click Delete [number] Photos. Choose Delete All only if you intend to remove everything in Recently Deleted, then confirm any prompt.
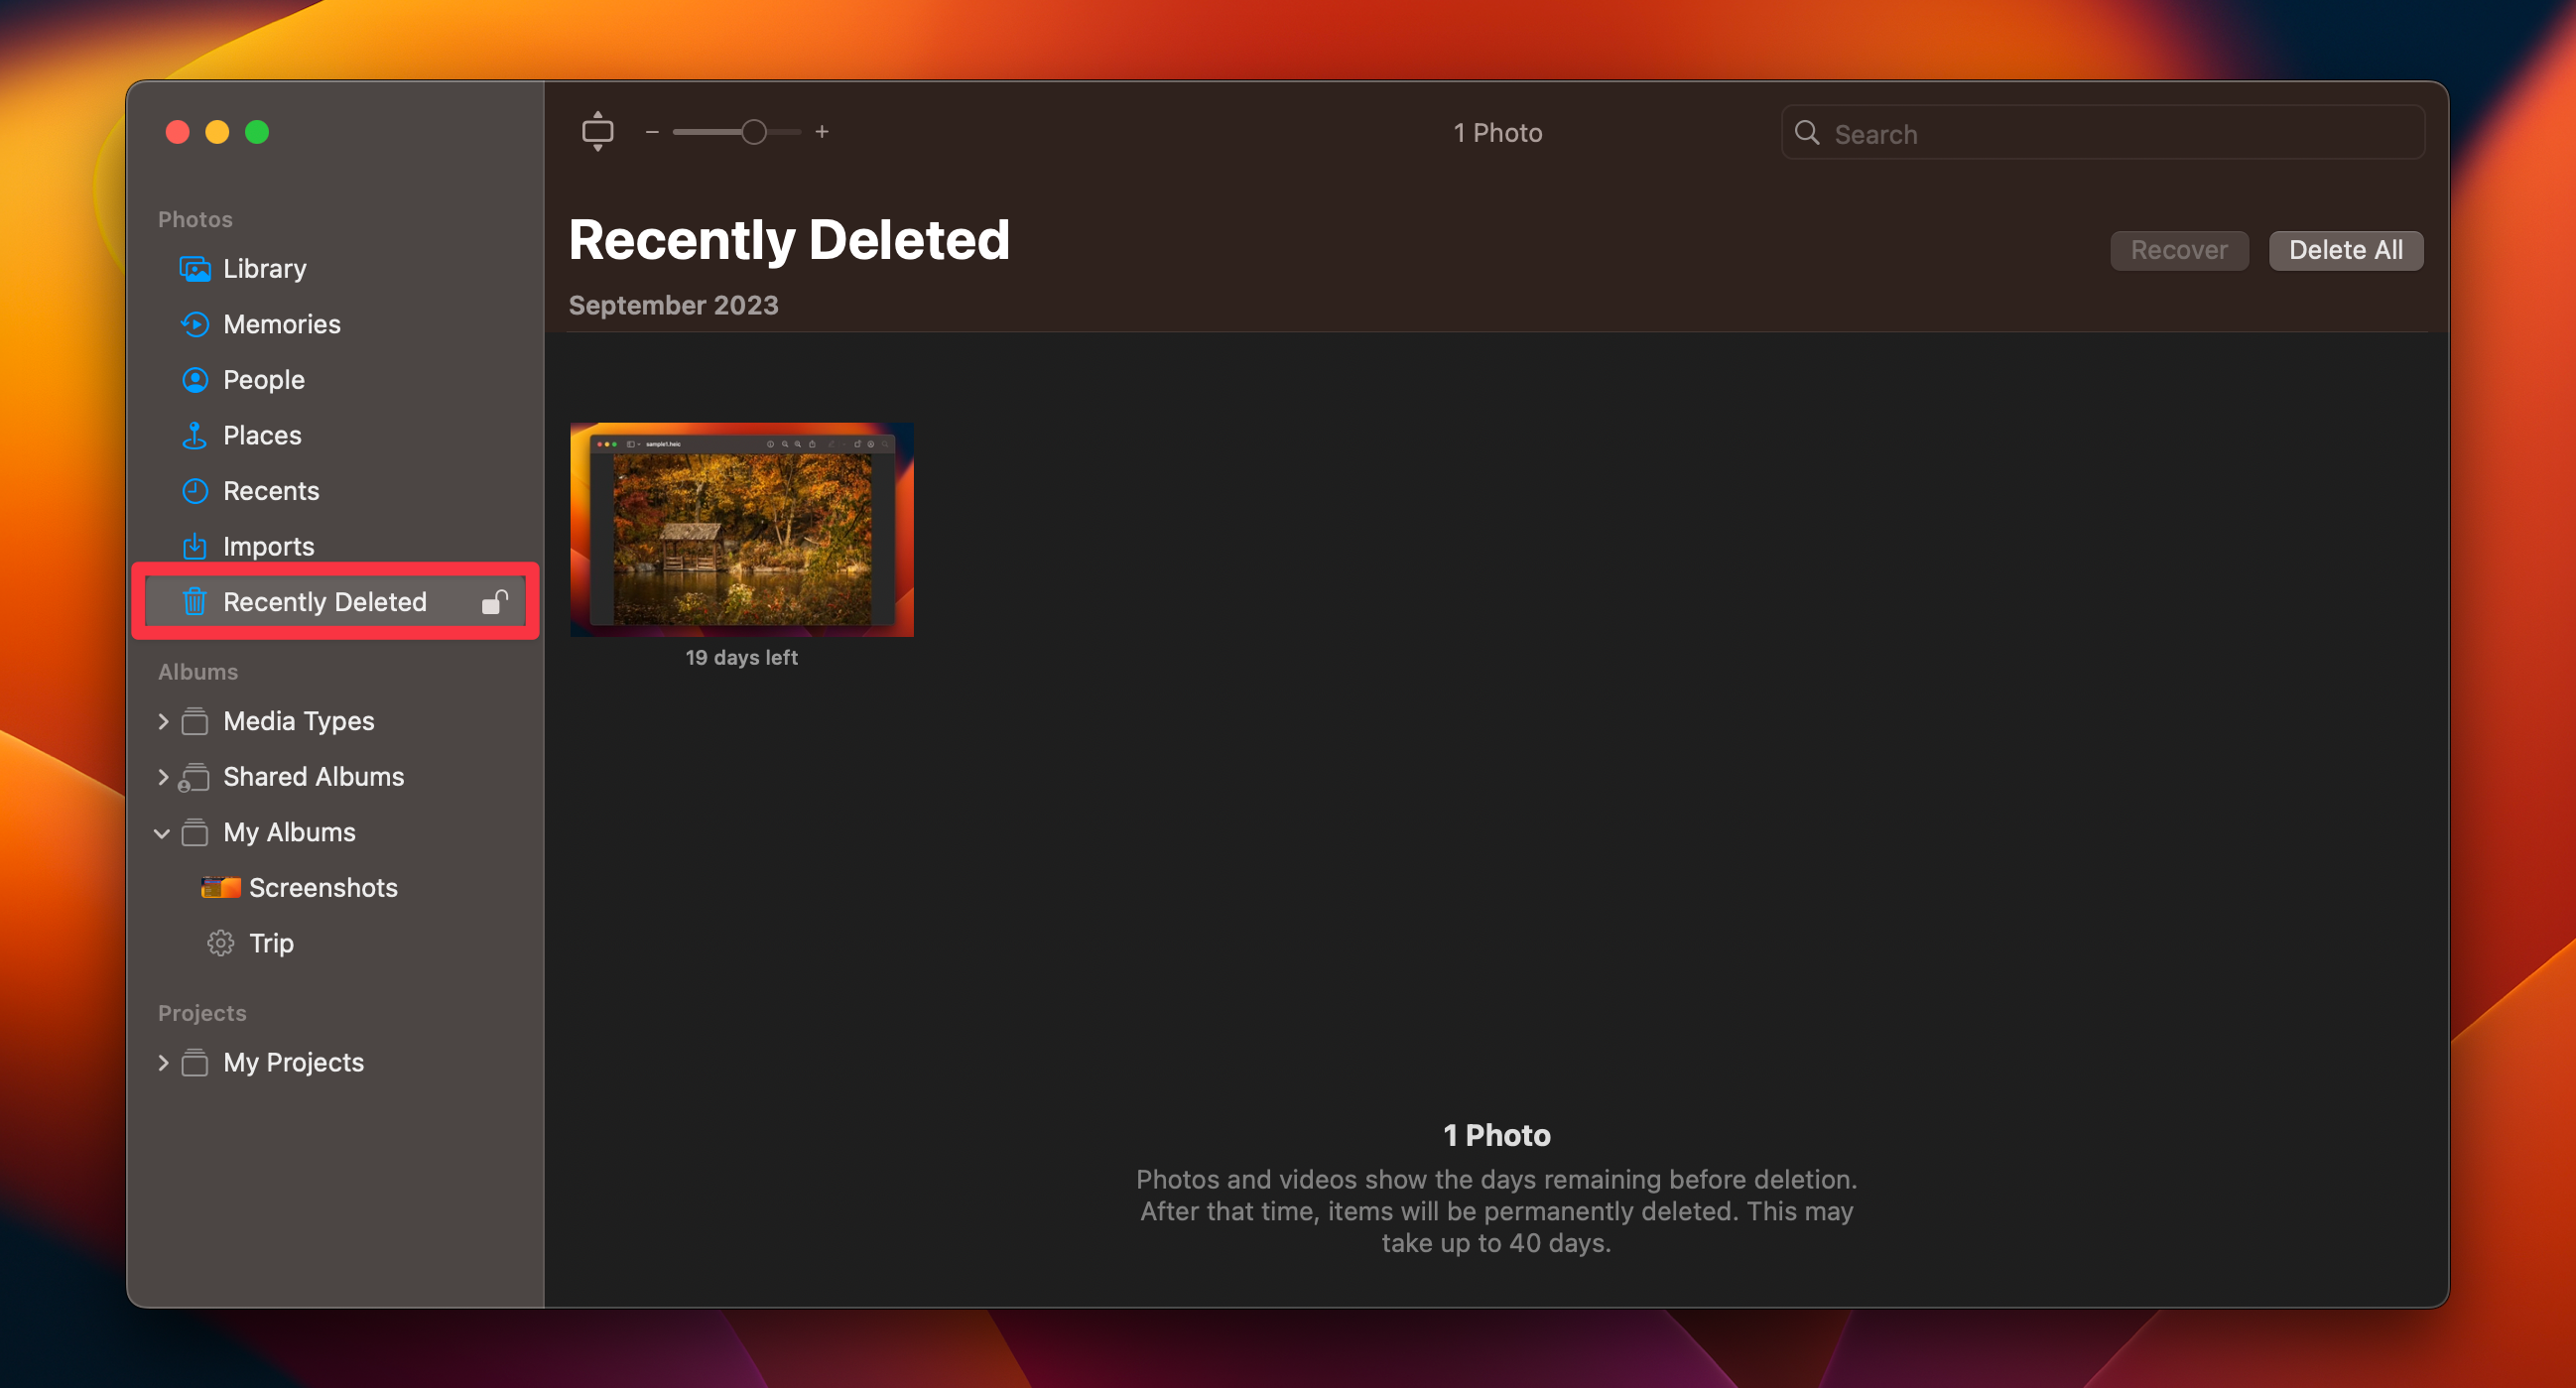


After recovering, check that the pictures are back in your library. After deleting, check that only the intended items are gone.
If your aim was local storage savings while retaining your collection, return to the iCloud storage settings instead of emptying Recently Deleted.
Frequently Asked Questions
Where are photos stored on Mac?
Photos stores its library in the Pictures folder by default, but a library can be stored elsewhere.
Separate images can also be in Downloads, Desktop, or other folders. Check your library and file locations before deciding what to remove.
Why can’t I see Recently Deleted in Photos?
Recently Deleted appears after you delete an item. In the current layout, look under Utilities and expand that section if it’s collapsed.
If the collection is locked, click View Album and follow the unlock instructions.
Can I recover a photo after permanently deleting it?
You can’t recover a permanently deleted photo through Recently Deleted. A separate backup may still contain it.
A Time Machine library restore can restore a backed-up library, but restoring a synced System Photo Library can also upload previously deleted photos to iCloud again.
Does Time Machine back up every original when Optimize Mac Storage is on?
Time Machine may not contain originals that are stored only in iCloud when Optimize Mac Storage is enabled.
Before deleting, export the originals you want to keep and verify the saved files. Apple explains this backup limitation in its restore guide.
Does copying the Photos Library also back up referenced files?
Copying the library doesn’t back up image files stored outside it as referenced files.
Back up those originals separately, or consolidate them into the library before making your library backup. Keep their original locations intact while Photos still references them.
Can I export a Live Photo before deleting it?
You can export a Live Photo in its original format before deleting it.
The original export produces two files, a still image and a video. Keep both files and verify the export before removing the library item.
Affiliate disclosure: MacBook Journal may earn a commission when you buy through links on this page, at no extra cost to you.
How helpful was this article?
Your feedback helps us improve our guides.