

TL;DR
Use Voice Memos for a quick recording, QuickTime for a named audio file, or GarageBand for editing and multitrack work.
- Choose the microphone you intend to use.
- QuickTime lets you choose audio quality.
- Check the saved recording before deleting or replacing the original.
Sources: QuickTime export guide
A microphone recording and system-audio capture are different. A mic records sound it hears in the room. It does not directly capture the Mac’s internal audio.
Apple’s newer system-audio control belongs to screen recording, which produces a video file.
How to record audio on your Mac
Choose the method by the file you need. Voice Memos is the shortest path to a voice note. QuickTime Player creates a separate audio file with a selectable quality setting.
GarageBand is useful when you need multiple tracks, instruments, or editing. The steps below are based on Apple’s current user guides.
The screenshots are from 2023 and show older interfaces, so use their labels as illustrations rather than expecting every button to look the same.
If an app cannot hear your microphone, check Apple menu > System Settings > Privacy & Security > Microphone, then allow access for that app. Select the intended input in the recording app too.
See Apple’s microphone privacy guide.
1. Record a quick memo with Voice Memos
Voice Memos is the simplest built-in choice for a spoken note, interview, lecture, or rough song idea. It records microphone input and keeps recordings in the Voice Memos library.
With iCloud enabled for Voice Memos, recordings can appear on your other signed-in Apple devices.
- Open Voice Memos. If you do not see it in the Dock or Applications, press Command-Space, type its name, and open the app.
- Choose the microphone from the available input controls if the app offers more than one. Connect an external microphone before opening the app if it is not listed.
- Click the red Record button and speak at a steady distance from the microphone. Click Pause if you need a break, then Resume to continue the same recording.
- Click Done to finish. Select the recording in the list to play it back. Rename it if the default name is not useful.

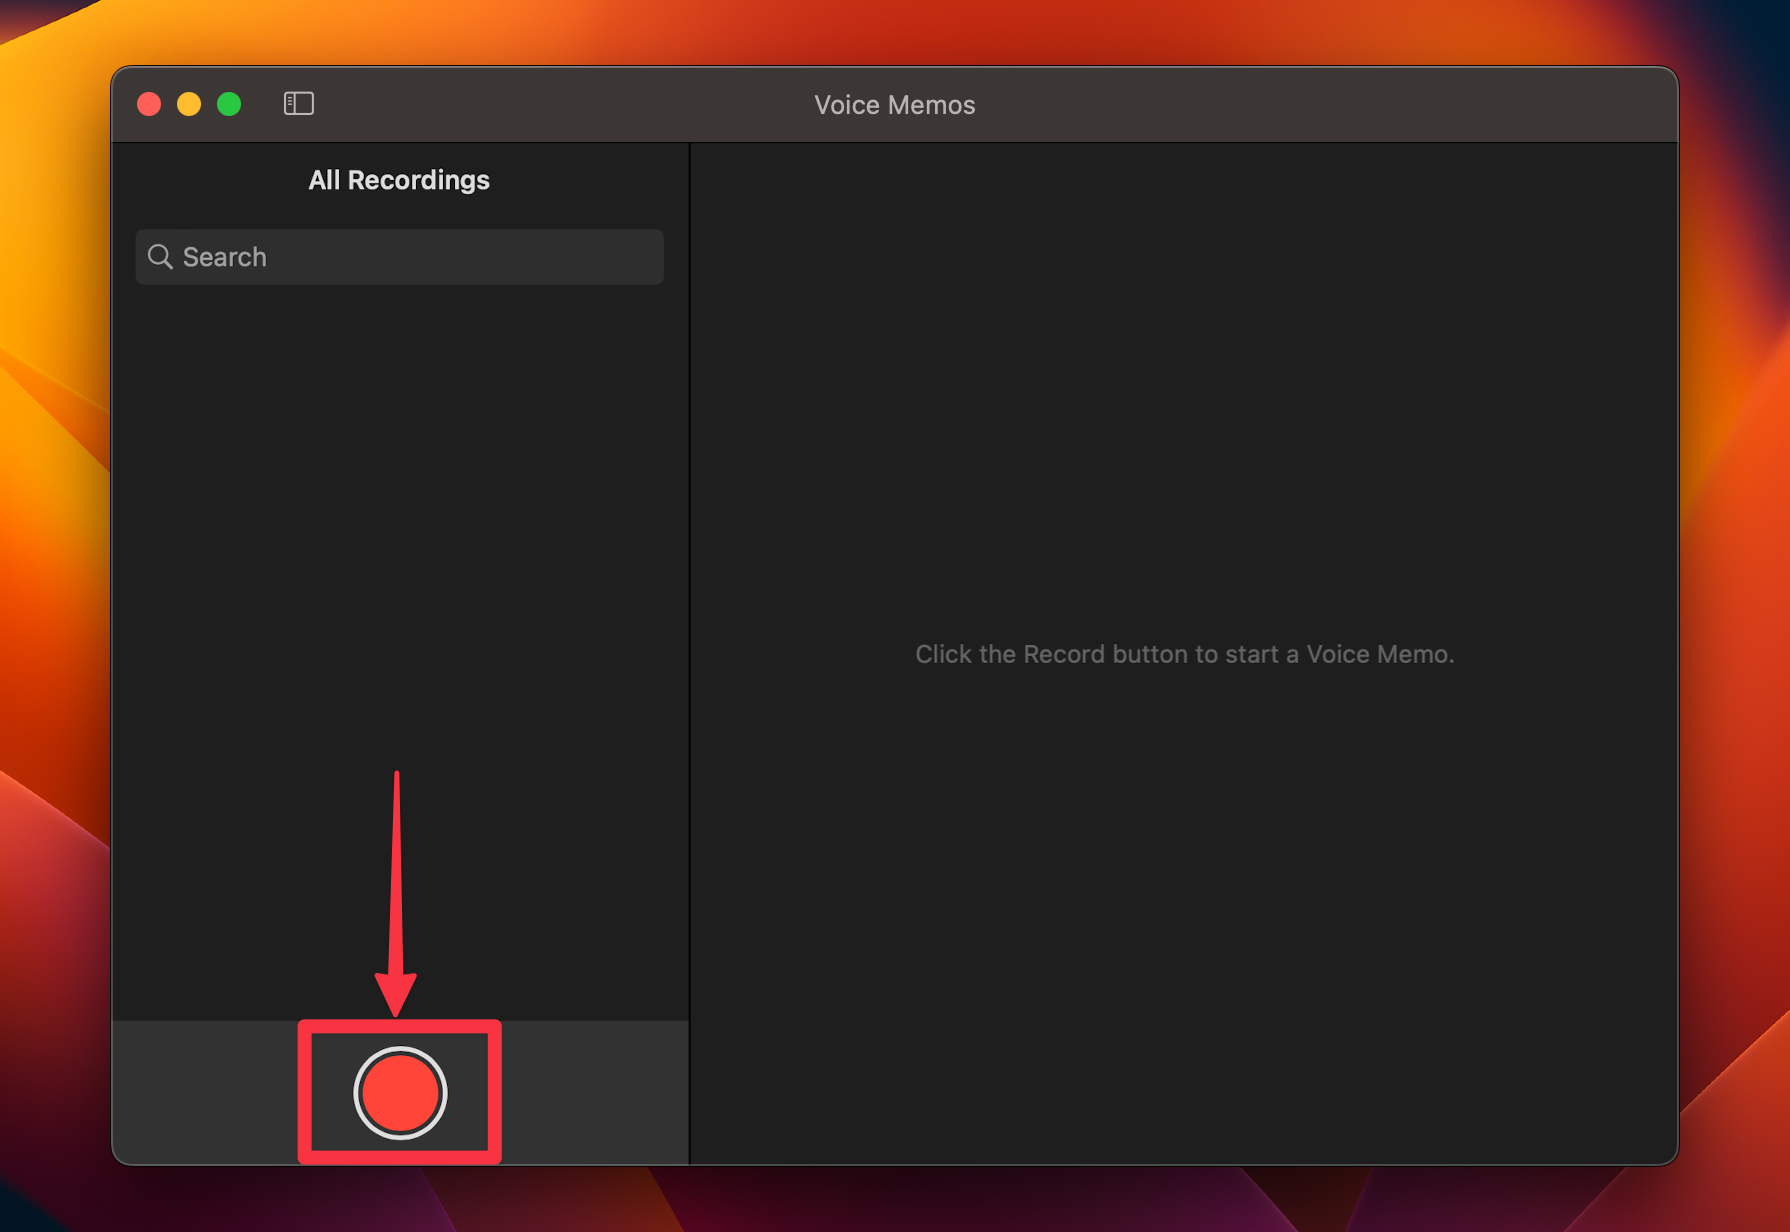


To trim a recording, select it and use the edit controls in Voice Memos. Check the shortened version before replacing anything you may need.
Use the trim handles to choose the part you want to keep, then check the result before replacing a recording you may need.
Voice Memos is convenient for notes, but it is not a multitrack editor. If you need a named file in a specific Finder folder, use QuickTime Player or share/export the memo from Voice Memos.
Apple’s Voice Memos guide covers recording, editing, sharing, and syncing recordings.
2. Save a microphone recording with QuickTime Player
QuickTime Player makes a standalone audio-only recording and lets you choose a microphone and recording quality.
This path is useful when you want to name the file and choose where it goes as soon as you finish.
- Open QuickTime Player from Applications or Spotlight.
- In the menu bar, choose File > New Audio Recording.
- Click the options menu beside the Record button. Choose a microphone if more than one is available, then choose a quality. High uses 44.1 kHz AAC. Maximum uses uncompressed 44.1 kHz, 24-bit Linear PCM in an AIFF-C file and needs more storage.
- Click Record. Click Stop when you are finished. Option-click the Record button to pause and resume.
- Choose File > Save, give the recording a name, and pick a Finder location. Play the saved file once to confirm you chose the right input and destination.


These instructions are for New Audio Recording. QuickTime’s separate New Screen Recording command records video. On current macOS, it may hand off to Screenshot controls.
Do not choose it when you only want to record your microphone as an audio file.
For an audio-only recording, QuickTime’s High quality uses AAC, while Maximum uses uncompressed Linear PCM and creates larger files. Apple’s QuickTime guide covers microphone selection, quality, pausing, and saving.
3. Record and export a project in GarageBand
GarageBand suits music, a podcast draft, or multitrack recording. Download it from the App Store if it is not installed, and check its requirements for your Mac. Create an audio track, record your input, and export the finished mix when you are ready to share it.
- Open GarageBand and create a new project. Choose Empty Project.
- In the New Track dialog, choose an audio track for a microphone or line input. Pick the available input source and create the track.
- Check the track’s input meter while speaking. If it does not move, verify the selected device and GarageBand’s microphone permission in System Settings.
- Click the red Record button to record. Stop when finished, then play the track back before exporting.
- To create a shareable audio file, use Share > Export Song to Disk, choose a format and quality, set the name and destination, then export. Keep the GarageBand project if you may want to edit the tracks later.
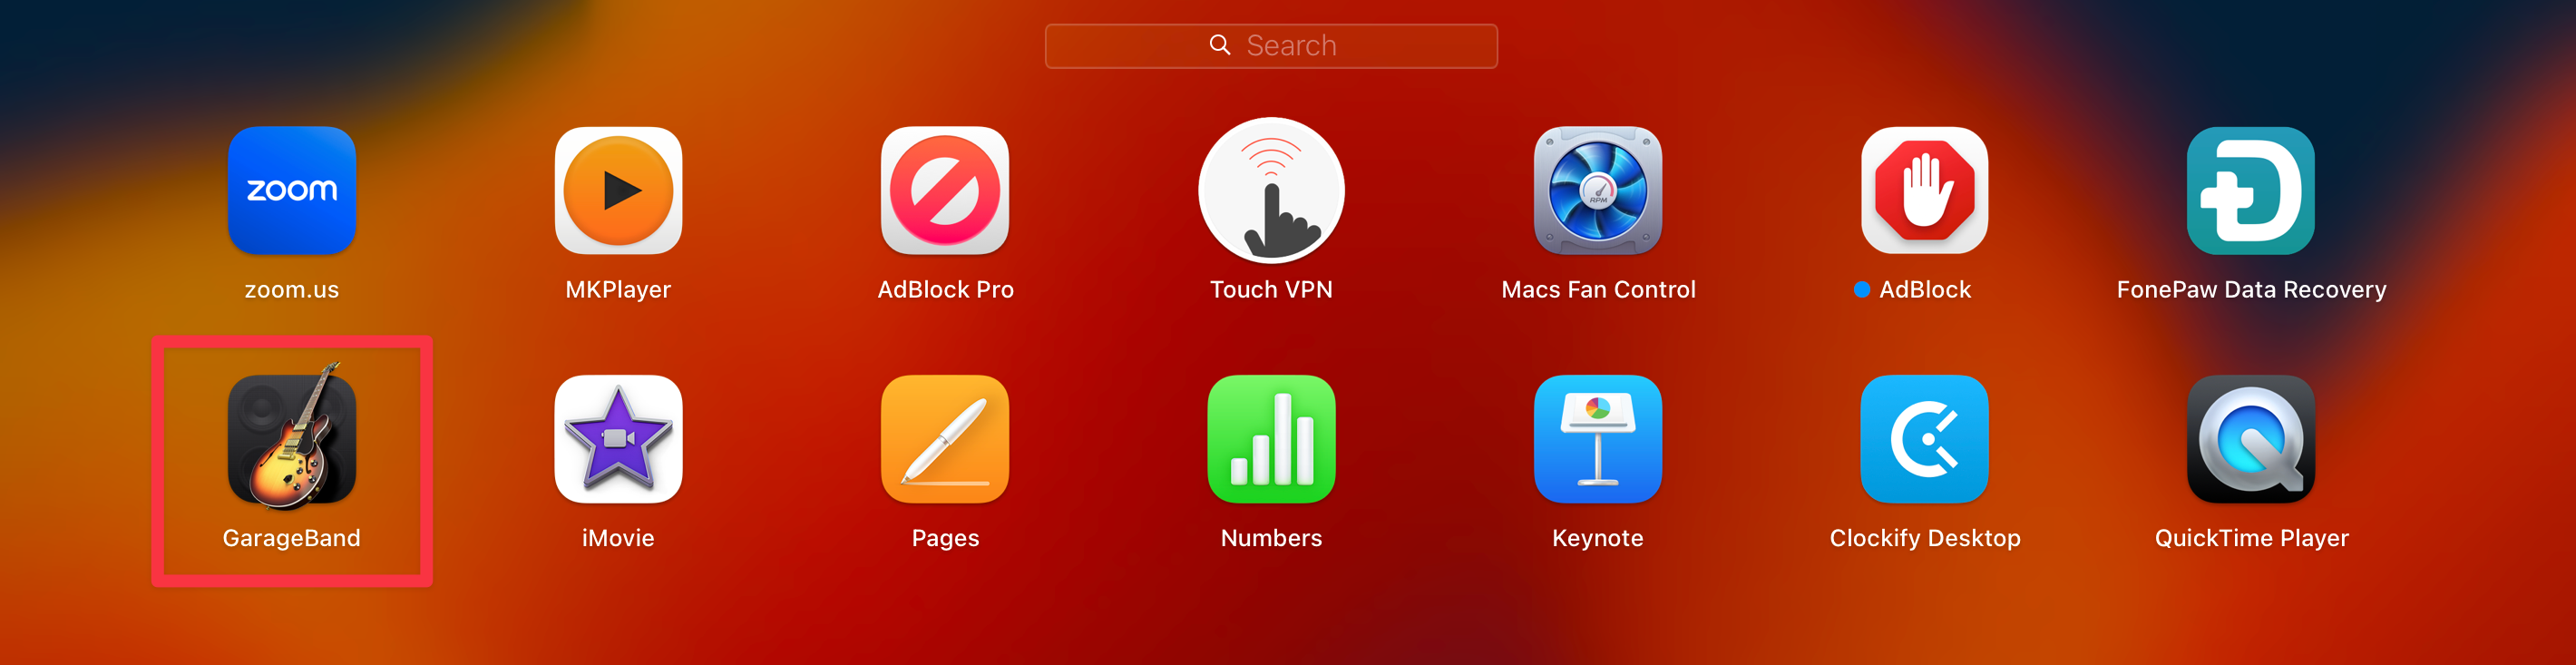
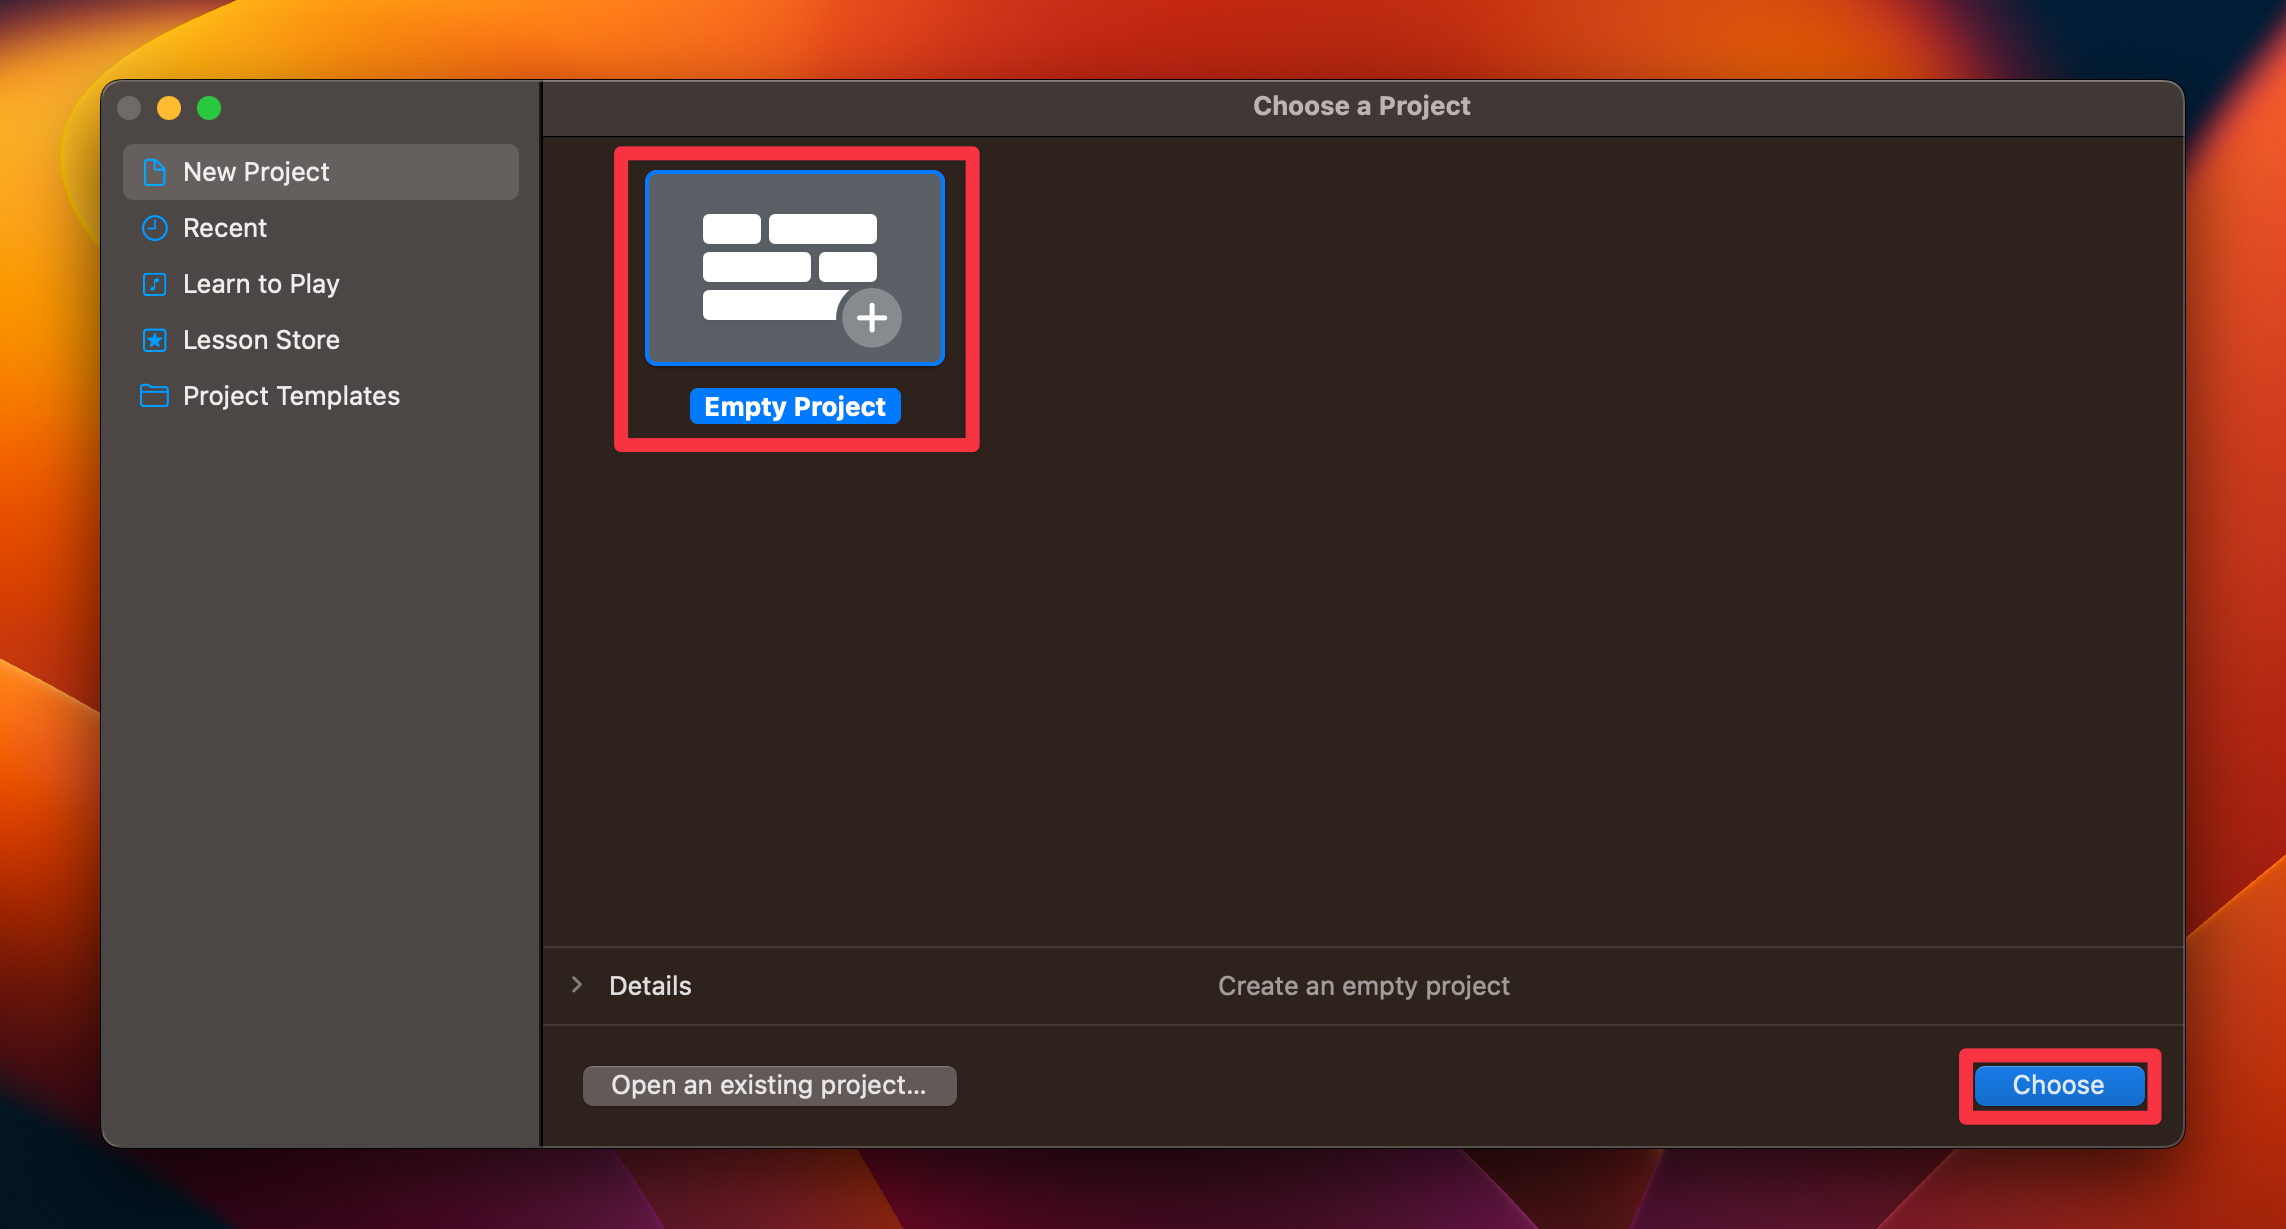
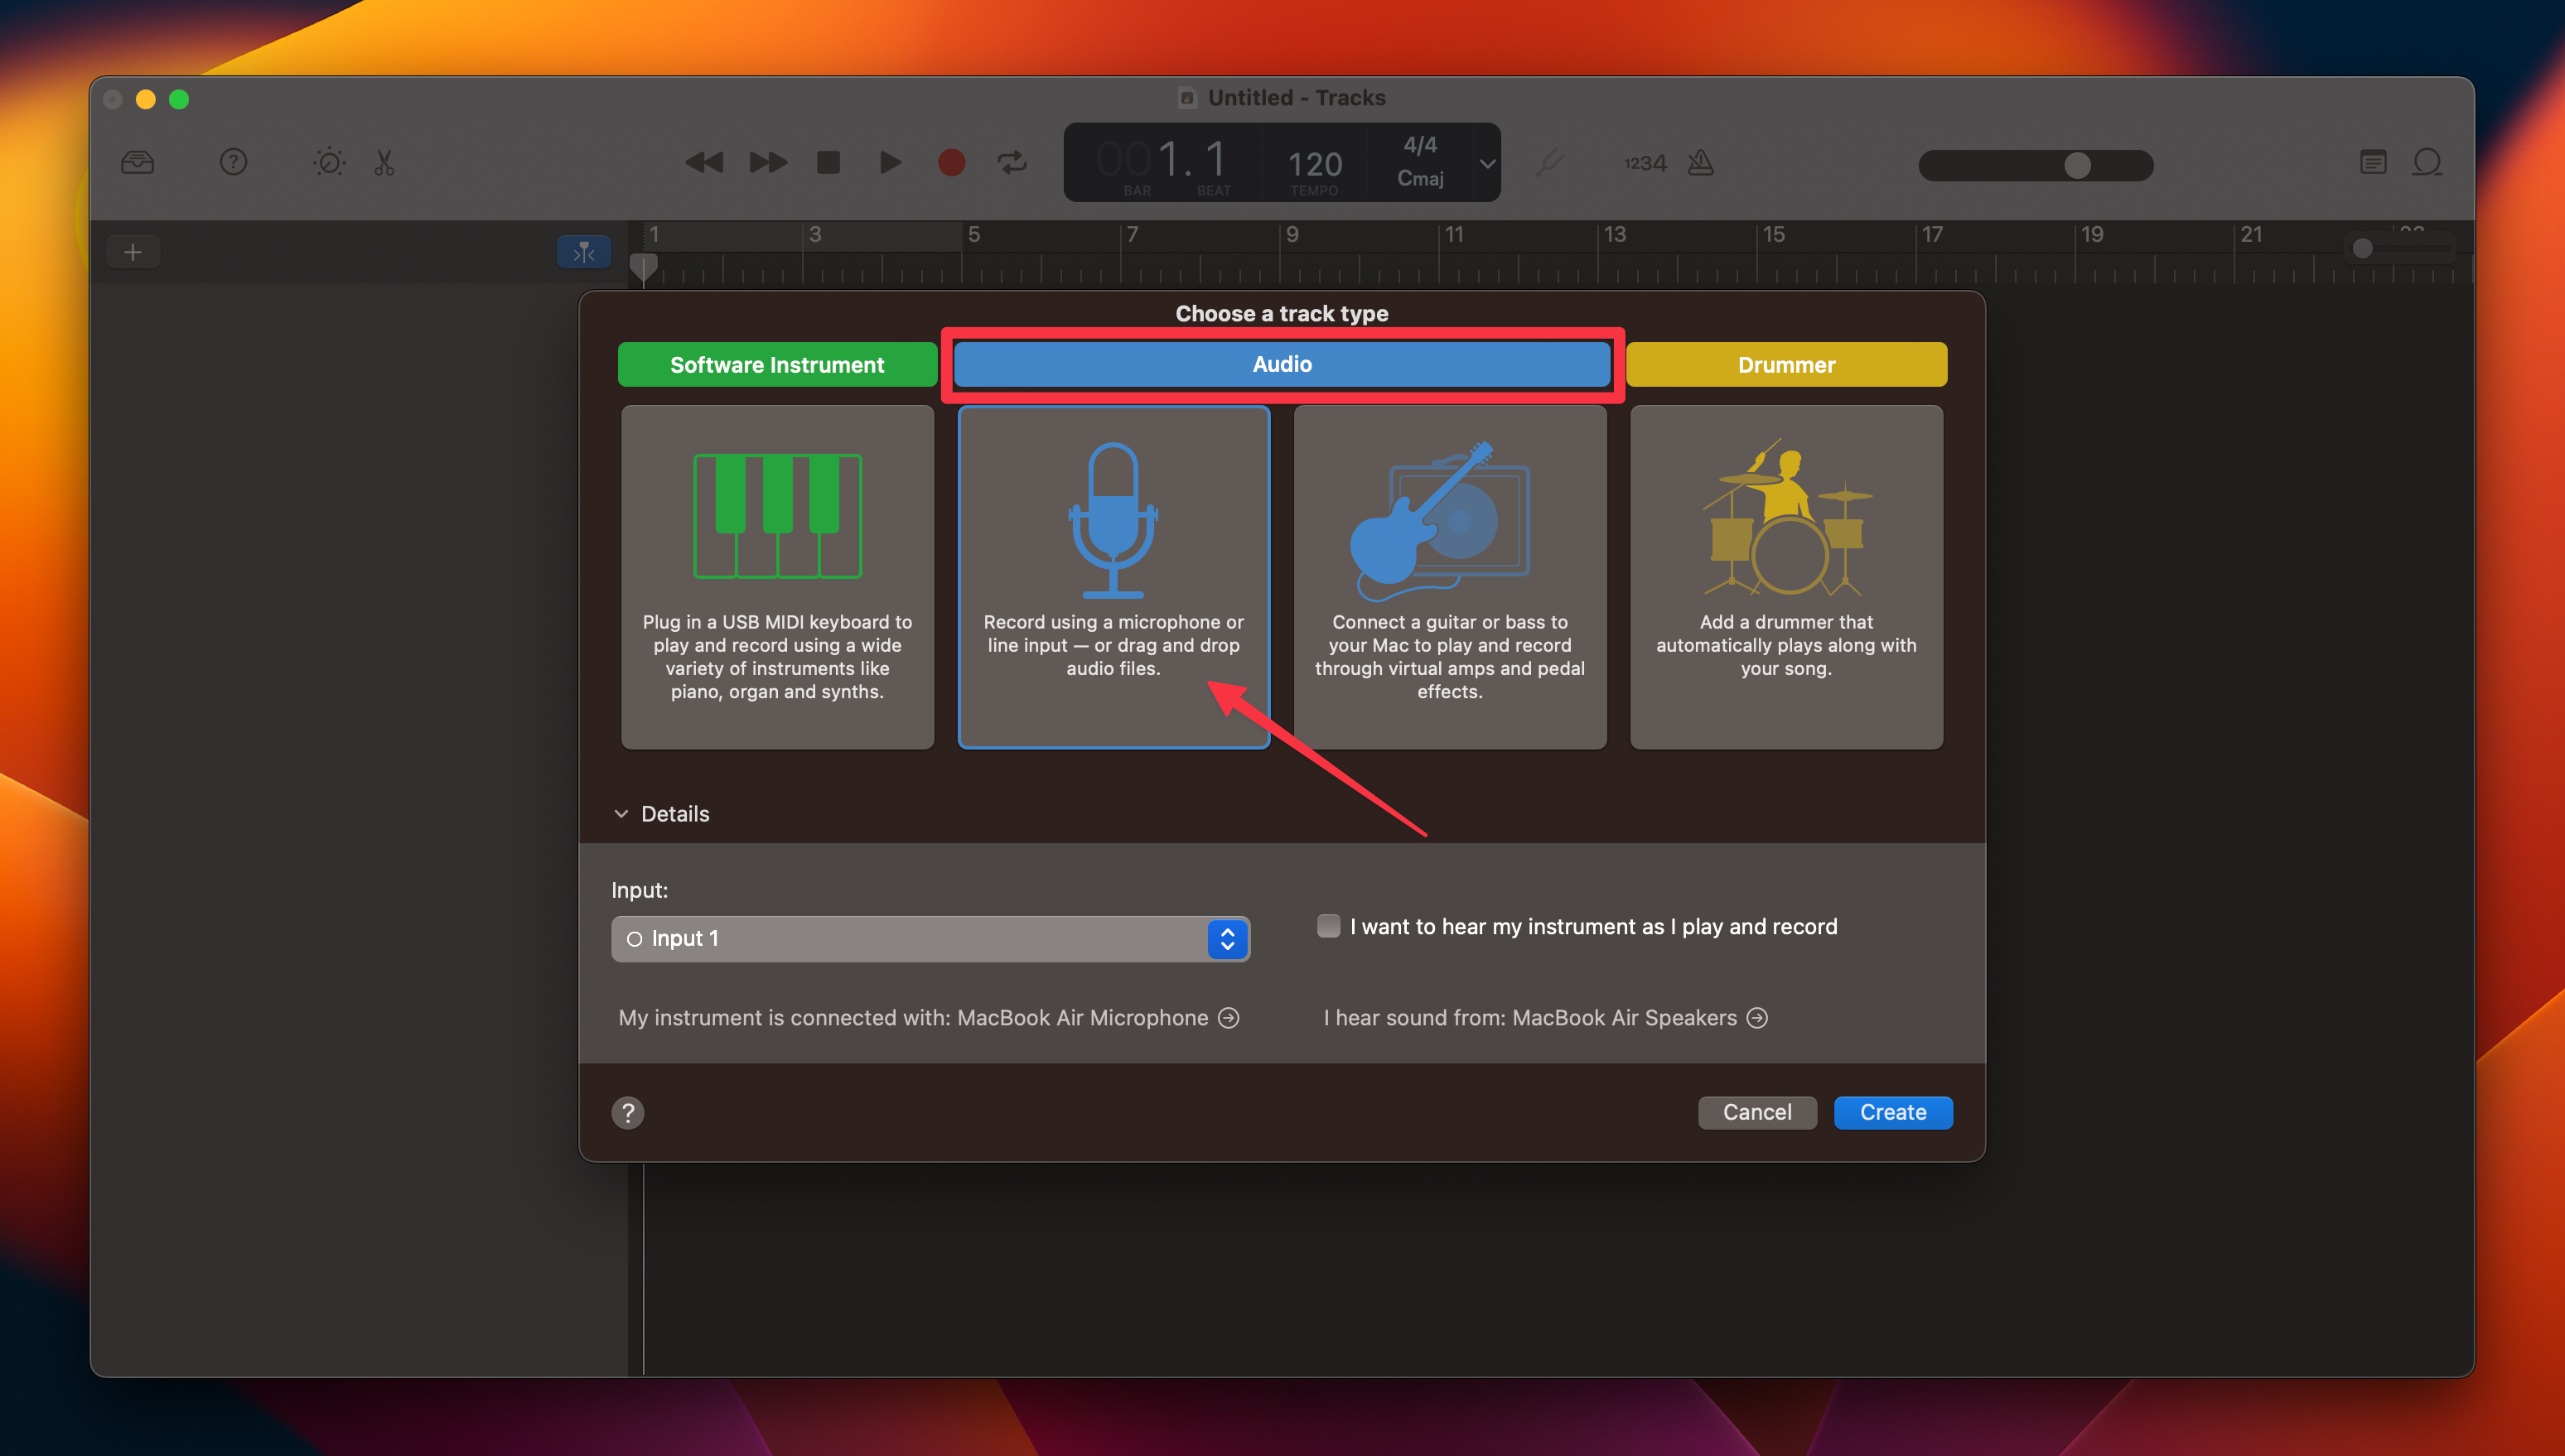
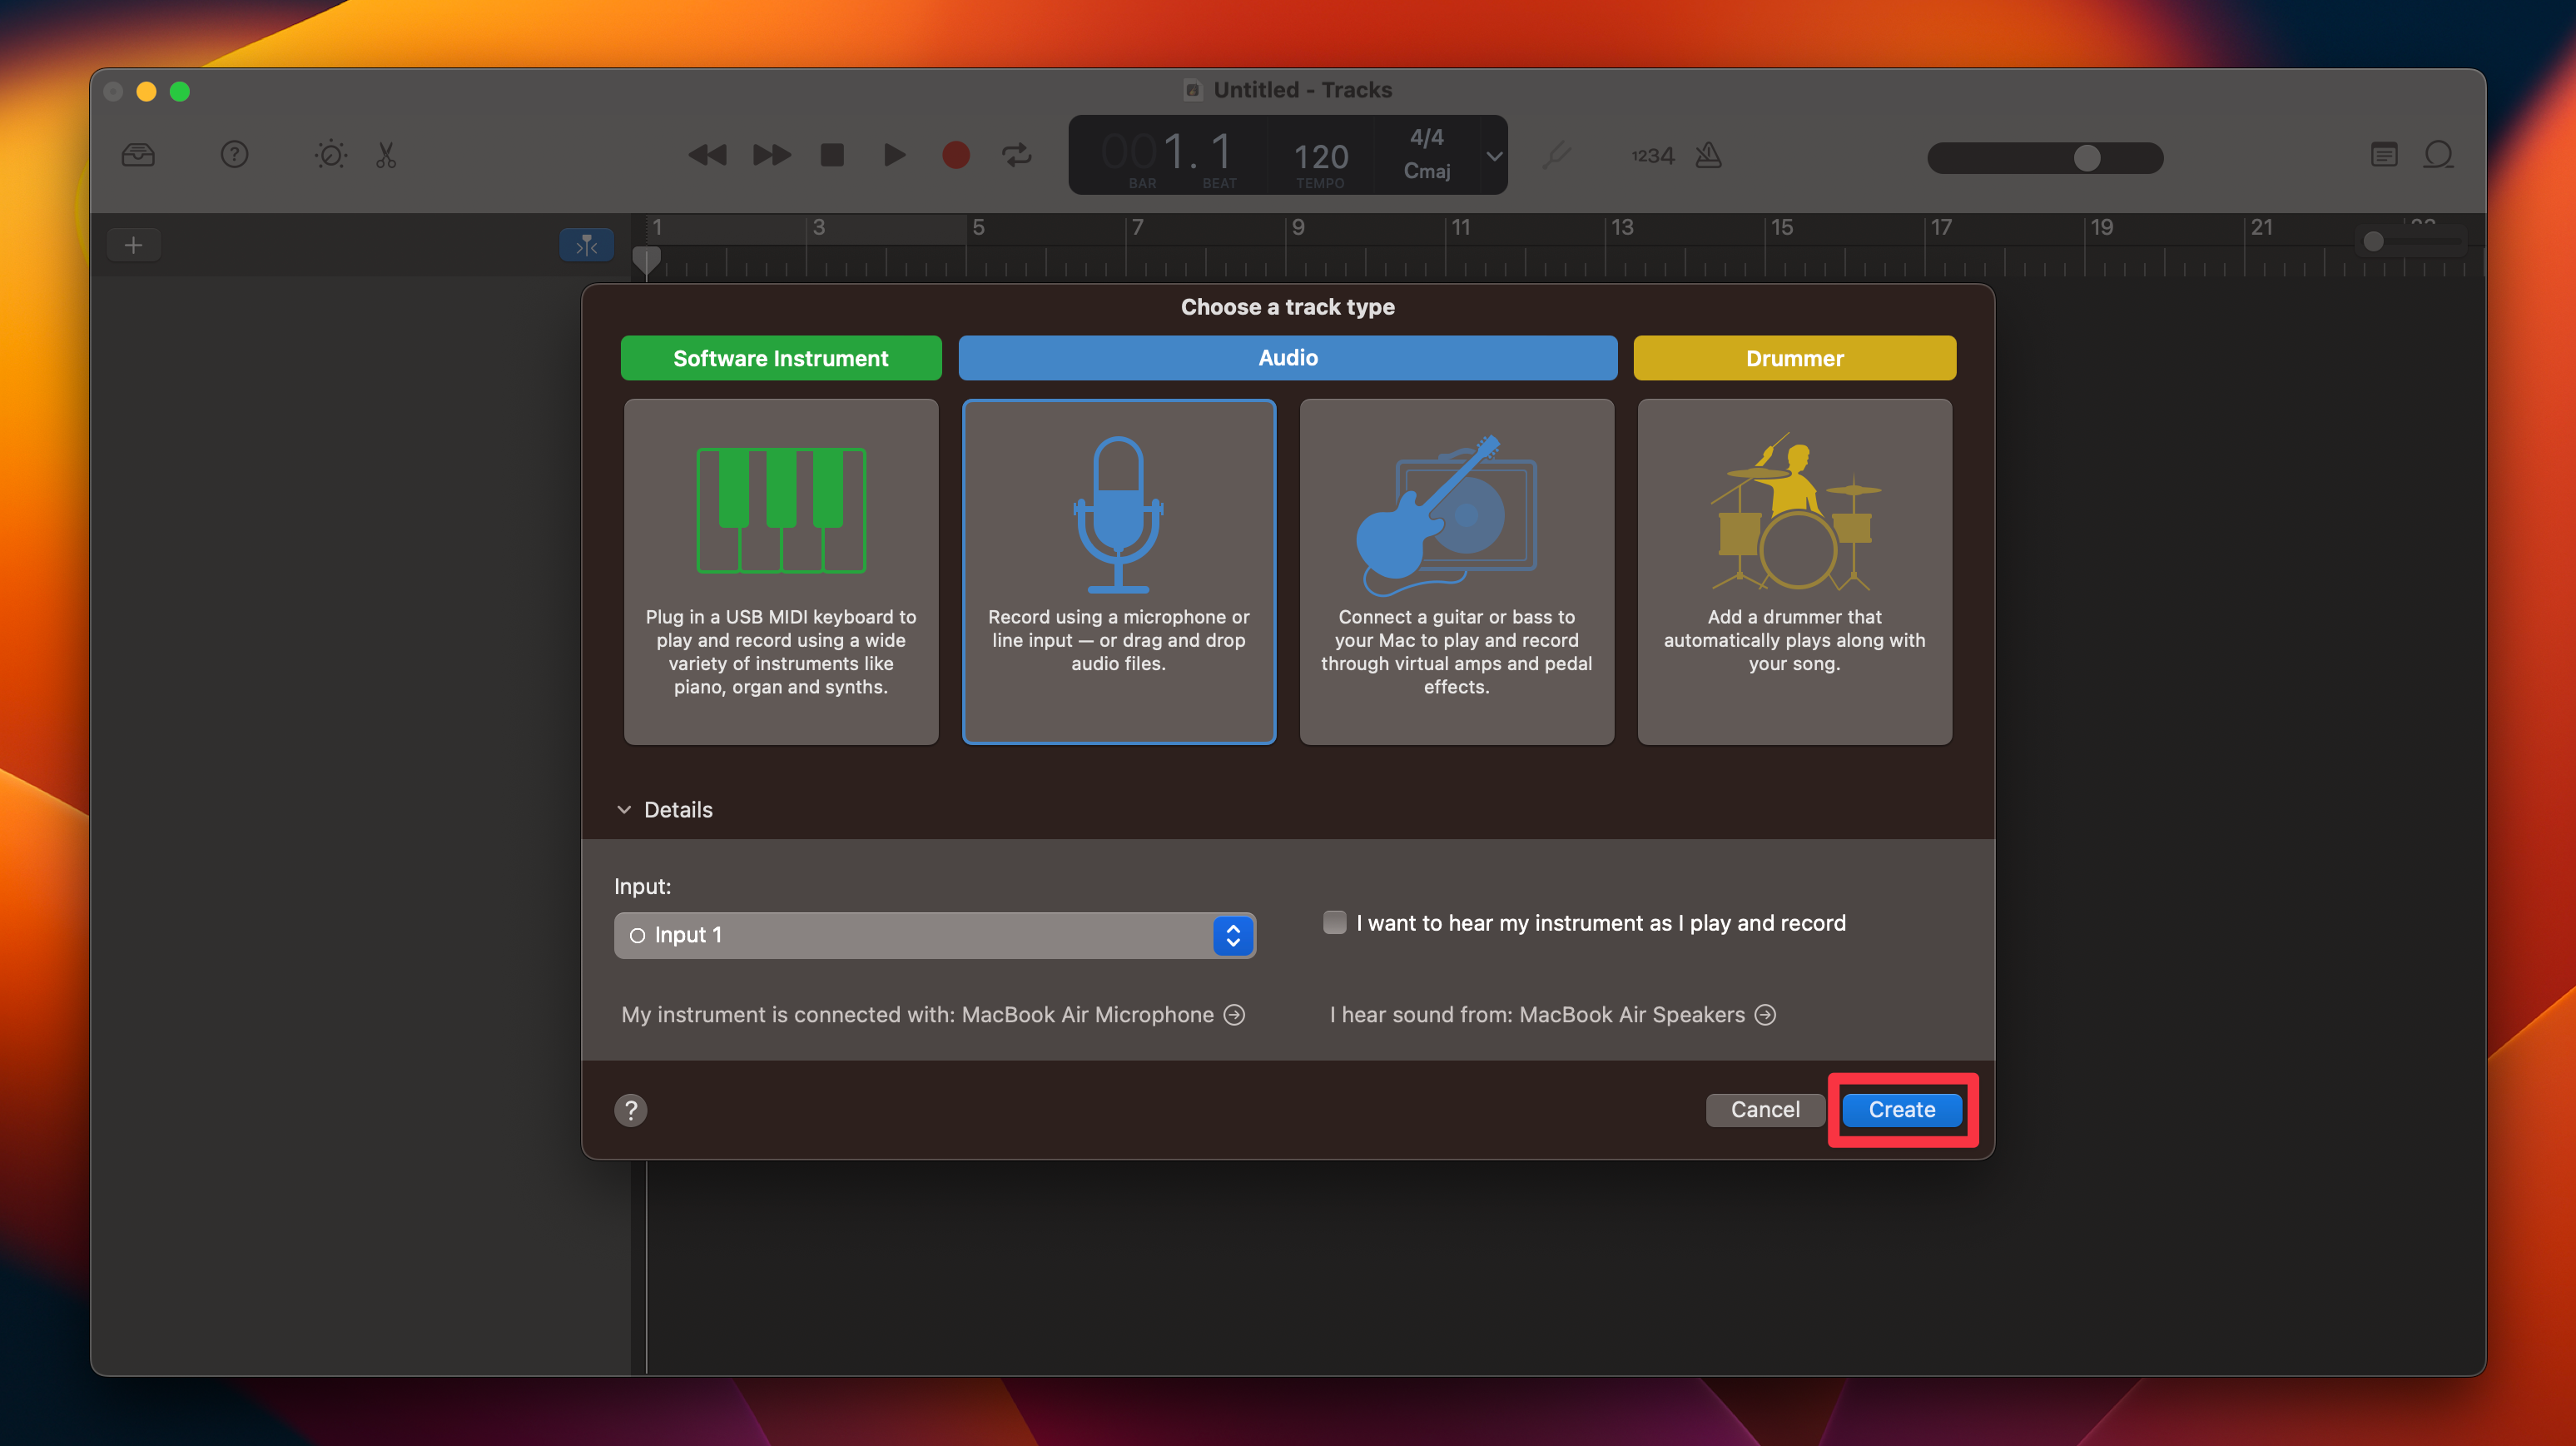
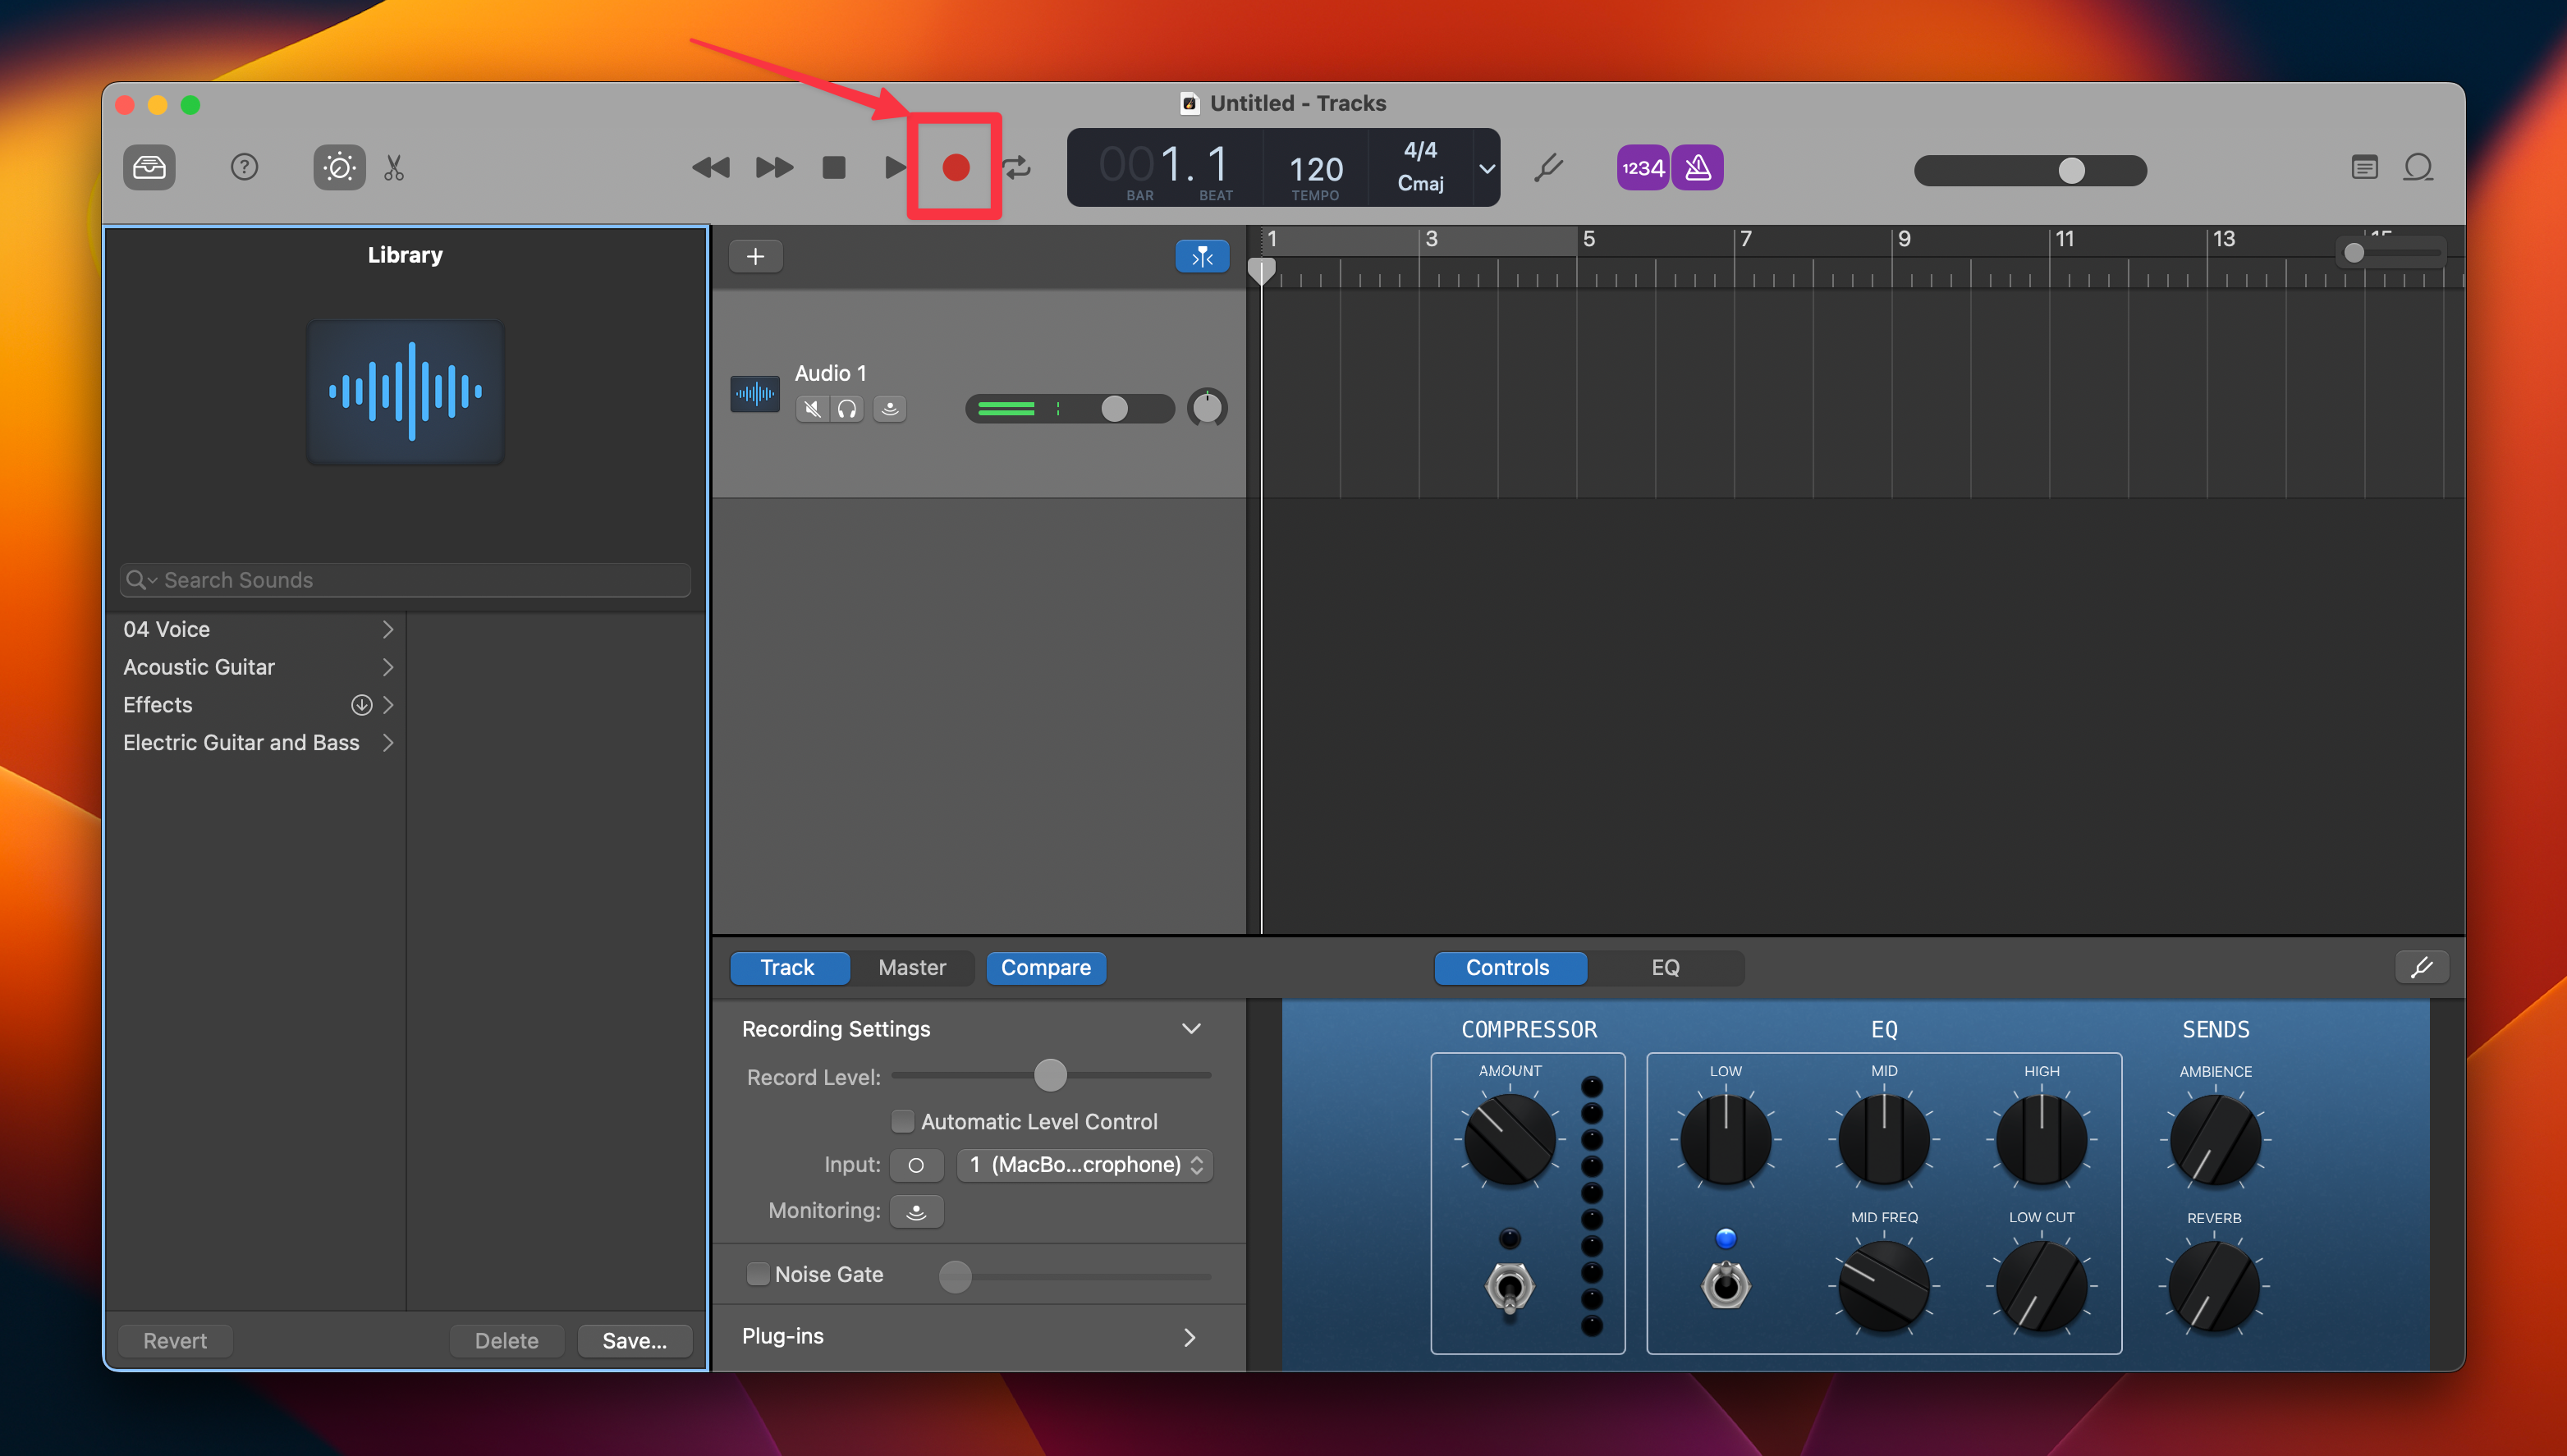
Apple’s current GarageBand guide includes instructions for recording to an audio track and exporting songs. Menu details can vary by GarageBand version and selected track type.
Other Mac audio-recording options
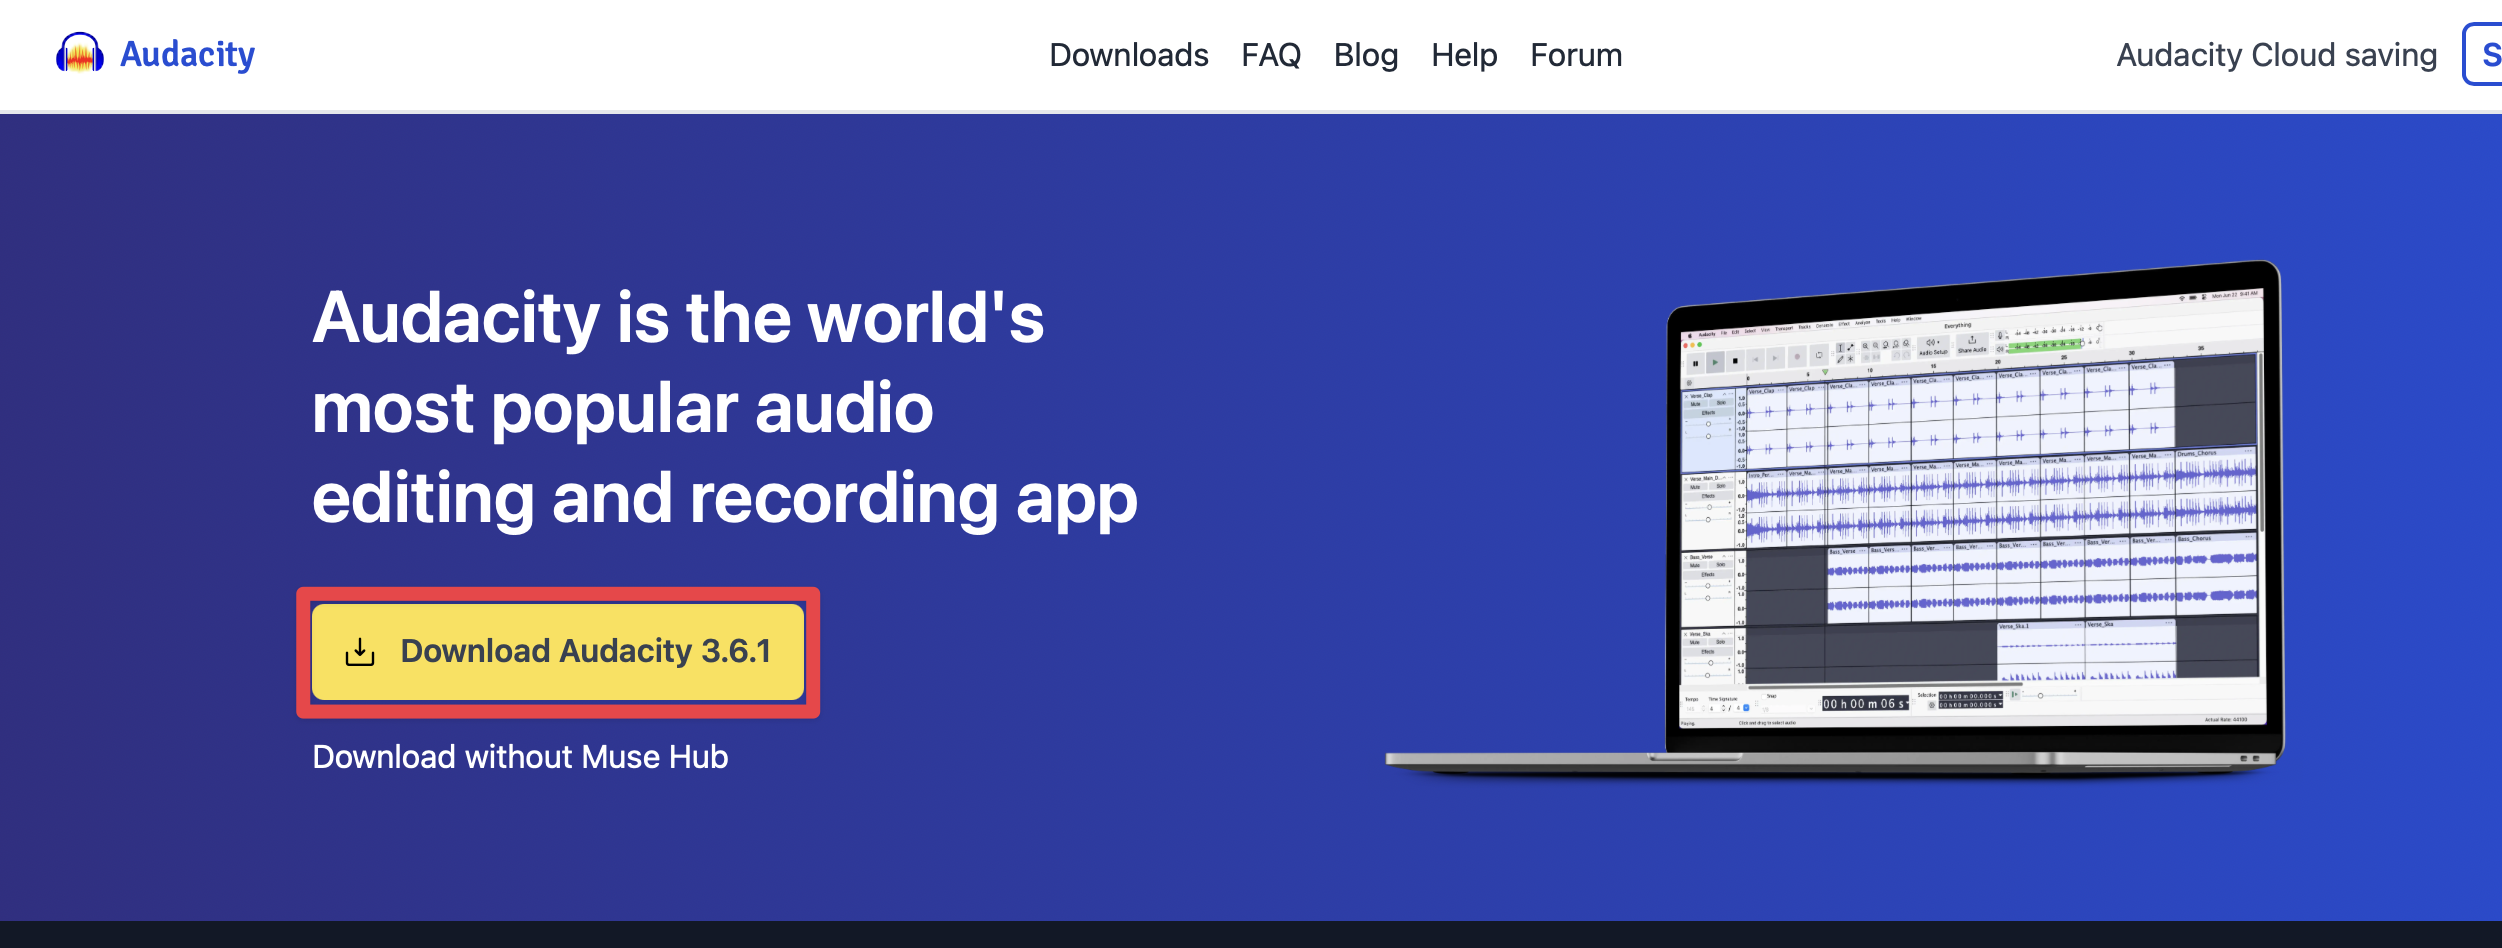
Audacity
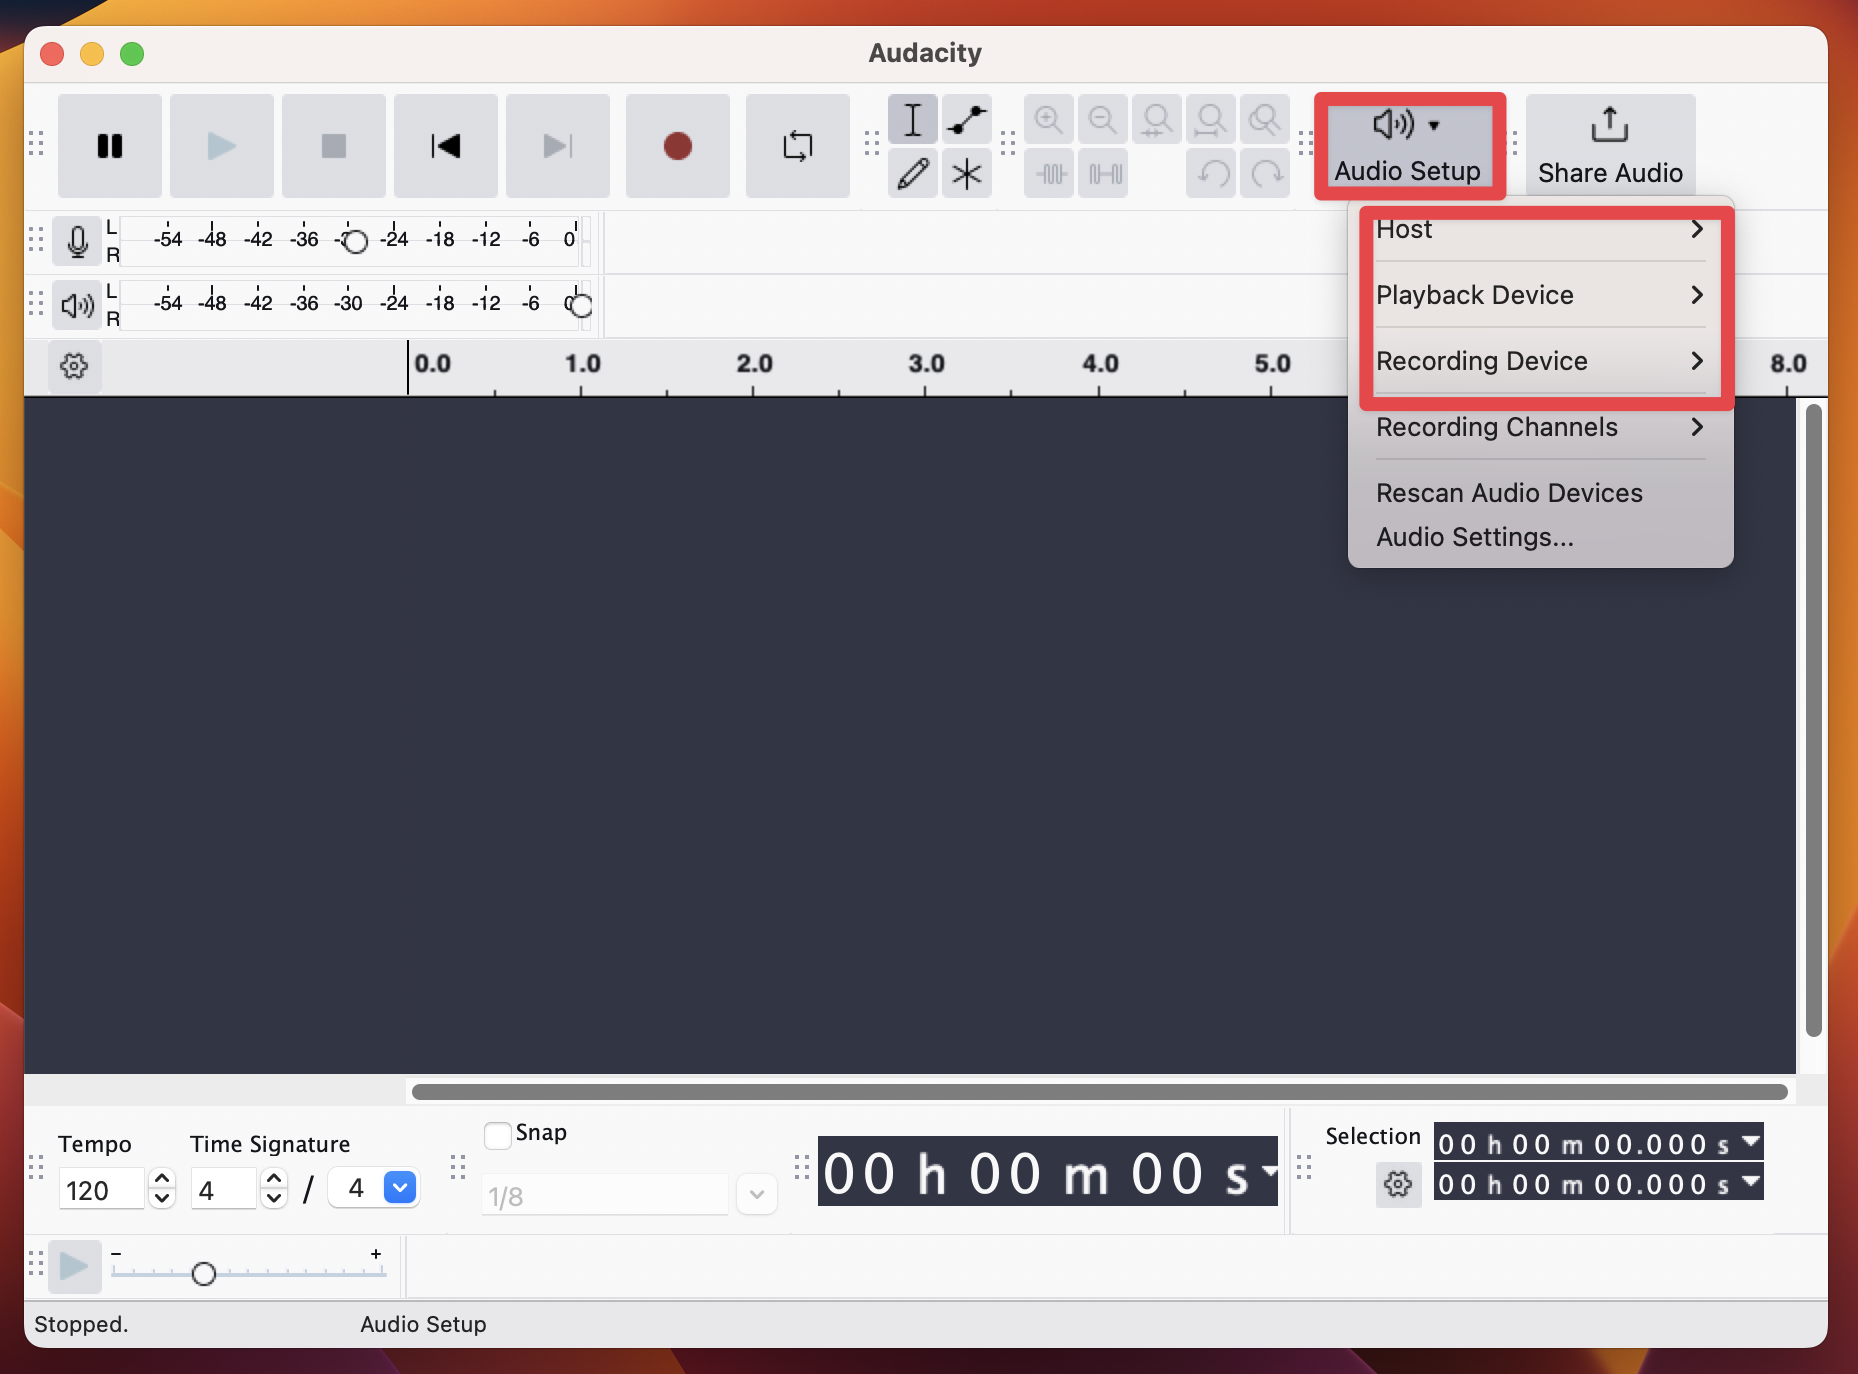
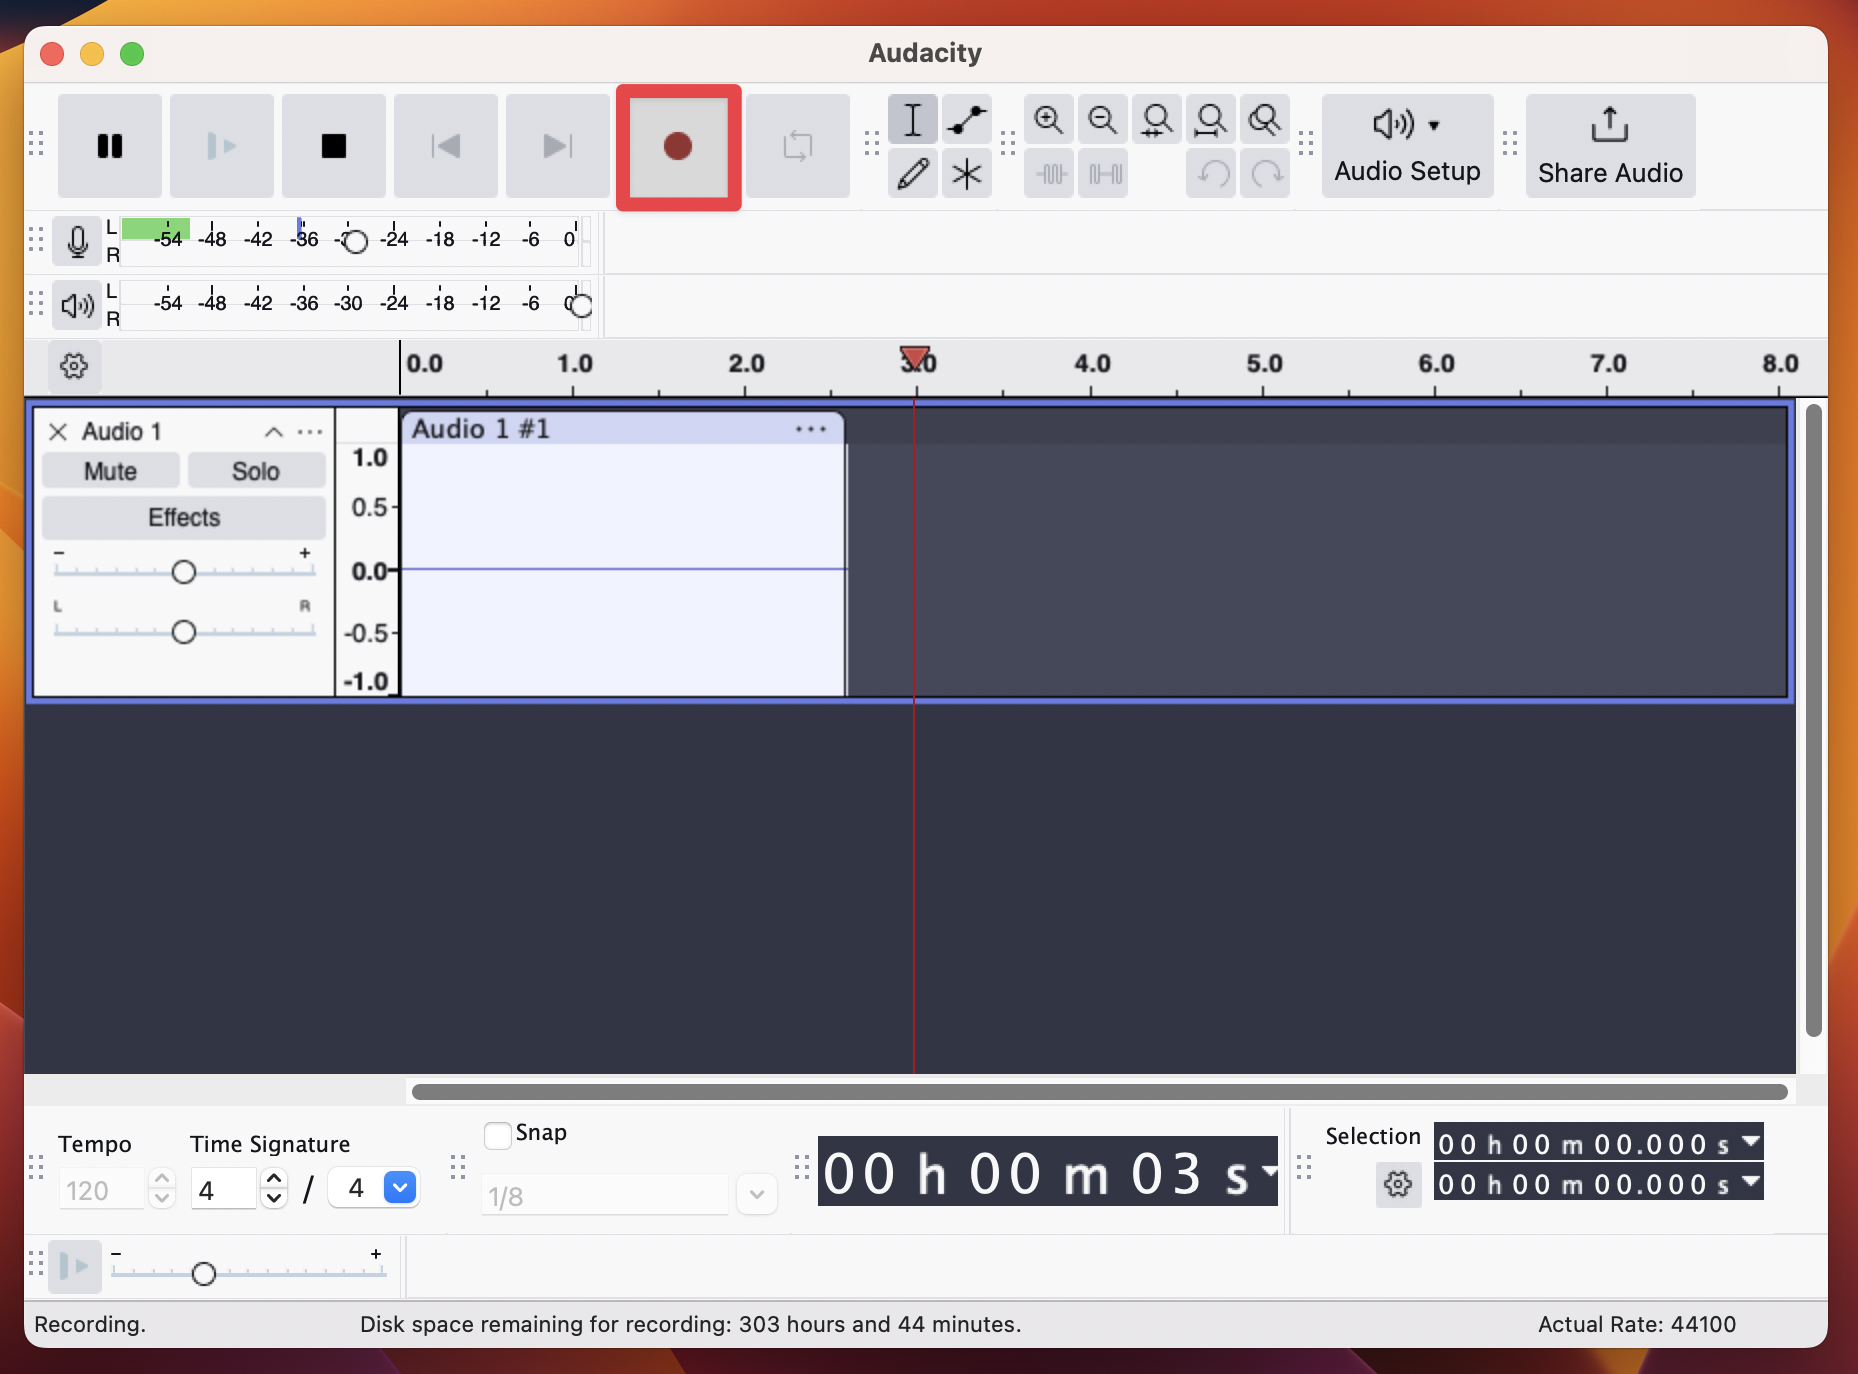
Audacity is a desktop recorder and editor for a microphone or connected audio interface. Use the Audio Setup toolbar to choose the recording device. On a Mac, choose Core Audio as the audio host.
If the controls look different in your release, follow the Audacity device guide.
Adobe Audition and Logic Pro
Adobe Audition and Logic Pro are fuller editing and production tools. Choose an input device, create or arm an audio track, record, then export or bounce the result.
They add more controls than most people need for a short spoken note. Check current software requirements, plan terms, and export options with Adobe Audition or Logic Pro before choosing one.
Browser-based recorders
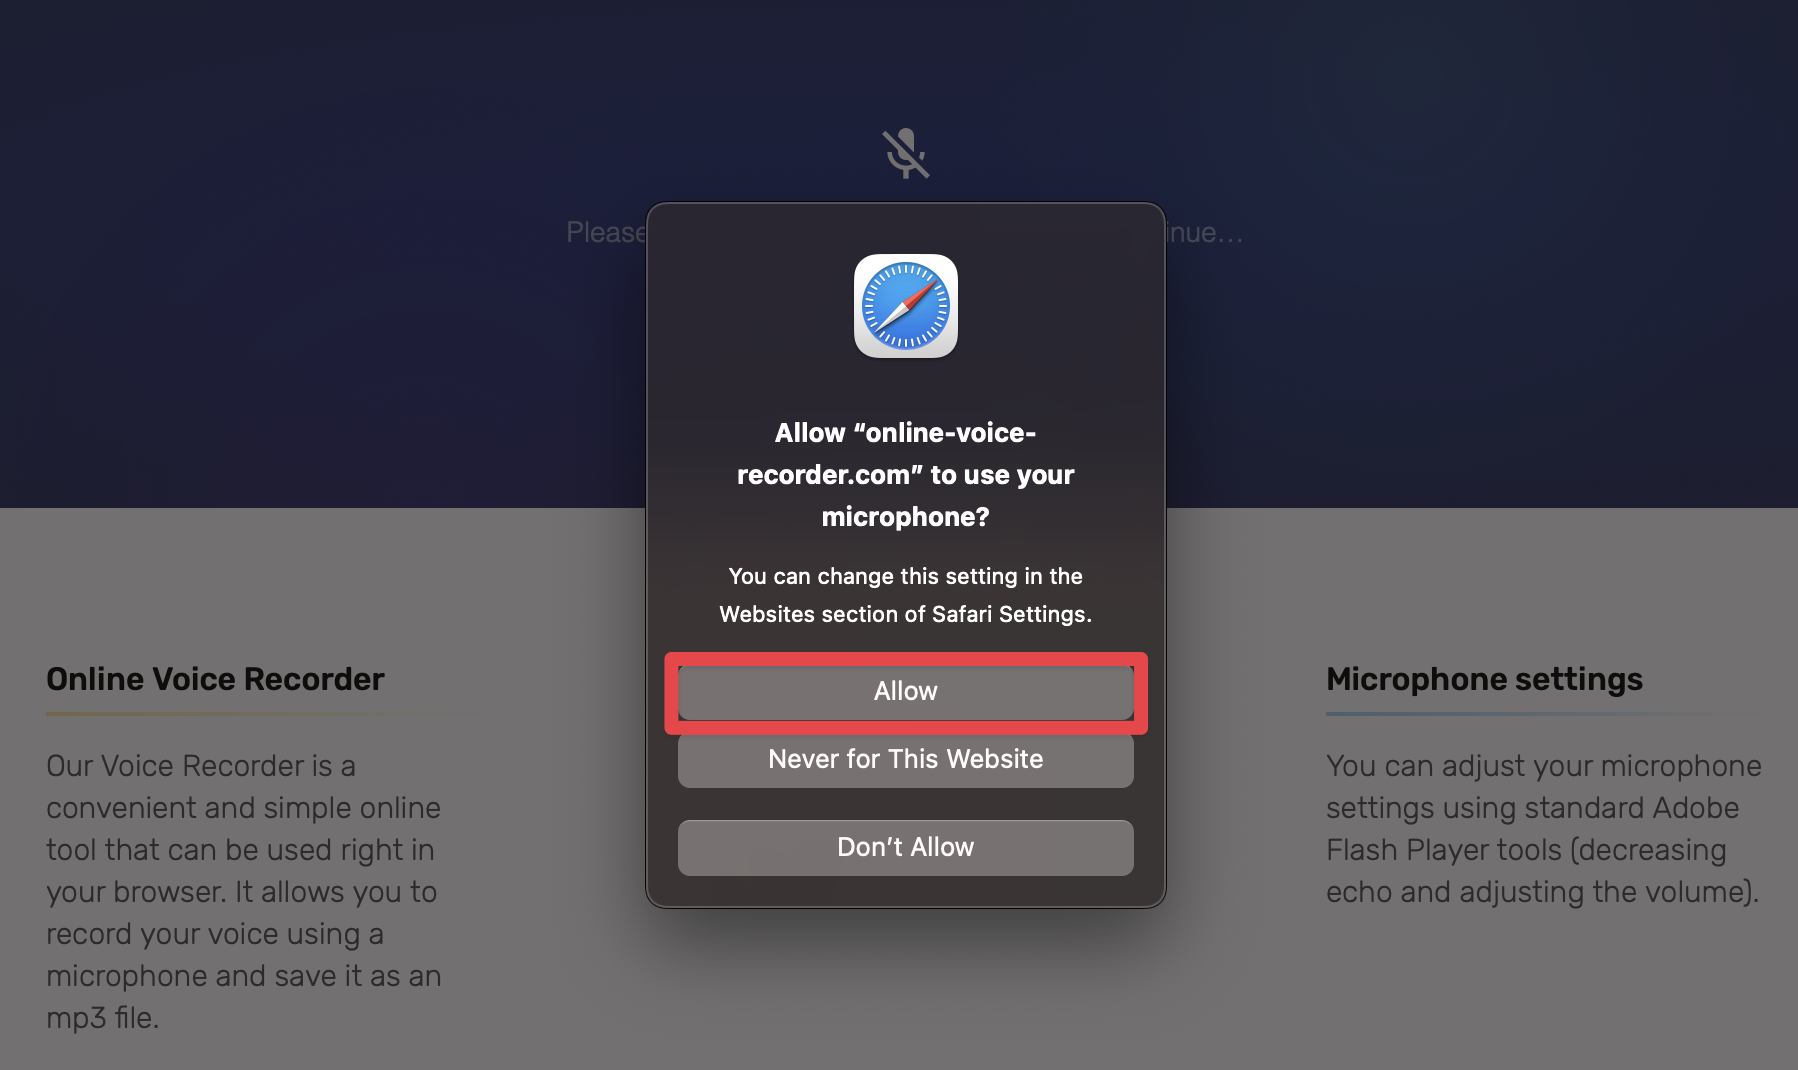
A browser recorder asks for microphone access and uses a third-party service. Before recording sensitive material, check how it handles and stores recordings and whether its connection, terms, and privacy controls meet your needs. Allow microphone access only for a site you trust.
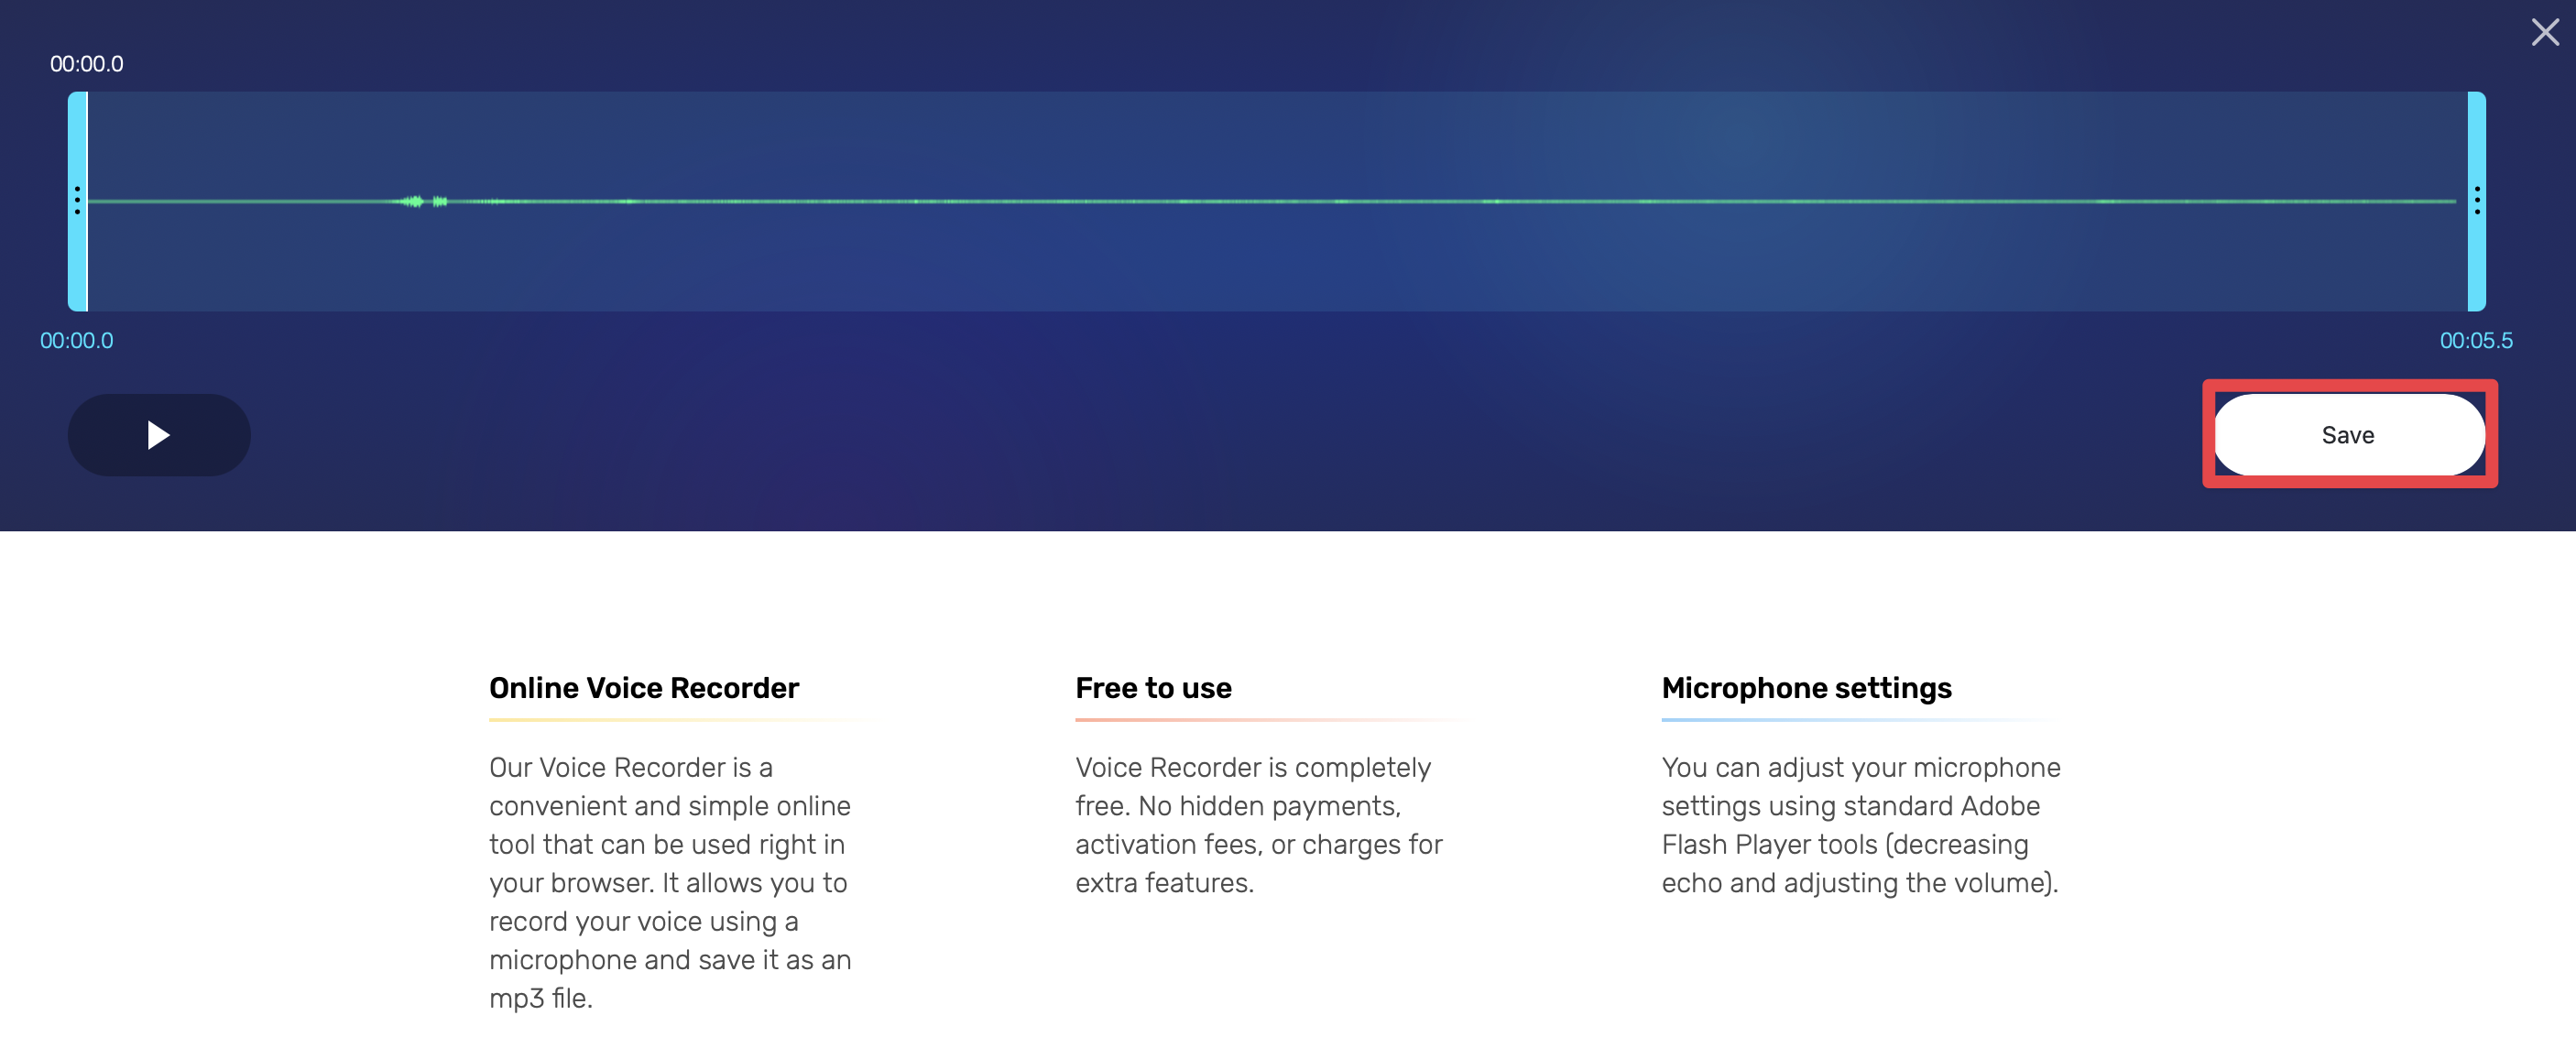
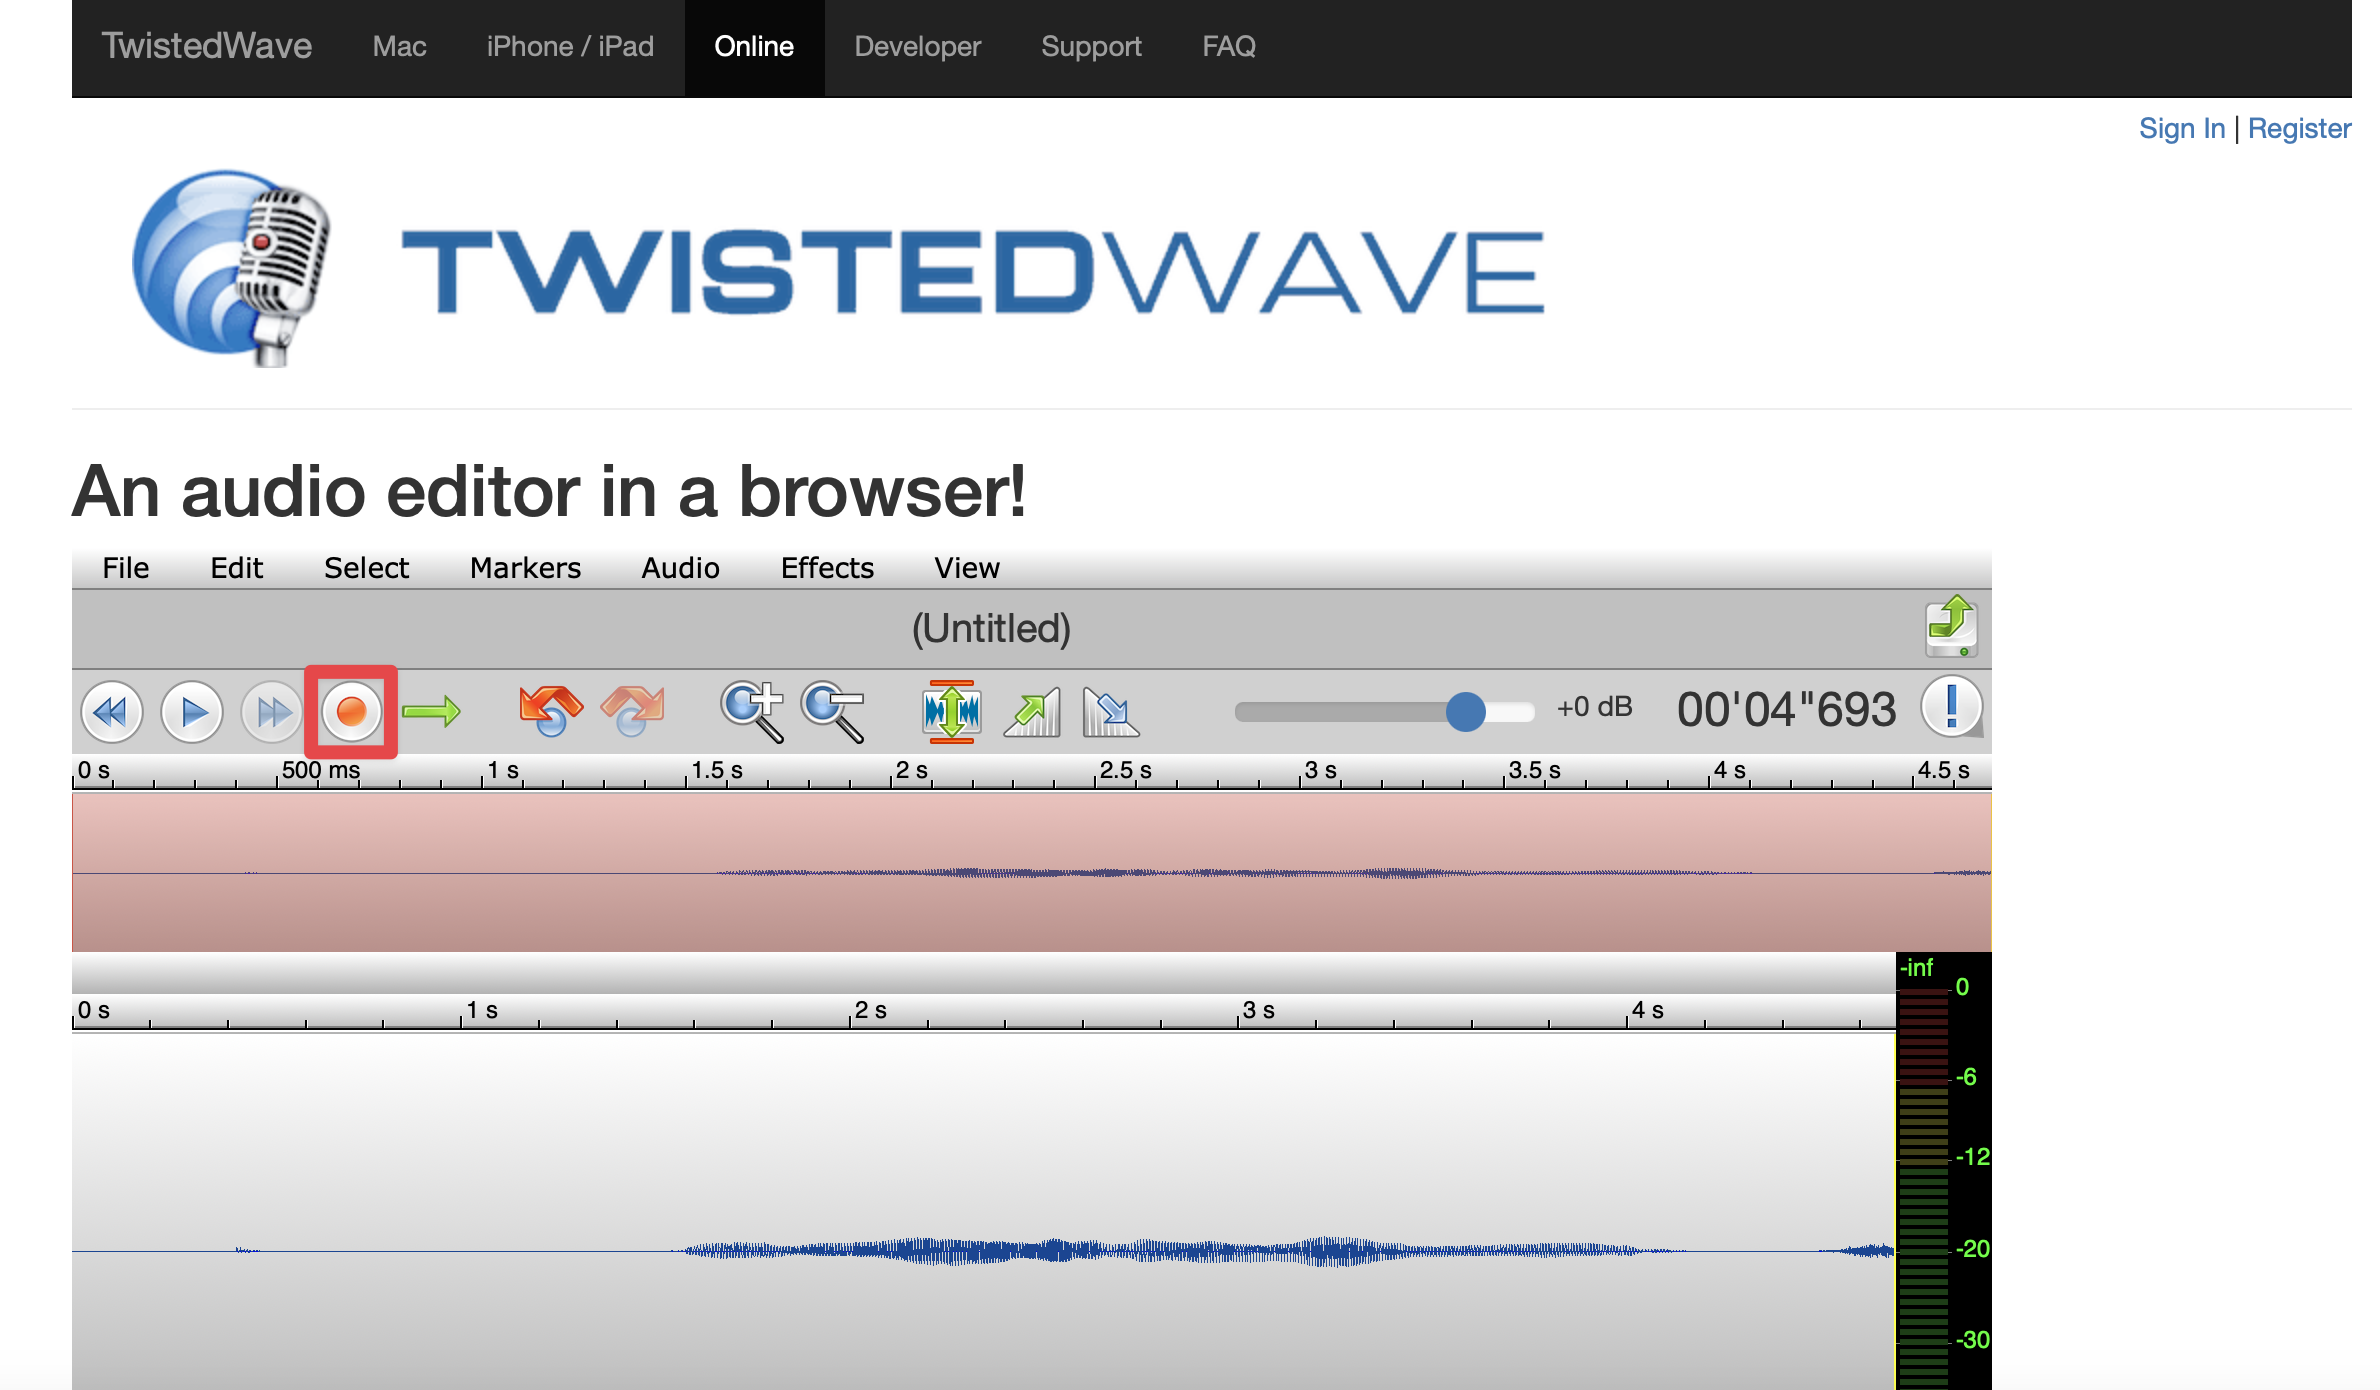
Online Voice Recorder, Vocaroo, and TwistedWave Online are browser-based alternatives. Check the current controls, output formats, and privacy terms before recording or uploading material.
The screenshots below are old examples of browser recorder interfaces. Their buttons and privacy terms may have changed.
For any browser app, allow microphone access only for a site you trust.
You can review website permissions in the browser settings and macOS microphone access in System Settings > Privacy & Security > Microphone.
Record sound from an app or the Mac itself
A standard audio recording uses a microphone input. It will not directly capture sound playing inside an app.
On macOS 27 Golden Gate or later, press Shift-Command-5, select a screen-recording mode, and choose Options > Include System Audio. Choose a microphone separately if you also want your voice or room sound. Apple’s screen-recording guide explains the version requirement and controls.
This creates a screen recording movie, even if you only care about its sound. To make an audio-only copy, open the movie in QuickTime Player and choose File > Export As > Audio Only.
QuickTime exports an AAC track in an MPEG-4 audio file. Apple explains this in its QuickTime export guide. Some protected video or app windows may not be recordable.
Apple’s screen-recording guide explains the version requirement and capture options. For access settings, see Apple’s screen and system-audio privacy guide.
On macOS 26 Tahoe and earlier, Apple’s built-in Screenshot controls do not offer the macOS 27 system-audio option described above. A third-party virtual audio device may be needed for direct system-audio capture on those versions.
That setup is different from selecting a microphone and can require installing software and changing audio routing.
For a meeting or call, confirm that recording is allowed and tell the other participants before you start. Rules vary by location and organization.
A system-audio option does not bypass an app’s recording restrictions or participant-consent requirements.
Which method should you choose?
| What you need | Try |
|---|---|
| A quick voice memo | Voice Memos |
| A microphone recording you can save as a file | QuickTime Player |
| Music tracks and mixing | GarageBand |
| More editing controls | Audacity or another audio editor |
| A short recording without a desktop app | A browser recorder, after checking its privacy terms |
| Sound playing on your Mac | Screen recording with system audio on macOS 27 or later; this saves a video |
If the recording has no sound
- Play the saved file and check that you opened the right recording.
- In the recording app, select the microphone or interface you intend to use. For an external mic, check its cable, connection, and input level.
- Open System Settings > Sound > Input and confirm the input meter responds when you speak.
- Check System Settings > Privacy & Security > Microphone and allow the recording app. Quit and reopen the app after changing access.
- Record a short sample and play it back before starting a long interview or session. This is a practical check for your setup, not proof that every app or device will behave the same way.
For a Mac that has no sound output or unusually low volume, see our guides to fixing no sound on a MacBook and raising low Mac volume.
Frequently Asked Questions
Can I record audio from an app on my Mac?
On macOS 27 Golden Gate or later, use Screenshot to make a screen recording and choose Options > Include System Audio.
It records a movie. In QuickTime Player, choose File > Export As > Audio Only if you need an AAC audio file.
On earlier macOS versions, the built-in Screenshot option is not available.
Does QuickTime record system audio with New Audio Recording?
No. File > New Audio Recording records from a microphone you select. The separate system-audio option is part of screen recording on macOS 27 Golden Gate or later.
Where does Voice Memos save recordings on Mac?
Voice Memos keeps recordings in its library.
If Voice Memos is enabled in iCloud settings, recordings can sync to your other Apple devices signed in to the same Apple Account.
Use the app’s share controls if you need to send or export a copy.
What format does QuickTime use for audio recordings?
Apple lists High quality as 44.1 kHz AAC. Maximum is uncompressed 44.1 kHz, 24-bit Linear PCM in AIFF-C, which uses more storage.
You can choose a name and save location with File > Save.
Can I record a phone call, class, or meeting?
The recording apps can capture microphone input, and macOS 27 screen recording can include system audio.
Before recording other people, tell them and check the laws, workplace rules, or meeting policies that apply. Do not assume the app’s recording controls provide permission.
Affiliate disclosure: MacBook Journal may earn a commission when you buy through links on this page, at no extra cost to you.
How helpful was this article?
Your feedback helps us improve our guides.