TL;DR
To create a bootable USB drive for macOS:
Format USB
- Open Disk Utility, select USB, click Erase.
- Choose Mac OS Extended (Journaled) and GUID Partition Map.
Create Bootable USB
- Open Terminal.
- Run the command for your macOS version: sudo /Applications/Install\ macOS\ version.app/Contents/Resources/createinstallmedia –volume /Volumes/[USBdrive]
(Replace [version] with the macOS version and [USBdrive] with your USB name.) - Enter admin password and confirm with Y.
Tried and Tested ✅: The methods and steps mentioned in this article have been tried and tested firsthand by Ojash Yadav on his MacBook Pro M3 and rechecked for errors on Hashir’s MacBook Air M2.
Installing macOS doesn’t have to take forever. I realized that using a bootable USB drive could speed things up and make the process a lot simpler. This post will show you how to create your own bootable USB drive if you want a faster way to install macOS.
What You Need to Create a Bootable macOS USB Drive
You need a few essential tools to create a bootable macOS USB drive.
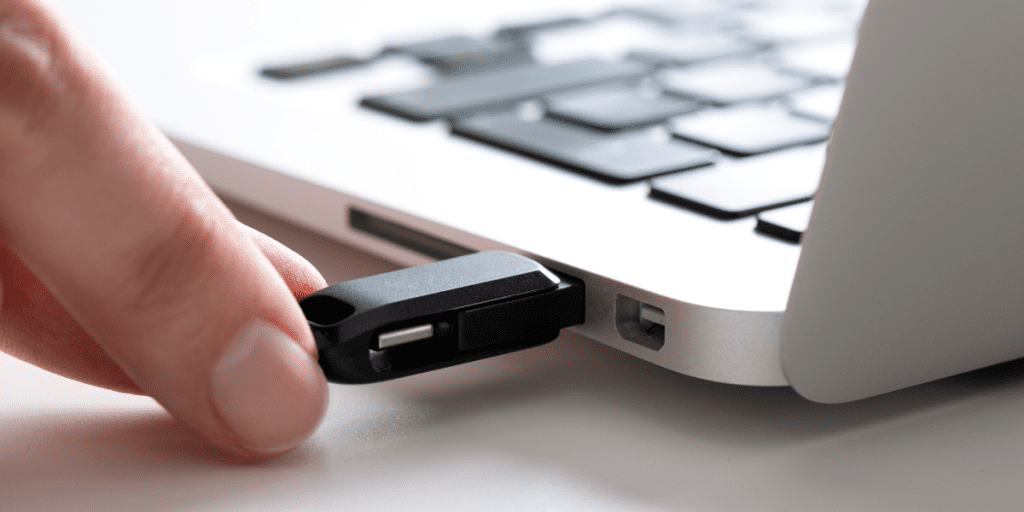
- USB Drive: A 16 GB USB drive is required, preferably USB 3 or Type C. Backup data, as it will be erased.
- macOS Installer: Download from the Mac App Store or Apple’s site. Ensure it’s compatible with your Mac.
- Mac Computer: A Mac is needed to download the installer and create the bootable USB.
- Administrator Access: Admin access is required to make system changes during the process.
- Reliable Internet Connection: A stable internet connection is necessary to download the macOS installer.
How to Create a Bootable USB Drive for macOS
Why You Can Trust MacBook Journal ![]() We always conduct first-hand research and verify every method or solution we present, ensuring you receive reliable and effective advice. Learn more about our process.
We always conduct first-hand research and verify every method or solution we present, ensuring you receive reliable and effective advice. Learn more about our process.
A bootable USB isn’t required for updating or reinstalling macOS, but it simplifies installation on multiple computers and helps if you have issues installing via Finder or Recovery.
Continue reading for a detailed step-by-step guide to create a bootable USB drive for macOS:
1. Format the USB Drive Using Disk Utility
Formatting the USB drive using Disk Utility is essential to create a bootable USB drive for macOS. Here is how to do it:
This method will erase everything on your USB drive. So, if you want to save the data on your drive, create a backup before moving on with the steps below.
- Connect the USB drive to your Mac.

- Open the Disk Utility app from the Finder > Applications > Utilities folder.

- Select the USB drive from the list of drives on the left-hand side.
- Click the Erase button in the top toolbar.

- Choose a name for your USB drive. It will be Untitled by default, but you can give it any name you want.
Please remember in the createinstallmedia command later, you must substitute the term MyVolume with the name you assign to your drive in this step.
- Choose the format as Mac OS Extended (Journaled).

- Choose the scheme as GUID Partition Map.
- Click the Erase button to format the USB drive.

- Wait for Disk Utility to create the partition and set up the drive. It can take a few minutes.
- Next, click Done.
2. Create a Bootable USB Drive for macOS Using Terminal
Now that you have formatted your USB drive, you can use a Terminal command to create a bootable USB drive for macOS. Here are the steps to create a bootable USB drive for macOS using Terminal:
This method to create a bootable macOS USB using the createinstallmedia command requires OS X 10.7 Lion or later. It doesn’t work on OS X 10.6 Snow Leopard or earlier versions.
- Insert the USB drive into your Mac and make sure it is formatted correctly.
- Open Terminal by typing Terminal in the Spotlight search.

- Type the following command in Terminal and press Enter to view your Mac’s list of disks and volumes:
diskutil list
- Now, type the following command based on the macOS version you’re creating a bootable USB drive for. Be sure to replace [version] with the macOS version and [USBdrive] with your USB drive name.
macOS 15 Sonoma (Sequoia)
sudo /Applications/Install\ macOS\ Sequoia.app/Contents/Resources/createinstallmedia --volume /Volumes/[USBdrive]macOS 14 Sonoma
sudo /Applications/Install\ macOS\ Sonama.app/Contents/Resources/createinstallmedia --volume /Volumes/[USBdrive]macOS 13 Ventura
sudo /Applications/Install\ macOS\ Ventura.app/Contents/Resources/createinstallmedia --volume /Volumes/[USBdrive]macOS 12 Monterey
sudo /Applications/Install\ macOS\ Monterey.app/Contents/Resources/createinstallmedia --volume /Volumes/[USBdrive]macOS 11 Big Sur
sudo /Applications/Install\ macOS\ Big\ Sur.app/Contents/Resources/createinstallmedia --volume /Volumes/[USBdrive]macOS 10.15 Catalina
sudo /Applications/Install\ macOS\ Catalina.app/Contents/Resources/createinstallmedia --volume /Volumes/[USBdrive]macOS 10.14 Mojave
sudo /Applications/Install\ macOS\ Mojave.app/Contents/Resources/createinstallmedia --volume /Volumes/[USBdrive]- After typing the command, press Enter.
- You’ll be prompted to enter your administrator password. Type your password (it will not show on screen) and press Enter.
- Terminal will ask for confirmation. Type Y and press Enter to begin the process
- The process may take several minutes to complete. Once finished, Terminal will display a message confirming that your USB drive is now a bootable macOS installer.
You now have a bootable USB drive ready to install macOS on other systems!
How to Boot macOS From the USB Drive
You can easily install or upgrade macOS on your Mac after creating a bootable USB drive. Follow the steps below to boot your Mac from the USB drive:
- Connect your bootable macOS USB drive to your Mac using a USB port.
- Click the Apple menu and choose Restart or hold down the Power button to restart your Mac.
- Click Restart on the prompt to confirm your action.

- Press and hold down the Option ⌥ key immediately after restarting your Mac. Keep holding it down until you see the Startup Manager screen.

- Use the arrow keys on your keyboard to select the bootable macOS USB drive as your startup disk. This will boot your Mac into Recovery Mode.
- Next, click Install macOS [version] and tap the Continue button.

- The macOS version on the bootable drive will start installing on your Mac.
- After the process completes, your Mac will restart with a clean installed macOS version.
Final Words
Creating a bootable macOS USB drive can be a lifesaver when troubleshooting or installing macOS on your Mac. Now that you know how to create a bootable USB drive for macOS, here are some more tips to fix similar issues:
- If your Mac won’t turn on properly, you can fix the issue by booting it into Verbose Mode.
- If you don’t want to create a bootable USB drive for macOS, you can reinstall macOS by booting your Mac into Internet Recovery Mode.
- You can also reinstall macOS and fix disk errors on your computer by booting your Mac into Recovery Mode.