TL;DR
To remove the Bing Redirect Virus:
- Safari: Go to Settings > General to update your homepage and switch to the Search tab to set your search engine.
- Chrome: In Settings, update the default search engine and remove unwanted pages under On Startup.
- Firefox: Update your homepage under Home and set your search engine in the Search tab via Settings.
Tried and Tested ✅: The methods and steps mentioned in this article have been tried and tested firsthand by Ojash Yadav on his MacBook Pro M3 and rechecked for errors on Hashir’s MacBook Air M2.
Dealing with random redirects to Bing on your Mac? I’ve been there, and it’s frustrating. In this guide, I’ll share simple steps to remove the Bing Redirect Virus and take back control of your browser.
What Is Bing Redirect Virus on Mac?
The Bing Redirect Virus isn’t technically a virus. It’s a browser hijacker—a type of potentially unwanted program (PUP).
It changes browser settings like your homepage and search engine, bombards you with ads, and collects data such as your IP address, search queries, and browsing habits. These actions are designed to generate ad revenue for its creators and can pose serious privacy risks.
How Bing Redirect Got Installed on Your Mac?
The Bing Redirect often finds its way onto Macs through deceptive or indirect means. Here’s how it typically gets installed:
- 📦 Bundled Software: Hidden add-ons in apps from unverified sources.
- 🛑 Misleading Ads: Fake system alerts or software prompts.
- 🔄 Fake Updates: Deceptive pop-ups urging you to update software.
- 🌐 Unverified Downloads: Software from unofficial websites.
- ⚙️ Compromised Installers: Legitimate apps altered with malicious programs.
What Are the Signs of the Bing Redirect Virus?
Here are the common signs of the Bing Redirect Virus on your Mac:
- Search Engine Switch: Default search engine changes to Bing.
- Changed Homepage: Bing replaces your usual start page.
- Redirects: Visiting websites reroutes you to unrelated pages.
- Pop-Up Ads: Intrusive banners and pop-ups appear.
- Unwanted Extensions: New toolbars or plugins show up unexpectedly.
- Persistent Changes: Browser settings reset after manual fixes.
How to Remove Bing Redirect Virus From Mac
Why You Can Trust MacBook Journal ![]() We always conduct first-hand research and verify every method or solution we present, ensuring you receive reliable and effective advice. Learn more about our process.
We always conduct first-hand research and verify every method or solution we present, ensuring you receive reliable and effective advice. Learn more about our process.
In this section, I’ve shared the quickest ways to remove Bing Redirect Virus from Mac on different browsers.
a. On Safari
For Safari users, here’s how to modify the homepage settings and remove Bing redirects on your Mac:
- Launch Safari on your Mac.
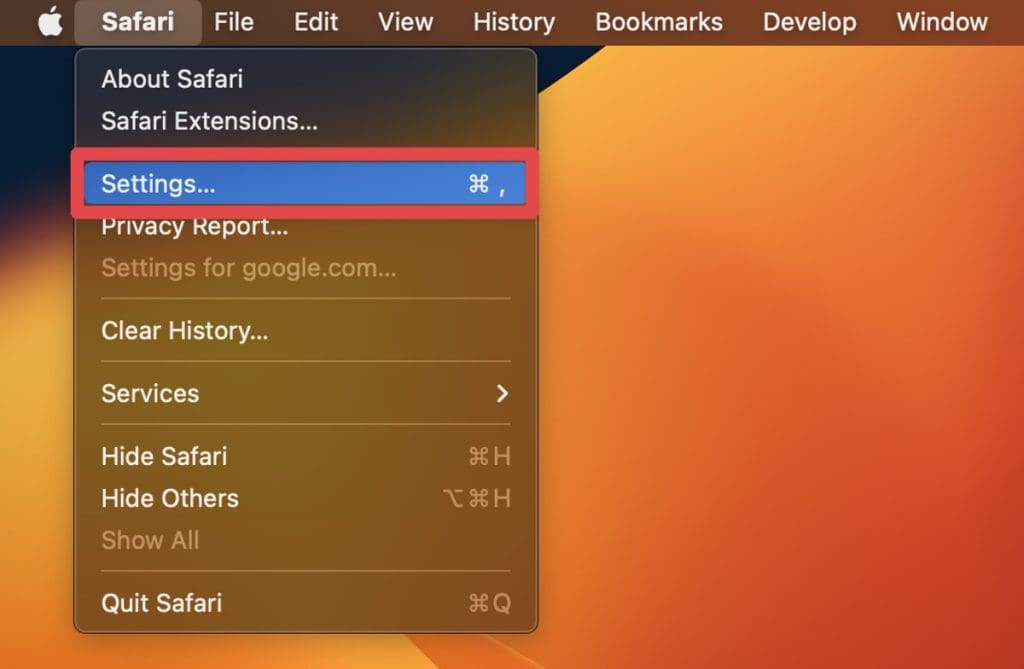
- Click Safari in the menu bar and select Settings.
- Click the General tab.
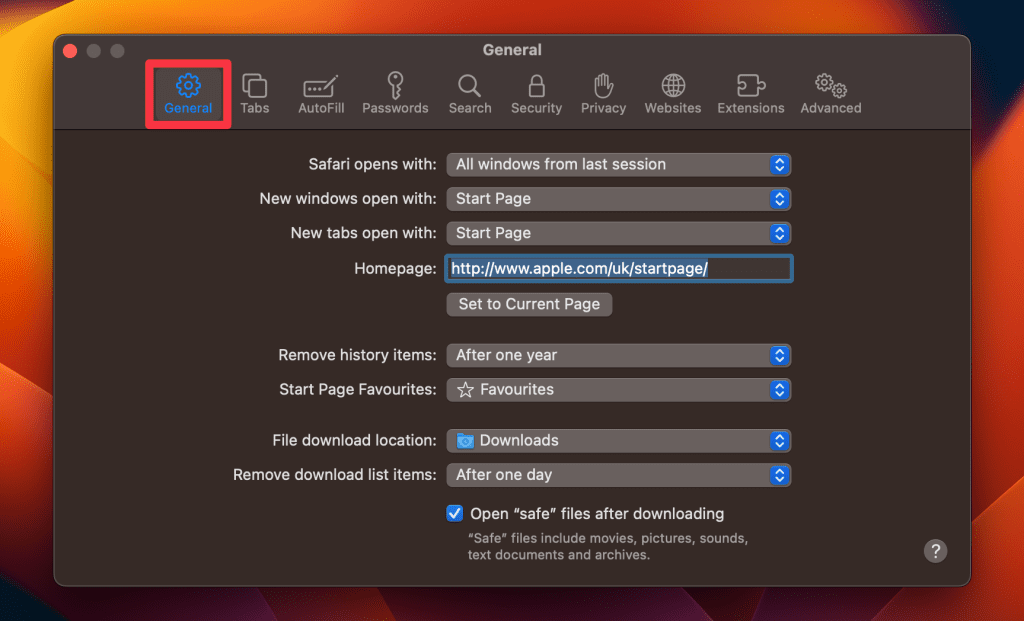
- Update the URL in the Homepage field to your desired one.

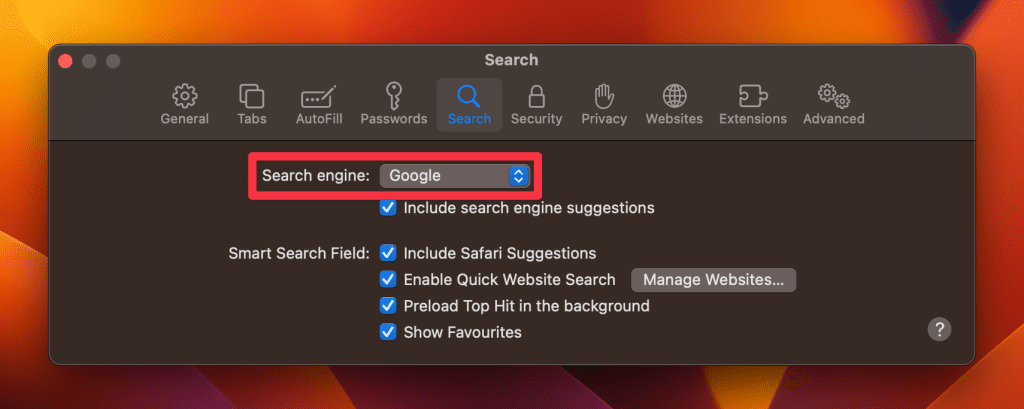
- Navigate to the Search tab and choose your preferred search engine.
b. On Chrome
To remove the Bing Redirect Virus in Chrome on your Mac, follow these steps:
- Launch Chrome on your Mac.
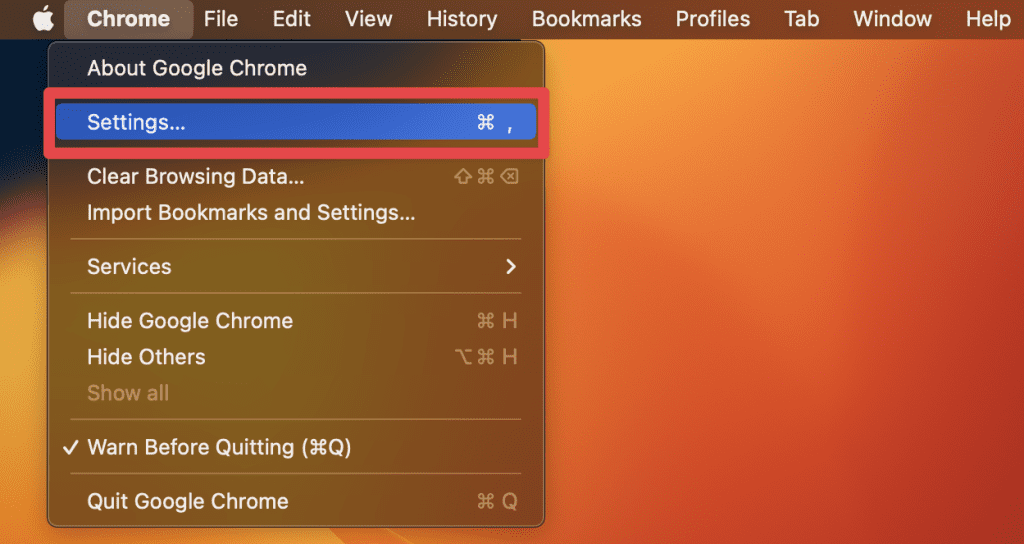
- Click Chrome in the menu bar and select Settings.
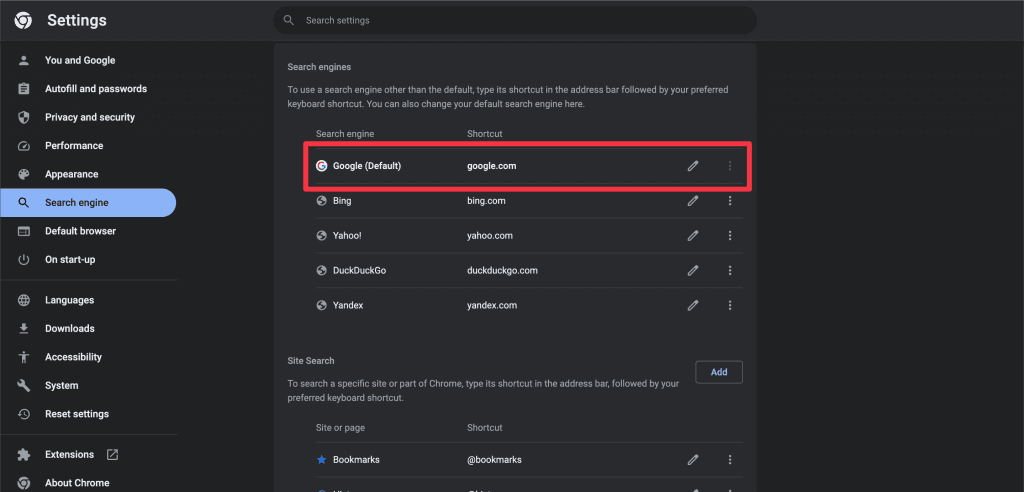
- Click Search engine in the left sidebar.

- Click Manage search engines and site search.

- Set your preferred search engine as default and remove any unwanted ones.
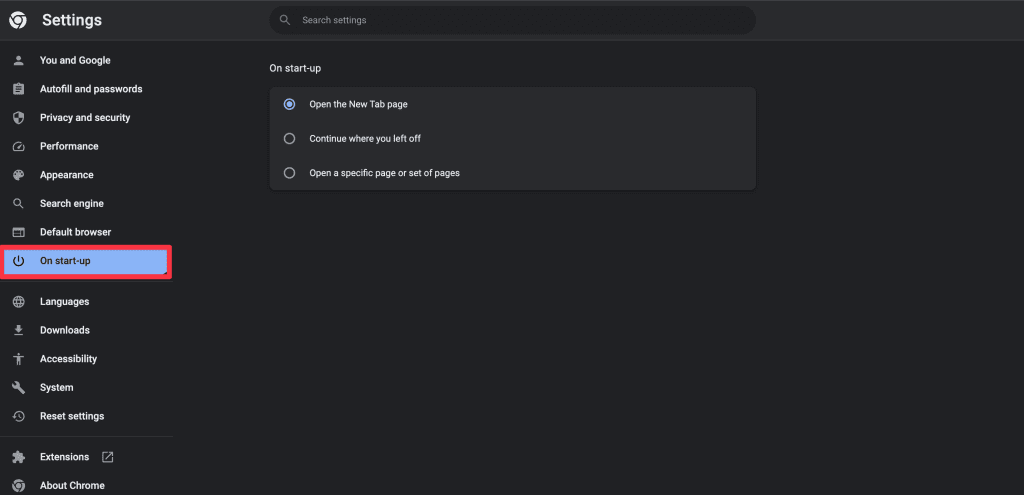
- Go to the On Startup tab.
- If Open a specific page or set of pages is selected, remove or change any undesired addresses.
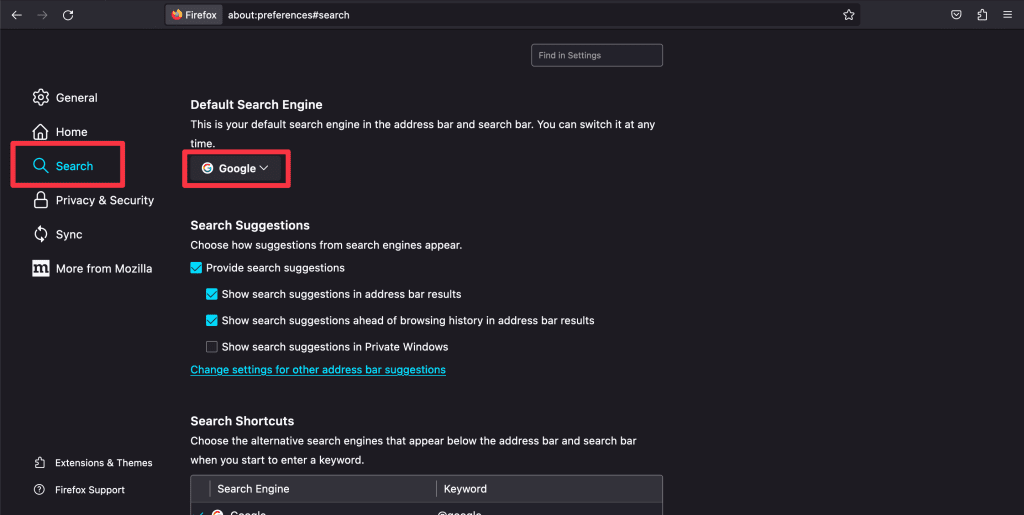
c. On Firefox
To remove the Bing Redirect Virus on Firefox, follow these steps:
- Launch Firefox on your Mac.
- Click Firefox in the menu bar and select Settings.

- Click Home in the left sidebar.
- Set your desired homepage beside the Homepage and new windows option.
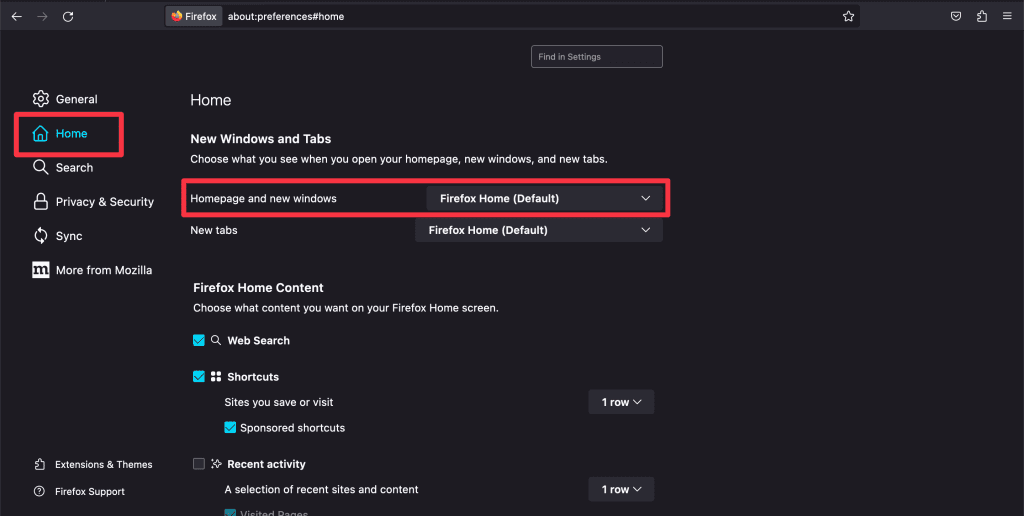
- Click the Search tab in the left sidebar and pick your favorite search engine.
Other Methods to Remove Bing Redirect Virus From Mac
If your Mac keeps getting unwanted pop-ups and redirects even after manually changing your browser’s homepage and default search engine then you need further troubleshooting:
1. Scan Your Mac With an Antivirus
One of the most effective ways to address the Bing Redirect Virus is using a trusted antivirus tool like MacKeeper. Here’s how to run a virus scan on your Mac using MacKeeper:
- Download and install MacKeeper.
- Launch MacKeeper and navigate to the Antivirus tab in the left sidebar.

- Start an instant virus scan by clicking the Start Scan button.

- If viruses are detected during the scan, click the Fix Items button to resolve the issues.
- You’ll see a No threats found message if your system is threat-free. You can tap the Restart button to run the scan again.
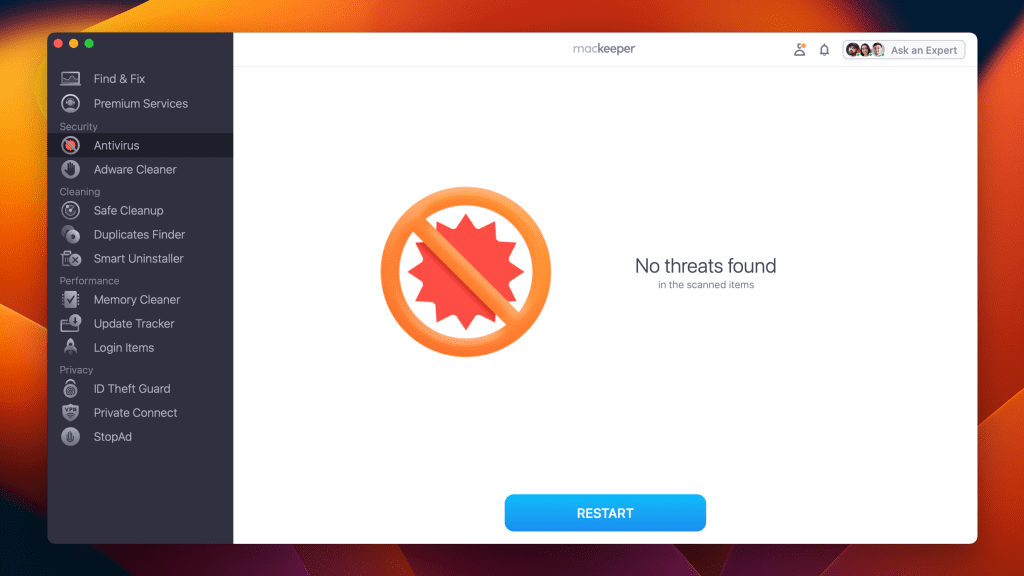
- Enable real-time antivirus protection to safeguard your Mac from future threats by clicking the Enable button.

After configuring your security settings, MacKeeper will continue to operate in the background, scanning for threats and blocking malicious activity.
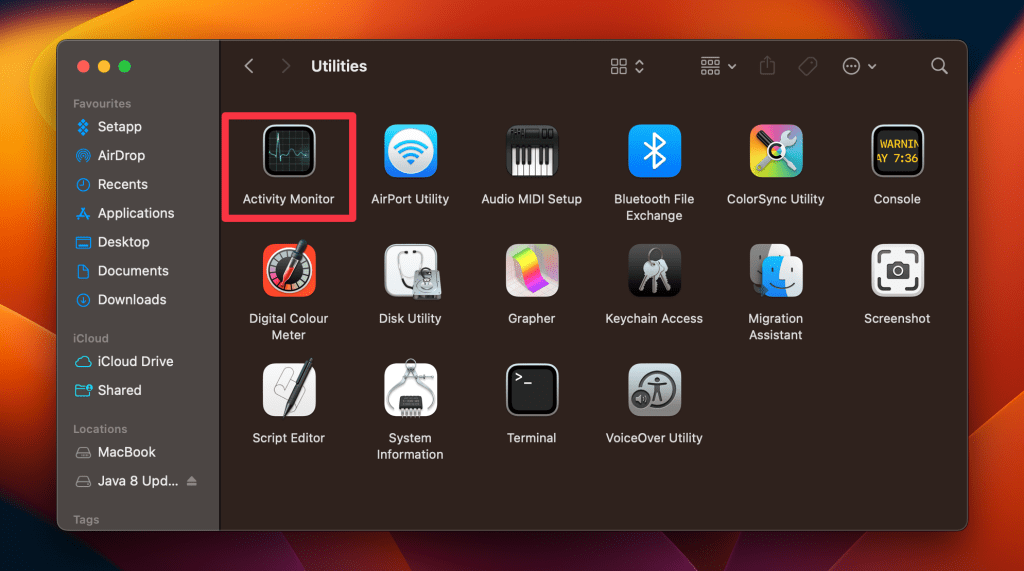
2. End Sketchy Programs via Activity Monitor
Sometimes, the root of the Bing Redirect Virus or similar issues lies in rogue processes running silently in the background. The Activity Monitor on your Mac is a powerful tool that allows you to view and end these suspicious programs, potentially stopping the redirect at its source.
Here’s how to use the Activity Monitor to kill suspicious background processes on Mac:
- Open Activity Monitor by going to Finder > Applications > Utilities > Activity Monitor.
- Once Activity Monitor is open, identify the background process you want to terminate by browsing the list or using the search box at the top-right corner.
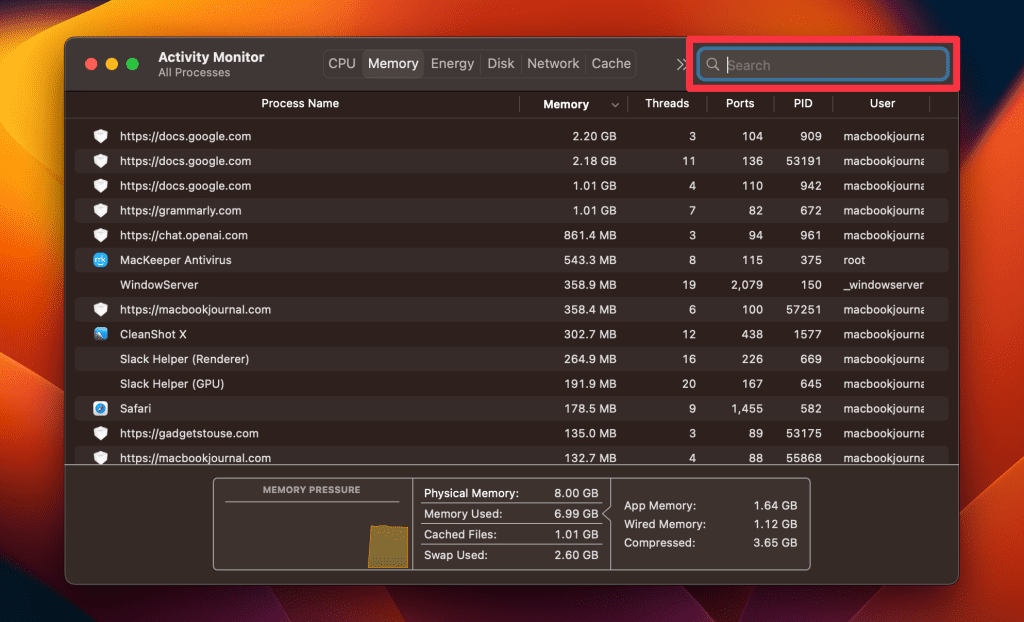
- Select the process you want to terminate and click the X button in the top toolbar.

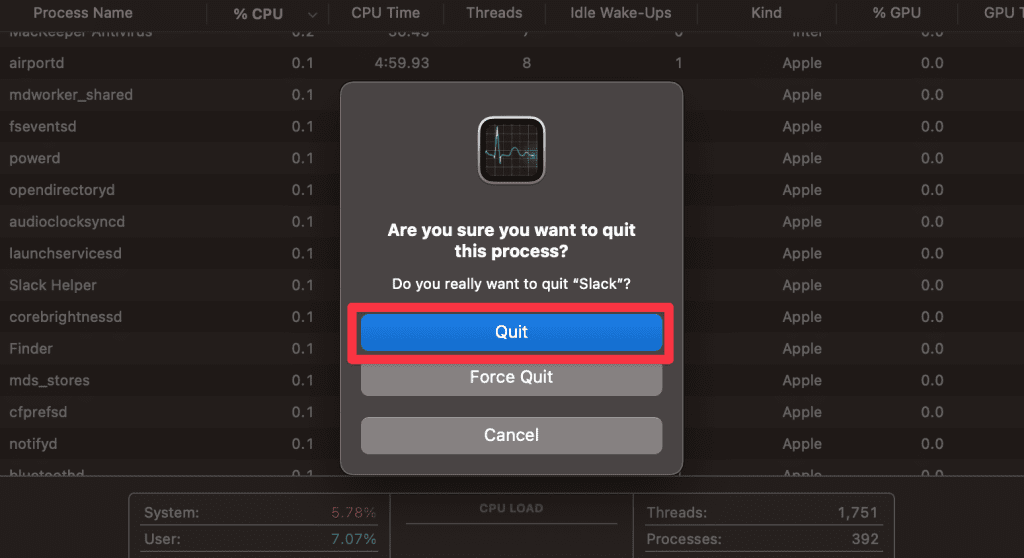
- A confirmation window will appear, asking if you want to Quit or Force Quit the process.
- Click the Quit button in the confirmation window to terminate the selected process.
3. Remove Bing Redirect From Applications
Sometimes, the Bing Redirect issue stems from an unwanted application installed on your Mac. Here’s how to identify and remove these culprits from your Applications folder:
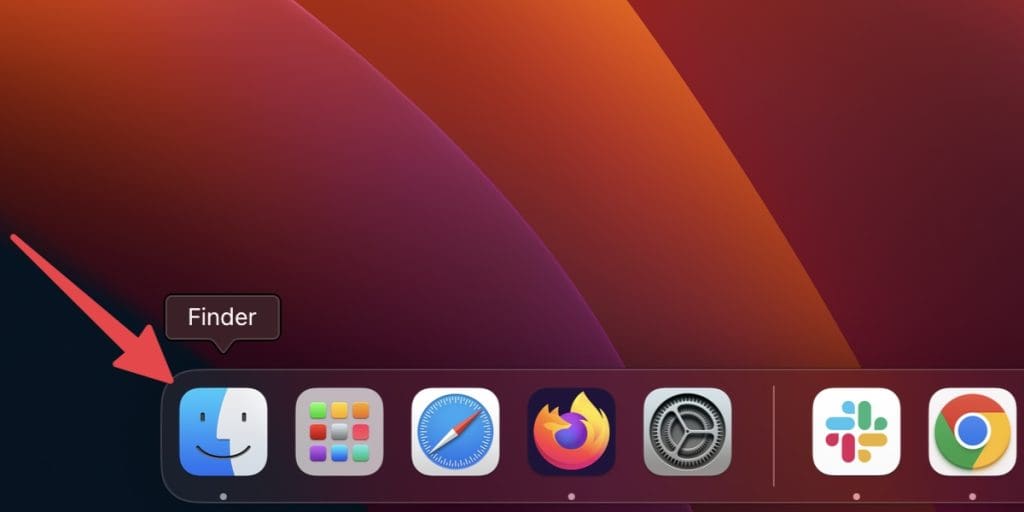
- Click the Finder icon in your Dock.
- Select Applications from the sidebar.

- Browse your applications and look for something like Uninstall Bing Redirect or Bing Redirect Uninstaller.
- Once you identify the unwanted application, click and drag it to the Bin in your Dock.
- To ensure the application is completely removed, right-click the Bin and select Empty Bin.

- After deleting the application, restart your Mac to ensure all associated processes are terminated.
4. Clear Browser Cache
Below, I’ve shared the steps to clear browser cache on your Mac for different browsers:
a. Safari
Here’s how to clear Safari cache on Mac:
- Open Safari, click Safari in the menu bar and select Settings.
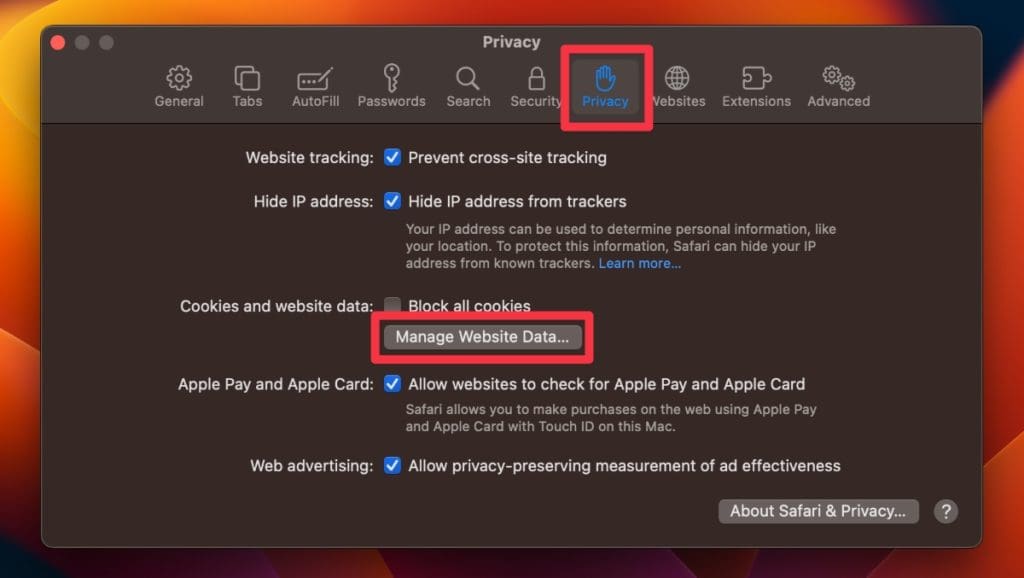
- Select the Privacy tab and click the Manage Website Data button.
- Click Remove All to clear all website cookies completely.
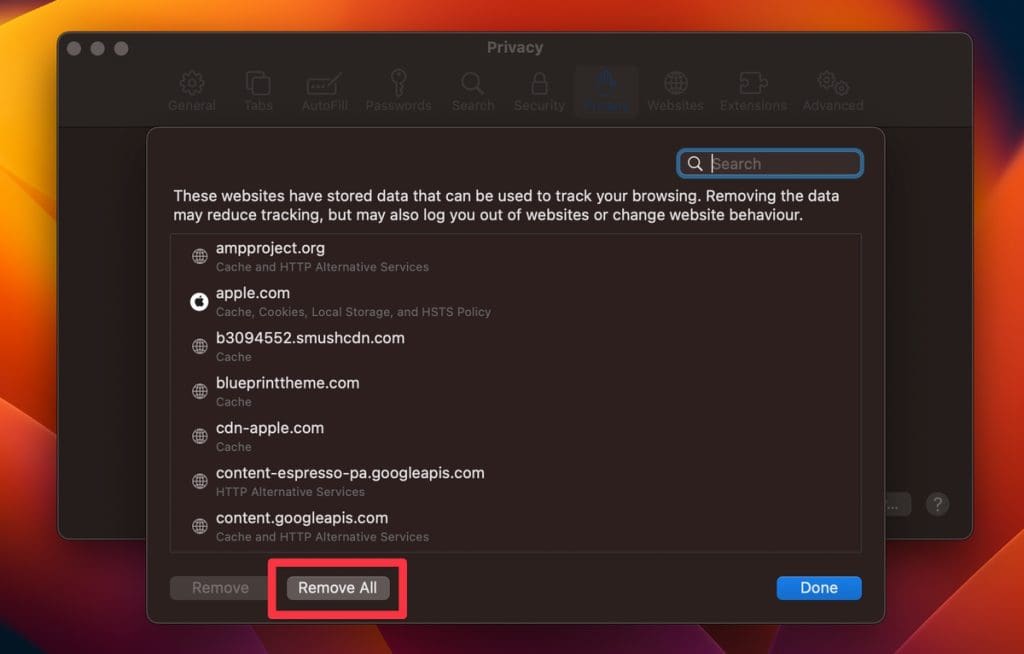
- Alternatively, you can select individual websites and tap Remove.
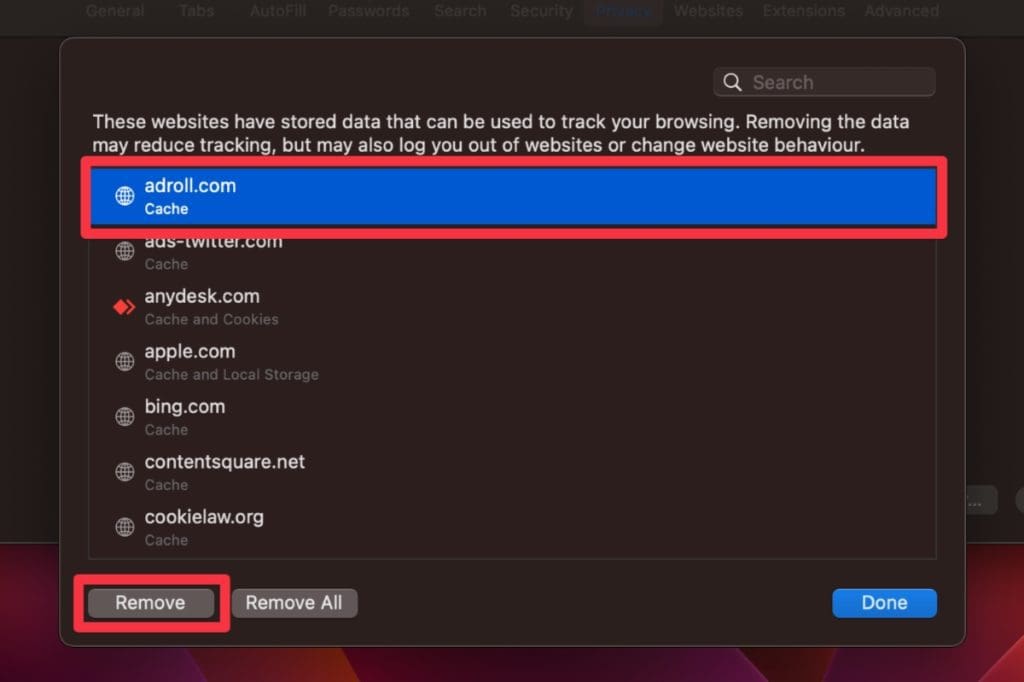
- Click Done when you have deleted all cookie files.
b. Google Chrome
Follow these steps to clear your cache on Google Chrome:
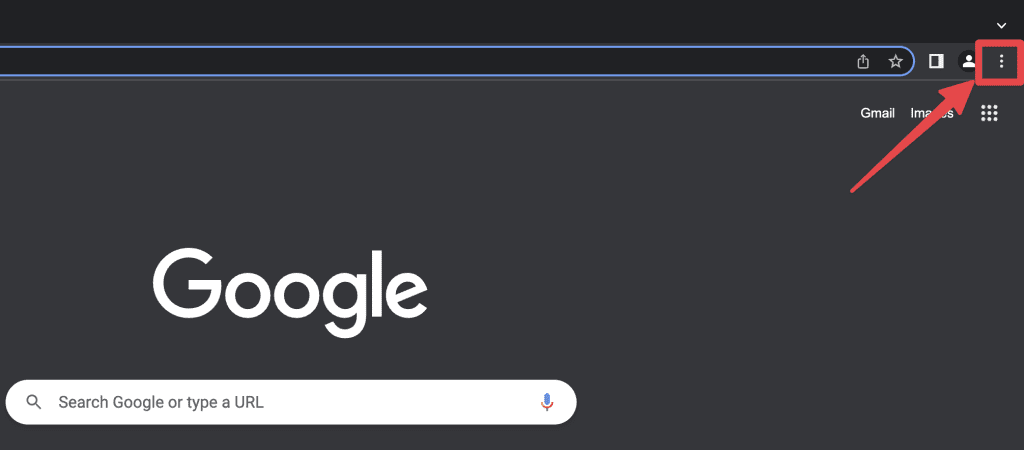
- Open Chrome and click the three dots at your display’s top right corner.
- Select More tools from the drop-down menu, followed by Clear browsing data…
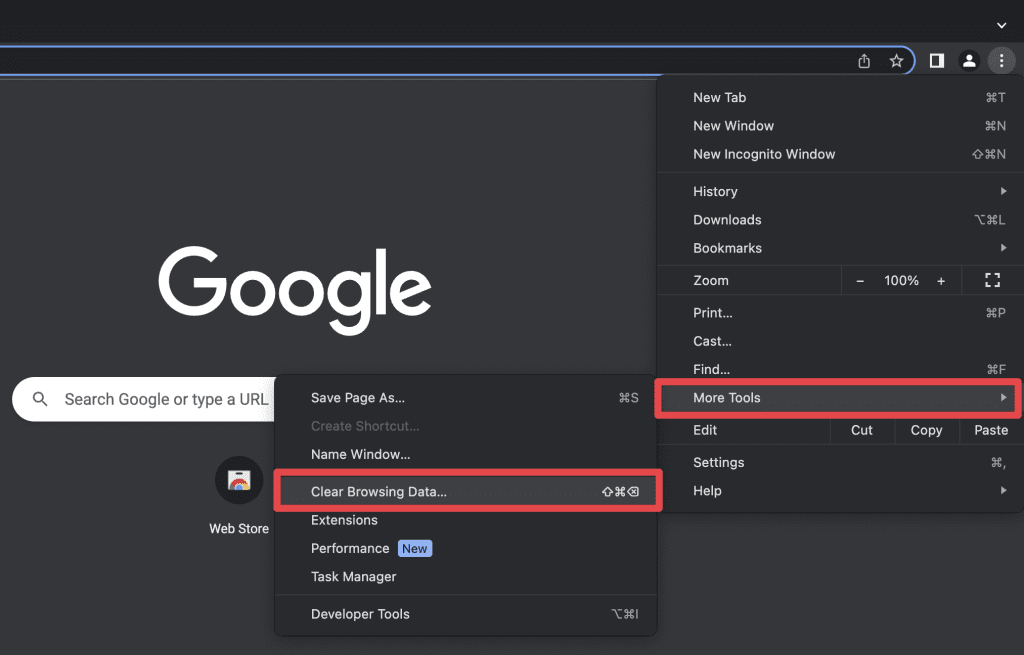
- A pop-up window will appear. Select the Cached images and files option. You can also clear other browsing data like browsing history, cookies, and more.
- Select the time range you want to clear the cache for (e.g., Last hour, Last 24 hours, All time).
- Now, click Clear data to remove these items from your browser.

c. Mozilla Firefox
Follow these steps to clear your browser cache on Firefox:
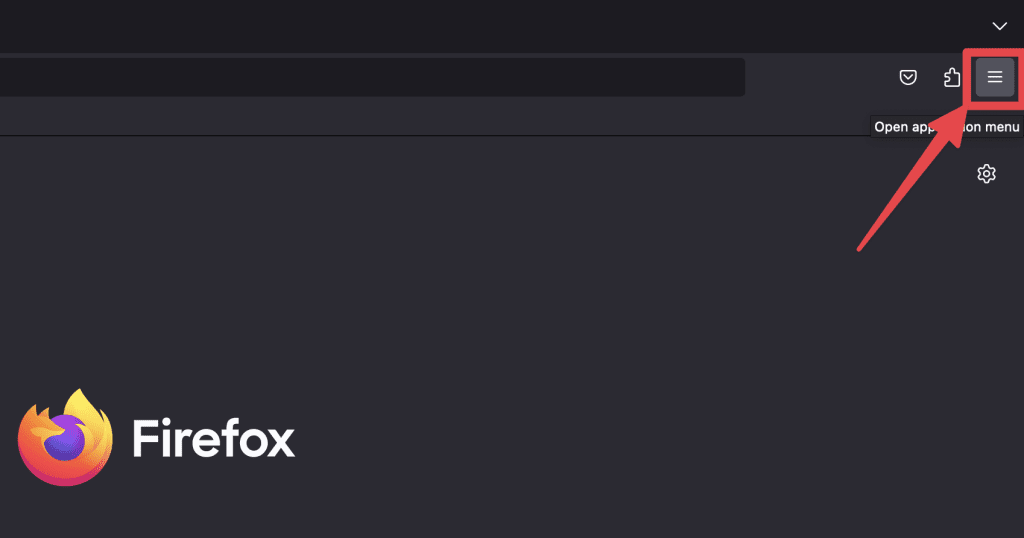
- Open Firefox and click the three horizontal lines in the top right corner.
- Select Settings from the drop-down menu.

- In the Settings window, click Privacy & Security in the left sidebar, scroll down the right pane, and click Clear Data… under Cookies and Site Data.
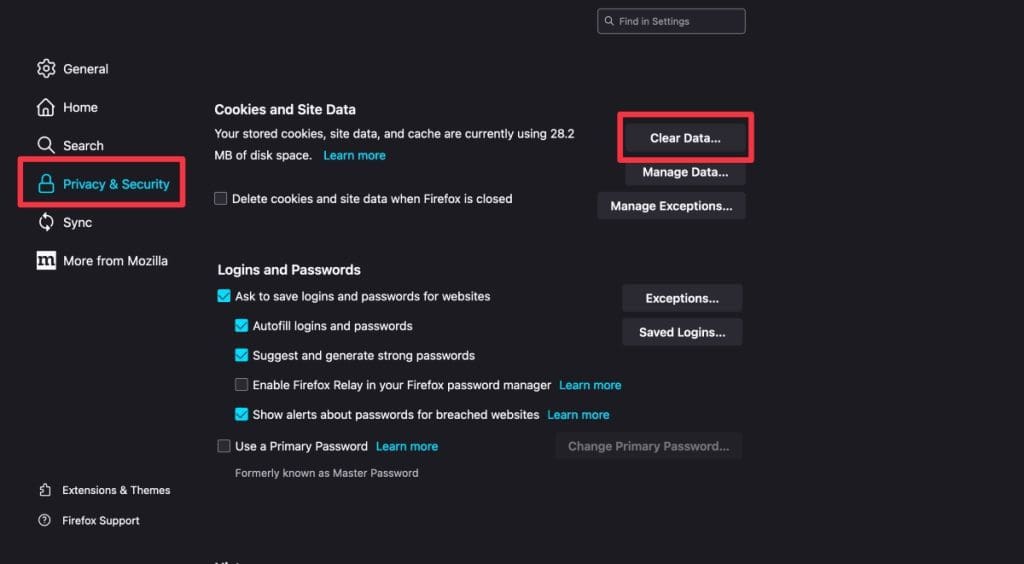
- Check the boxes next to Cookies and Site Data and Cached Web Content, and tap the Clear button.

- Your Firefox browser cache will now be cleared.
5. Remove Suspicious Login Items
By checking and removing suspicious login items, you can prevent these programs from running when you boot up your Mac. Follow these steps to delete unwanted login items on Mac via System Settings:
- Click the Apple icon in the top left corner of your screen and tap System Settings.
- Select General and click Login Items in the right menu.
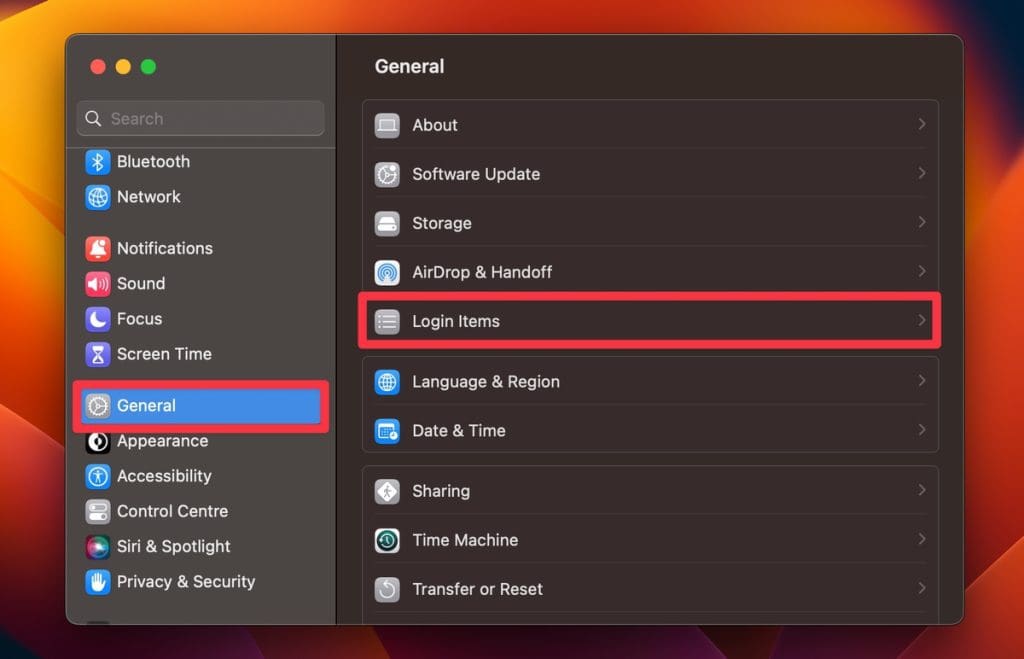
- Select the login item you want to remove and click the – button at the bottom of the list to remove the login item.
6. Remove Harmful Browser Extensions
Browser extensions can enhance your online experience, but some can be harmful or intrusive, especially if installed without your knowledge. Removing these extensions can help restore your browser’s performance and security.
Here’s my detailed guide on how to remove browser extensions on your Mac.
7. Remove Malicious Configuration Profiles
Configuration profiles can set specific preferences and restrictions or deploy applications on Mac systems. Here’s how to identify and delete these harmful profiles to remove Bing Redirect Virus from Mac:
- Click the Apple logo and select System Settings.
- If you see a Profiles tab, configuration profiles are installed on your Mac.
If you don’t see this option, it means there are no profiles on your Mac, and you can skip the remaining steps.
- Click the Profiles tab and review the list of configuration profiles in the right pane.
- Look for any profiles you don’t recognize or seem suspicious.
- Select the malicious or unfamiliar profile and click the – button at the bottom to remove it.
- A prompt will appear asking for confirmation. Click Remove to finalize the deletion.
8. Reset Your Browser to Factory Defaults
Here’s how to revert your browser to its original settings to remove Bing Redirect Virus from Mac:
a. On Safari
- Close all Safari tabs and windows and exit the browser.
- Open Finder by clicking its icon in the Dock.
- With Finder open, click Go in the menu bar and select Go to Folder.
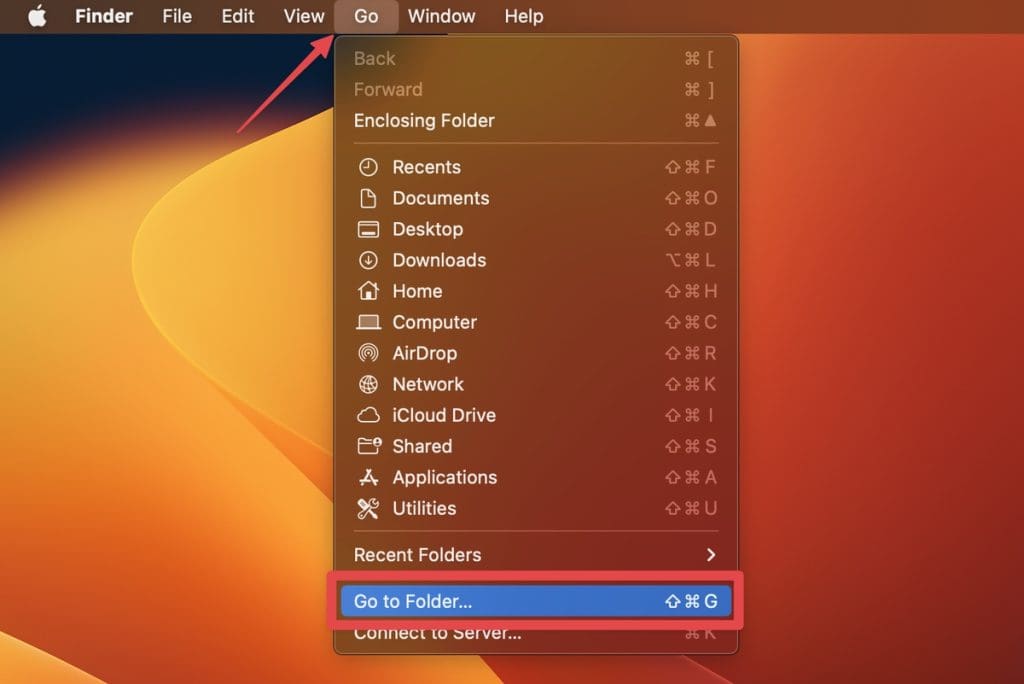
- Type the following directory in the box and press Enter:
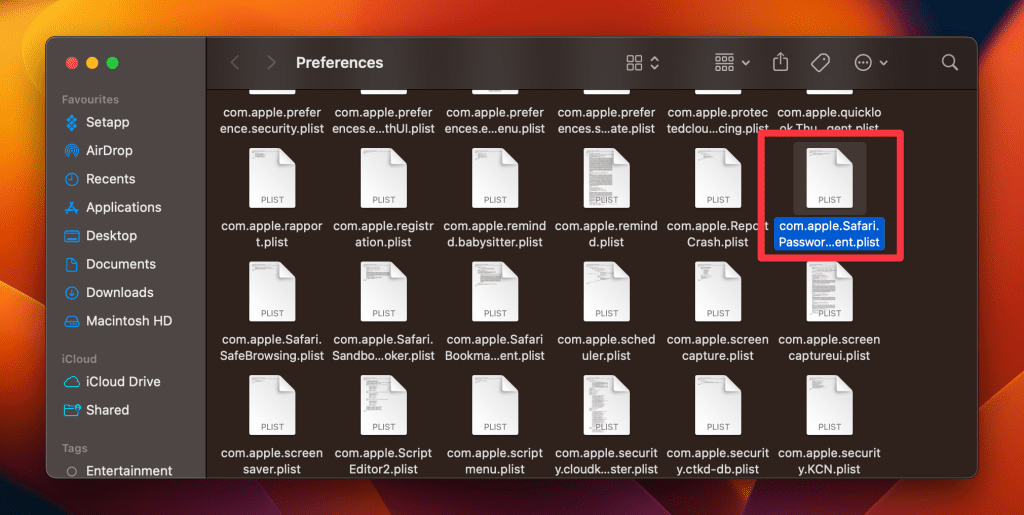
~/Library/Preferences/
- Find and drag the com.apple.Safari.plist file into the Bin.
- Next, bring the Go to Folder box again and type the following directory:
~/Library/Safari/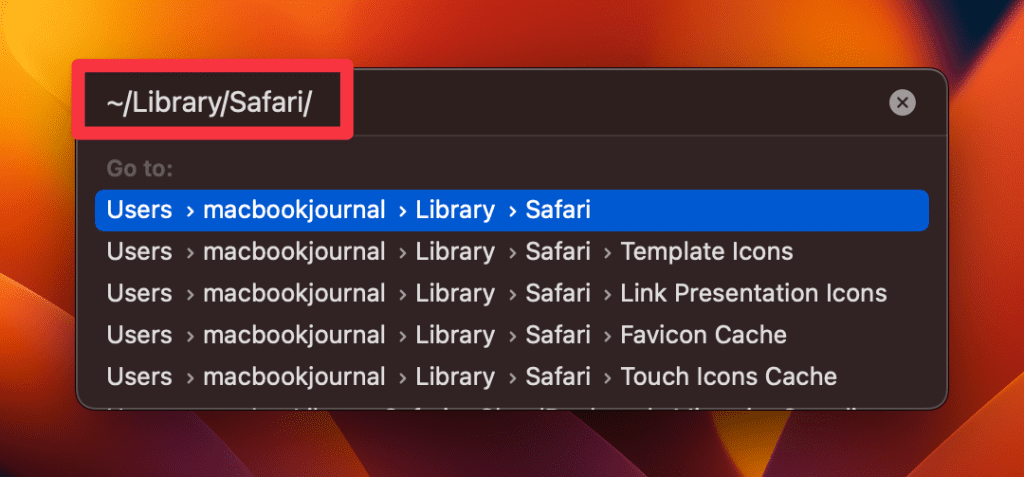
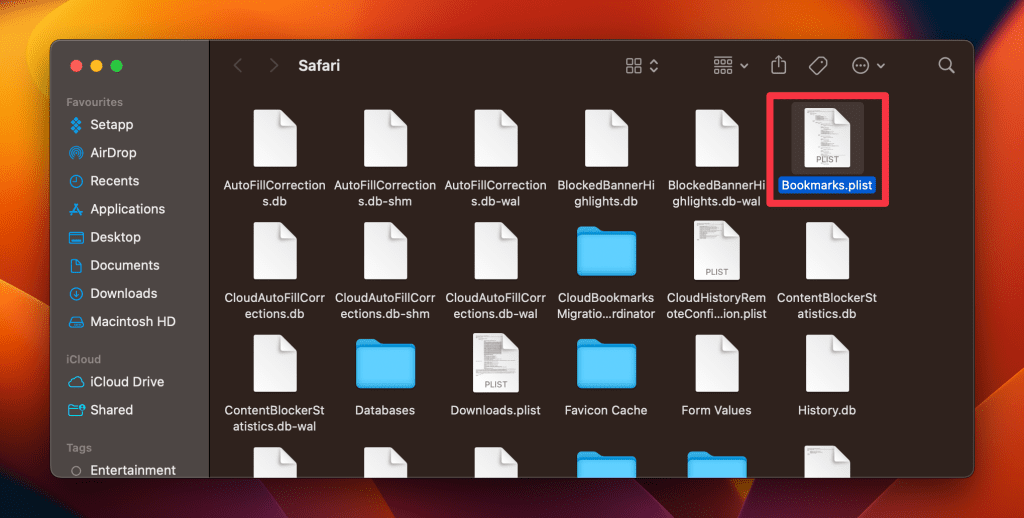
- Inside this folder, delete everything except the Bookmarks.plist file.
- Lastly, bring the Go to Folder box again and type the following directory:
~/Library/Containers/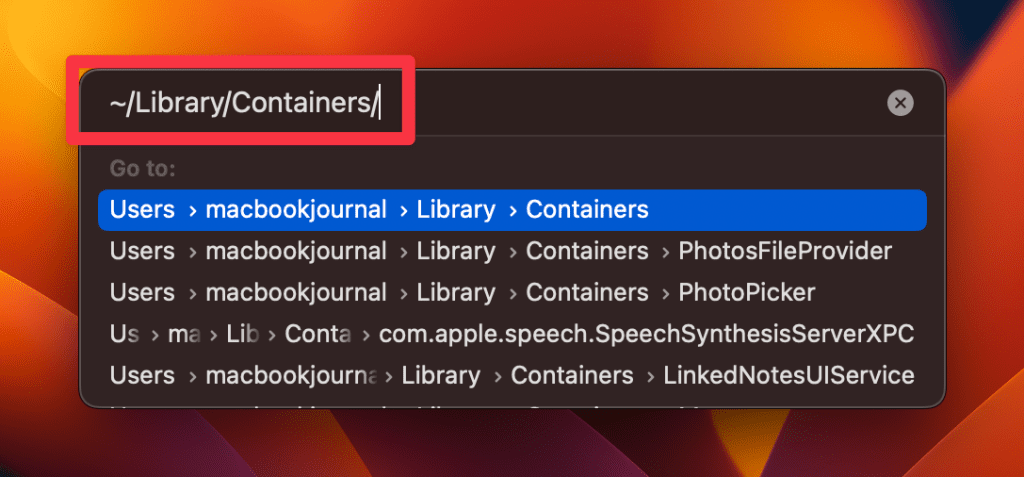
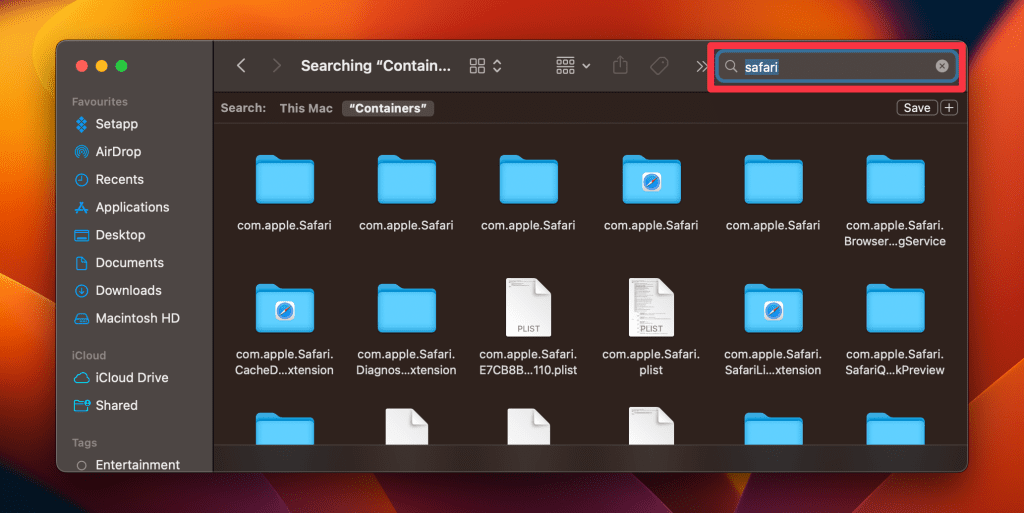
- Type Safari in the search box on the top-right of the window and delete all files and folders that appear in the result.
b. On Chrome
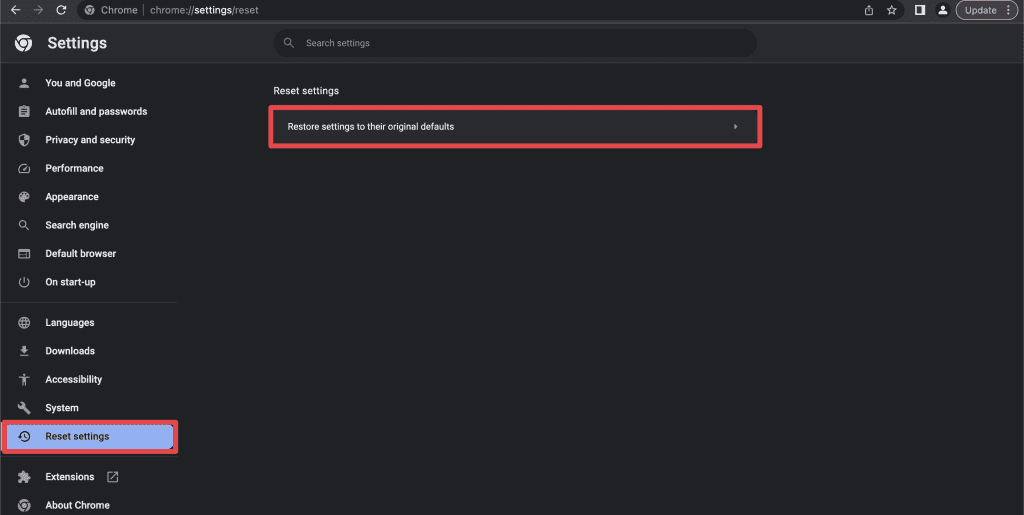
- In Chrome, click the three vertical dots and go to Settings.

- In the next window, click Reset settings in the left sidebar and select Restore settings to their original defaults.
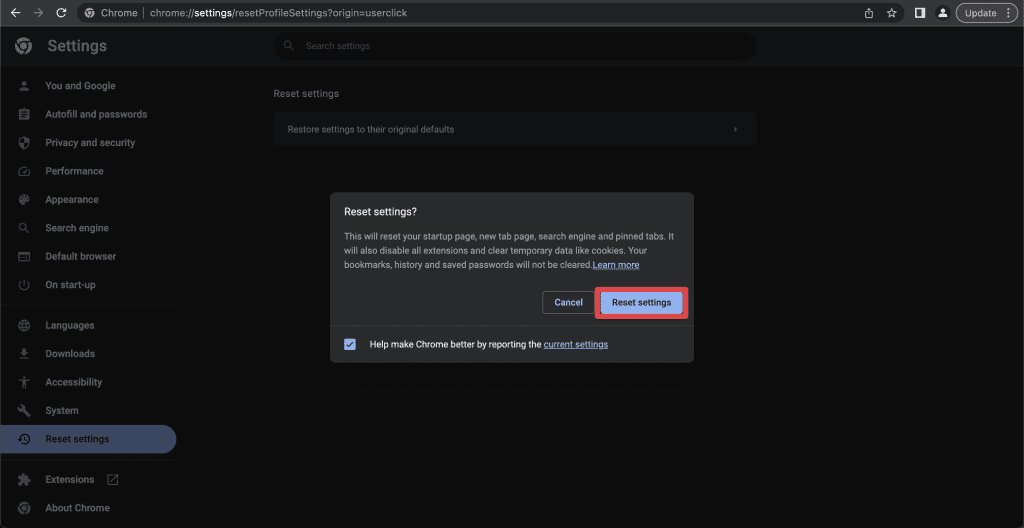
- A pop-up window will appear. Click Reset settings, and it will restore your Chrome settings to default.
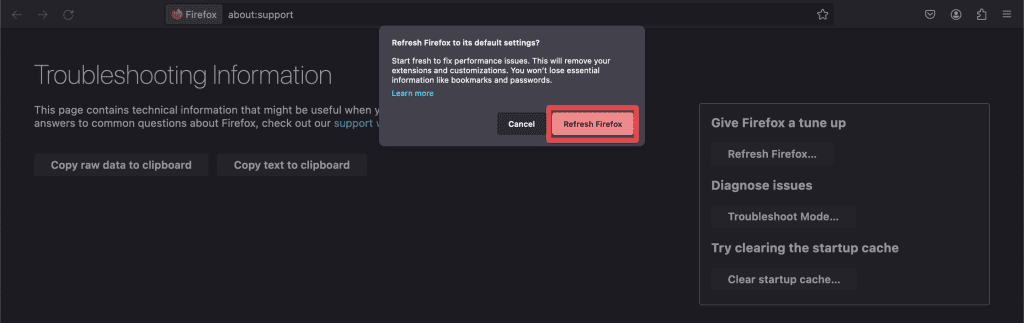
c. On Firefox
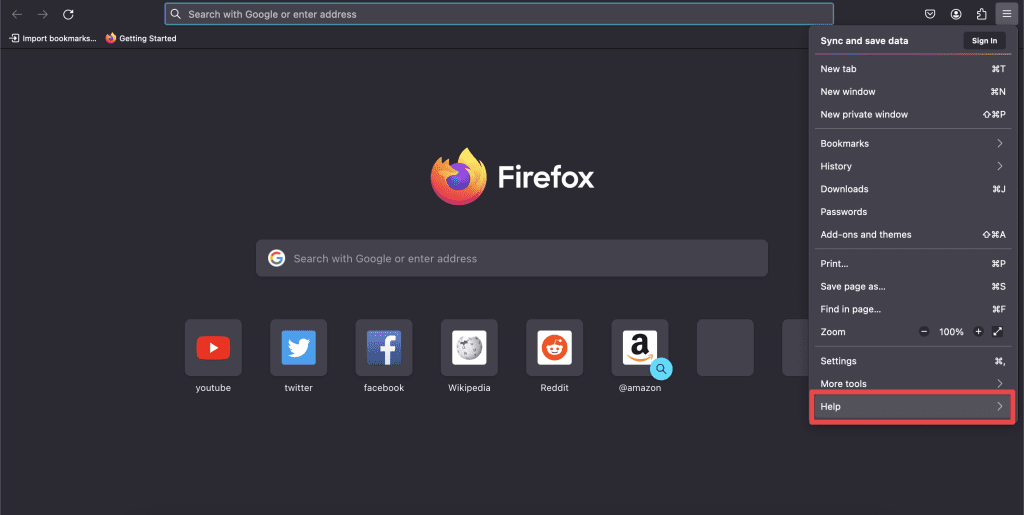
- In Firefox, click the three horizontal lines and go to Help.
- Select More troubleshooting information.
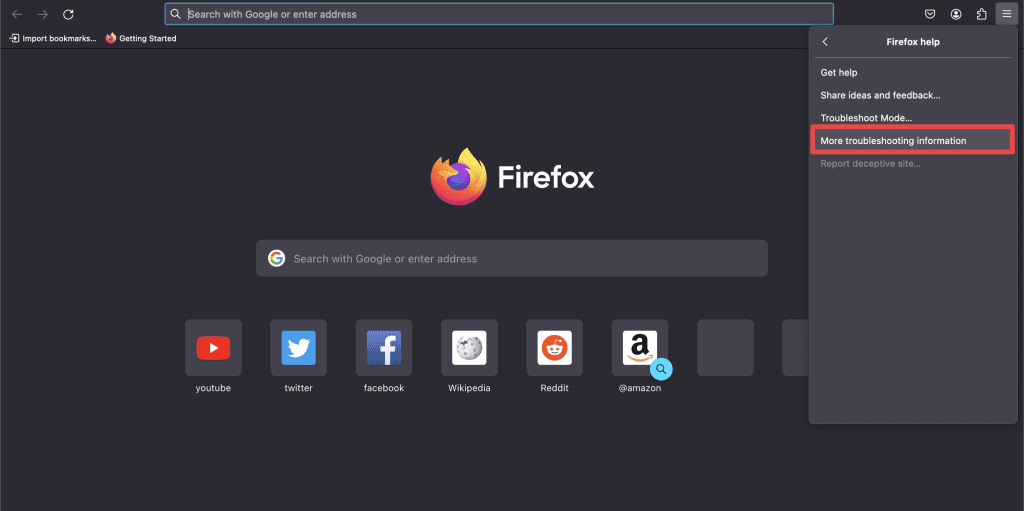
- On the right, you’ll see Refresh Firefox. Click it.

- When you click Refresh Firefox, a pop-up will appear at the top of the page. Click Refresh Firefox again.
Get Rid of Bing Redirect Viruses on Your Mac
The Bing Redirect Virus, while not a traditional virus, can be a pesky intruder disrupting the Mac user experience. With the knowledge and steps provided in this guide, you can effectively combat and prevent this issue, ensuring a smoother and safer browsing journey.
Here are some more tips to make your Mac more secure:
- Besides redirects, phishing scams, like the iforgot.apple.com phishing scam are quite common on Mac. You should adopt safe browsing practices to stay safe from such scams.
- You can remove the Windows Defender Security Warning on Mac by uninstalling suspicious extensions, running a virus scan, or resetting your browser settings.
- To remove keyloggers from your Mac, you can use the Activity Monitor, Privacy & Security settings, and Login Items.