TL;DR
To clean junk files on Mac:
- Free up space by deleting cache files.
- Delete large, unused files to free storage.
- Remove leftover files from uninstalled apps.
- Clear accumulated user log files.
- Delete system logs to free space.
- Remove unused language files from apps.
Tried and Tested ✅: The methods and steps mentioned in this article have been tried and tested firsthand by Ojash Yadav on his MacBook Pro M3 and rechecked for errors on Hashir’s MacBook Air M2.
Junk files can really slow down your Mac. In this post, I’ll share how you can quickly remove junk files and get your Mac running fast again.
What Are Junk Files on Mac?
Junk files are unnecessary files that take up space on your Mac. These include:
- 🗂️ Cache Files: Speed up app operations but can take up space over time.
- 📜 Log Files: Track system events and errors, often building up with many apps.
- ⏳ Temporary Files: Used for downloads or updates, but no longer needed afterward.
- 🌐 Unused Language Files: Accompany apps but are useless if you use only one language.
- 📑 Duplicate Files: Copies of existing files that consume significant space, especially with media.
Did You Know? Clearing your cache files regularly can free up several gigabytes of space. However, cache files help apps run faster, so don’t clear them too frequently unless your system is noticeably slow.
How to Clean Junk Files on Mac
Why You Can Trust MacBook Journal ![]() We always conduct first-hand research and verify every method or solution we present, ensuring you receive reliable and effective advice. Learn more about our process.
We always conduct first-hand research and verify every method or solution we present, ensuring you receive reliable and effective advice. Learn more about our process.
Follow these methods to clean junk files on Mac and improve its performance:
1. Clean Junk Files With MacKeeper
Before We Begin
A third-party app can quickly clean junk files and improve your Mac’s performance. MacKeeper offers an easy Safe Cleanup feature to do this in just a few clicks.
Here’s how to use Safe Cleanup to delete junk files and declutter your Mac:
- Download and install MacKeeper on your Mac.
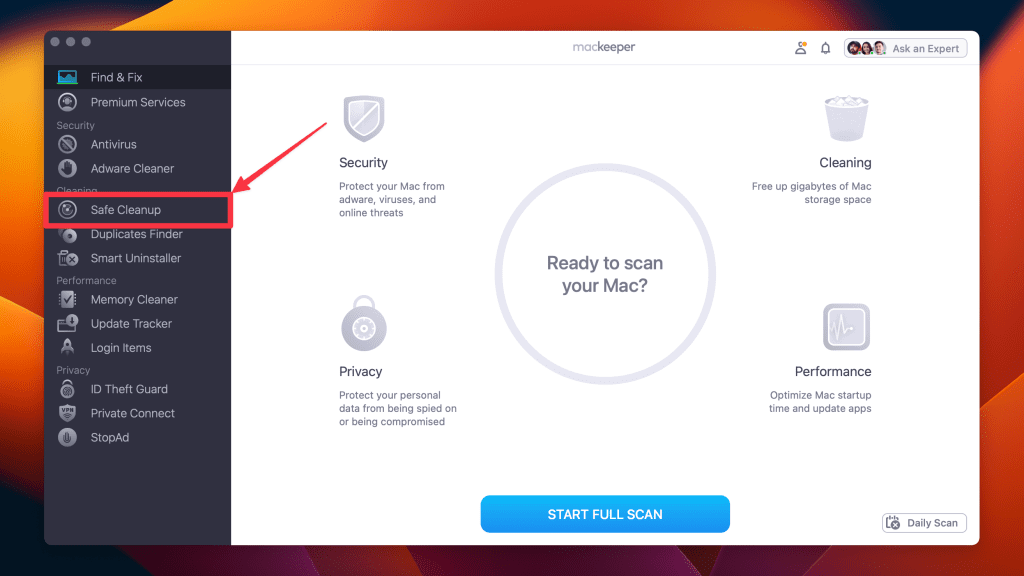
- Now launch MacKeeper and select Safe Cleanup in the left sidebar.
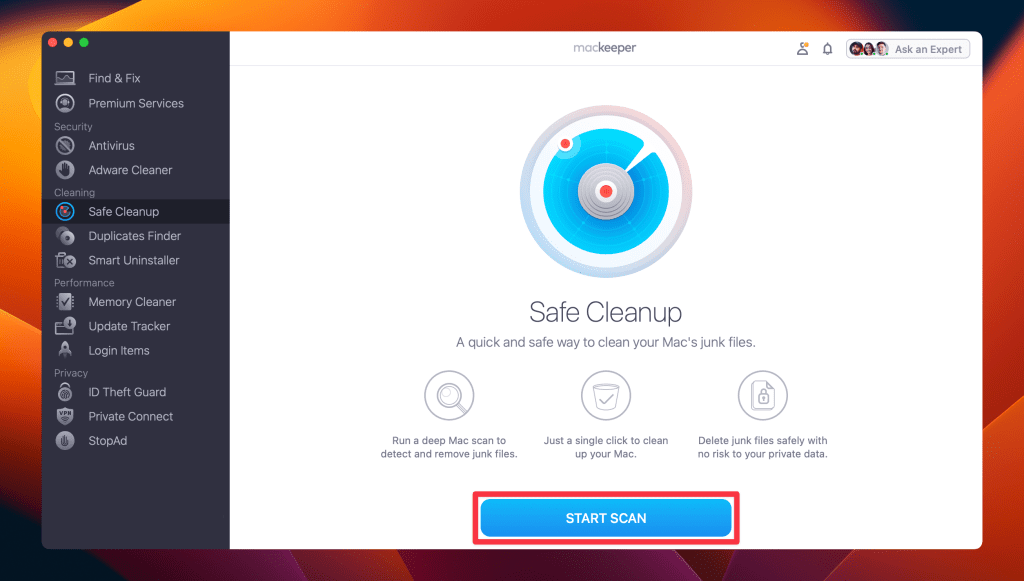
- Click Start Scan.
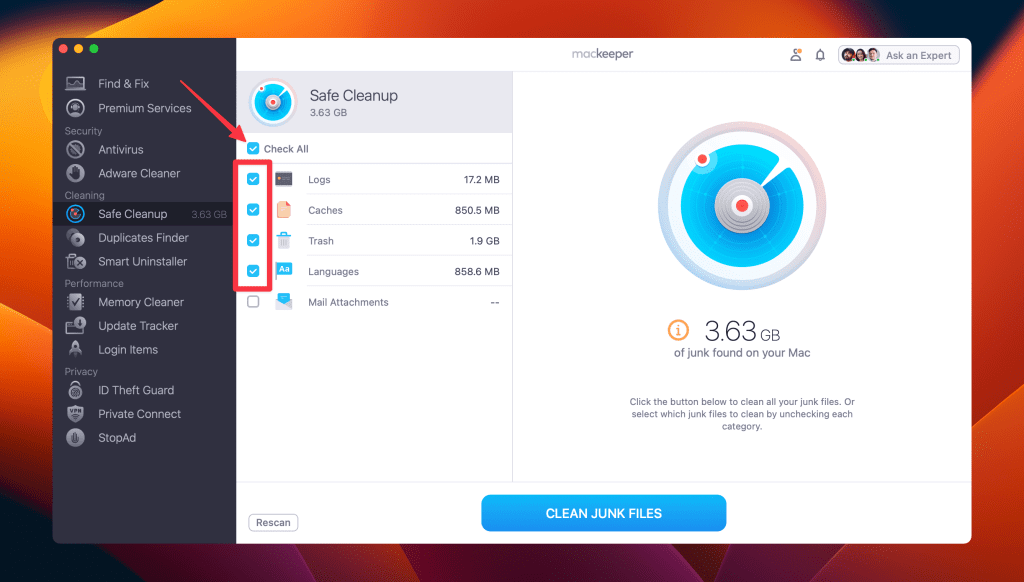
- From the list of detected items, choose which ones you want to remove from your Mac or click Check All.
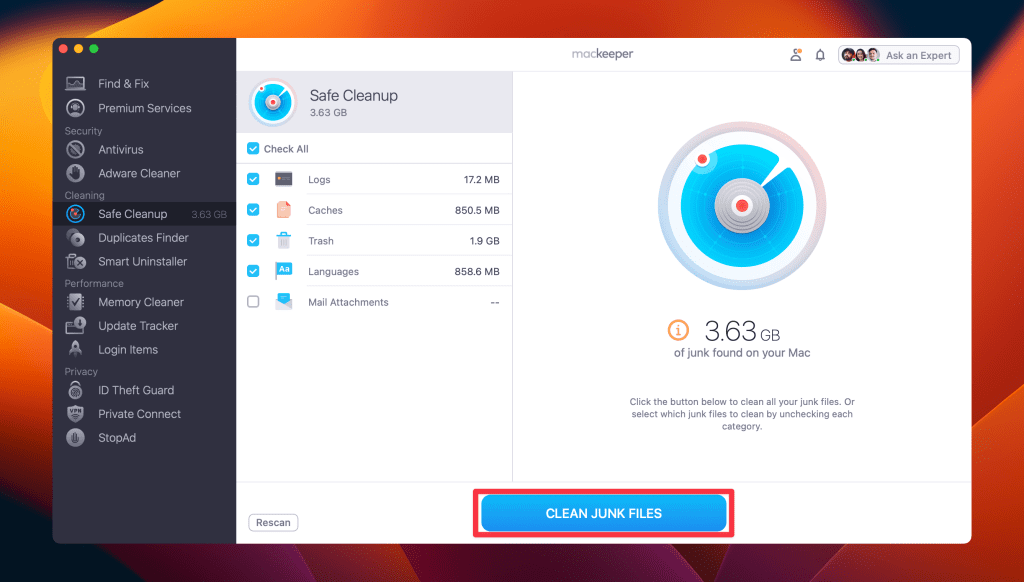
- Click Clean Junk Files.
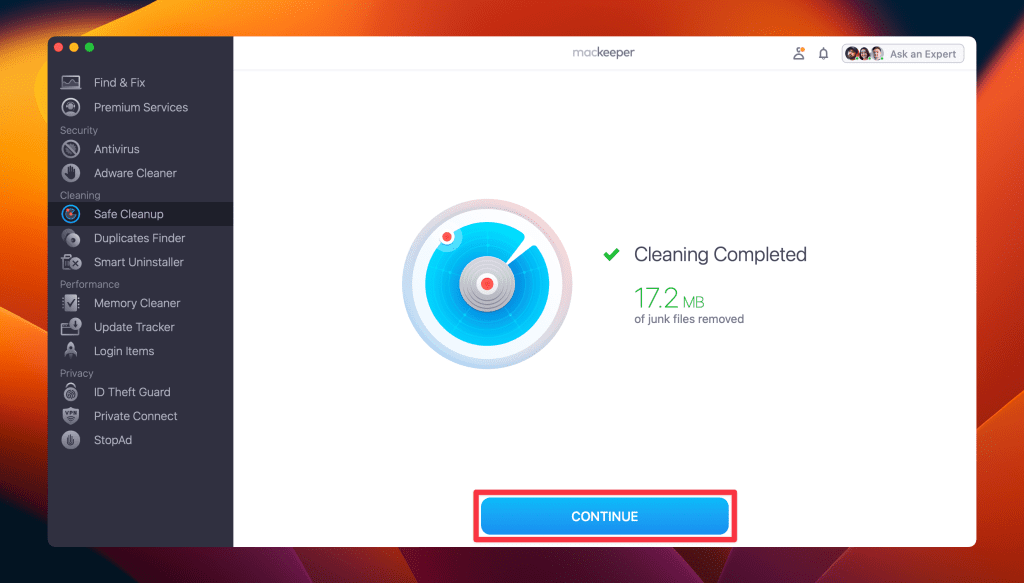
- Wait for MacKeeper to finish cleaning. When it’s done, you’ll get a Cleaning Completed notification. Click Rescan to scan your Mac again.
What Else Can MacKeeper Do?
Along with cleaning junk files, MacKeeper can help you clear cache files, remove unwanted apps, delete duplicate files, and free up storage automatically. You can read the full MacKeeper review to see all its tools in one place.
2. Clear Cache Files
Removing cache files can quickly free up significant space and improve system speed on your Mac. So, follow these steps to clear cache files on your Mac manually:
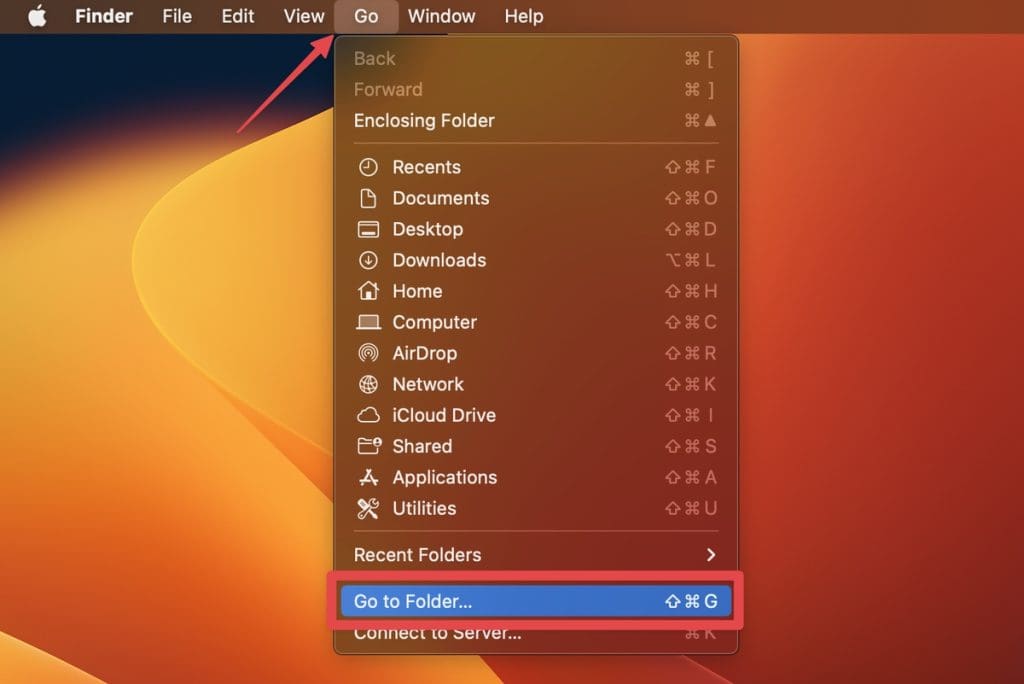
- Open Finder, click Go in the menu bar, and select Go to Folder.
- Type in the following path and press Enter:
~/Library/Caches
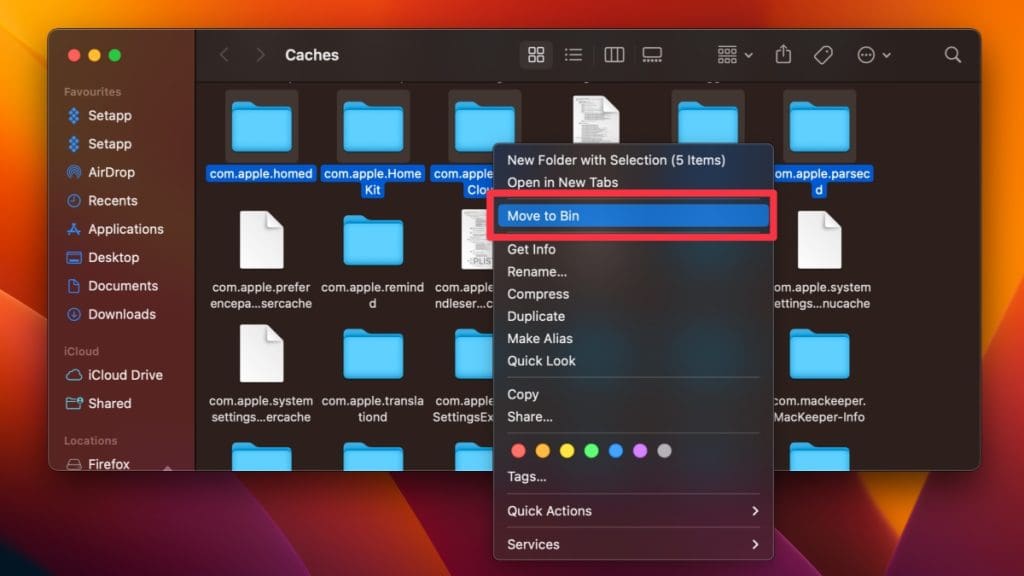
- Select the cache files you want to delete, or select all cache files. Right-click the selected files and select Move to Bin.
- Right-click the Bin icon in Dock and select Empty Bin to remove junk files from your Mac permanently.

3. Remove Large and Old Files
Deleting large or outdated files helps clear space and ensures efficient storage usage on your Mac. Here’s how to remove large and old files on your Mac:
If you have large-sized videos and photos that you want to keep, I suggest moving them to an external drive.
- Open Finder, click File in the menu bar, and select New Smart Folder.

- Click the + icon in the upper-right corner of the New Smart Folder window.
- Set the search parameters for files larger than a specific size.

- Select the files you want to delete and move them to the Bin by right-clicking and selecting Move to Bin.

- Empty the Bin to remove large files from your Mac permanently.
4. Delete App Leftovers
Uninstalling apps often leaves behind leftover files that take up space and clutter your system. To remove leftover files from your Mac, follow these steps:
- Open Finder, click Go in the menu bar, and select Go to Folder.
- Paste the following in the empty field one by one:
~/Library/~/Library/Application Support~/Library/Application Support/CrashReporter/~/Library/Caches~/Library/Internet Plug-Ins/~/Library/Preferences/~/Library/Saved Application State/- Delete the folders and files associated with apps you have uninstalled by sending them to the Bin.
5. Remove User Log Files
User logs track activities on your Mac and can accumulate, taking up unnecessary space. Here’s how to remove user log files on Mac:
Warning: Be careful when manually deleting files from the Library folder. Deleting the wrong files can affect your apps or system functionality. Always make sure you are removing unnecessary files.
- Open Finder and press Command ⌘ + Shift ⇧ + G.

- Type the following path in the field and press Enter:
~/Library/Logs
- You will see all the user log files. You can move the files manually to the Bin. If you want to declutter your Mac completely, select all the user log files and delete them by right-clicking and selecting Move to Bin.

- Next, right-click the Bin icon in Dock and select Empty Bin.
6. Delete System Log Files
System log files can pile up over time, and removing them helps free up space without affecting your Mac’s performance. So, let’s see how to delete system data on Mac:
- Open Finder, click Go in the menu bar, and select Go to Folder.
- Type in the following path and press Enter:
/var/log
- Select the system log files you want to delete or delete all system log files by dragging them to the Bin.
- Alternatively, you can right-click the selected files and select Move to Bin.

- Don’t forget to empty the Trash on your Mac by right-clicking the Bin icon in Dock and selecting Empty Bin.
7. Remove Localization Files
Removing unnecessary language files from apps can free up storage space if you only use one language. To remove these files, you can follow these steps:
- Open Finder and navigate to the Applications folder.

- Find the app you want to remove language files from. Right-click the app and select Show Package Contents.

- Open the Contents folder and navigate to the Resources folder inside.

- Subfolders that end with lproj are language files containing localization information for specific languages. Each folder is dedicated to a particular language. For instance, the folder en.lproj contains localization files for English.

- Select and delete the language folders you don’t need.

- Then, empty the Bin to completely remove localization files from your Mac.
Get Rid of All Junk Files on Your Mac
Regularly removing junk files can free up valuable space and help your Mac run faster. Here are some more tips to improve your Mac’s performance:
- Clear temp files on your Mac regularly and keep them from piling up.
- Clean your browser cache on Mac regularly to prevent it from accumulating over time.
- Remove login items on your Mac to free up memory and improve its speed.