TL;DR
To clear temp files on Mac:
- Use MacKeeper: Delete all temp files with a single click.
- Clear Browser Data: For Chrome, go to More Tools > Clear browsing data. For Safari, enable the Develop menu and click Empty Caches. In Firefox, open Settings > Privacy & Security > Clear Data.
- Remove App Caches: Go to ~/Library/Caches in Finder and delete cache folders for specific apps.
- Delete Logs: Go to ~/Library/Logs in Finder and remove log file contents, or use sudo rm -rf /private/var/log/* in Terminal.
- Reset Settings: Navigate to System Settings > General > Transfer or Reset, then select Erase All Content and Settings.
Tried and Tested ✅: The methods and steps mentioned in this article have been tried and tested firsthand by Ojash Yadav on his MacBook Pro M3 and rechecked for errors on Hashir’s MacBook Air M2.
Has your Mac been feeling sluggish lately? I ran into the same issue and found out that hidden temp files were the main culprit. Now I’ll show you how I cleared them out—quickly and easily—so you can get your Mac running smoothly again.
Before We Begin:
Junk and temporary files on your Mac occupy a lot of disk space. As a result, your Mac becomes slow and laggy. If you want to improve your Mac’s performance, consider downloading MacKeeper. You can use its Safe Cleanup feature to clear temp files on your system and prevent excessive lag and sluggish performance.
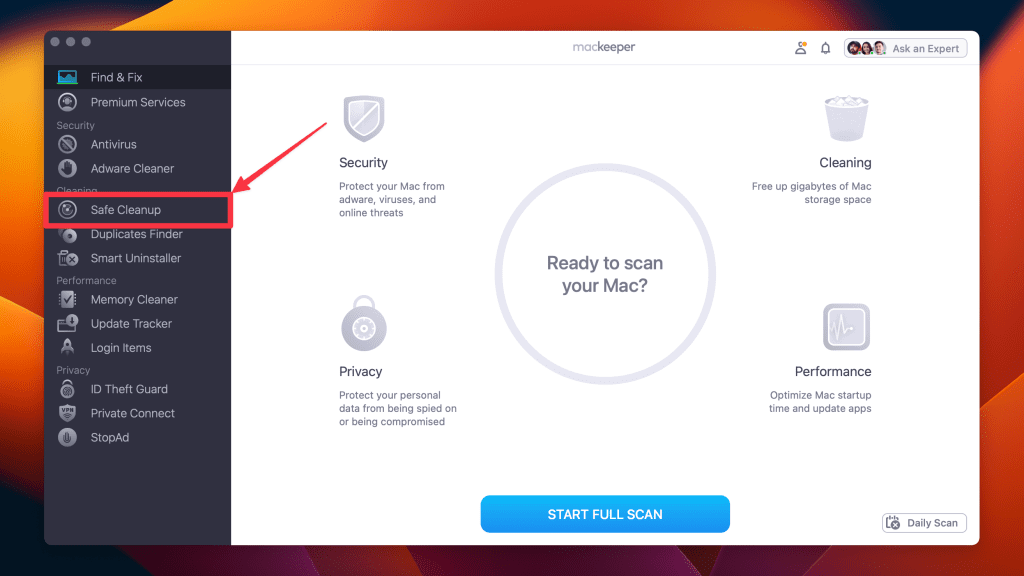
How to Clear All Temporary Files In A Single Click Using MacKeeper
While deleting cache files can free up space and resolve issues, it can also cause some applications to behave differently until new cache files are created. That’s why using a third-party app is a good choice to safely delete temporary files on Mac.
Here’s how you can quickly perform temp file cleaning on your Mac using the MacKeeper app:
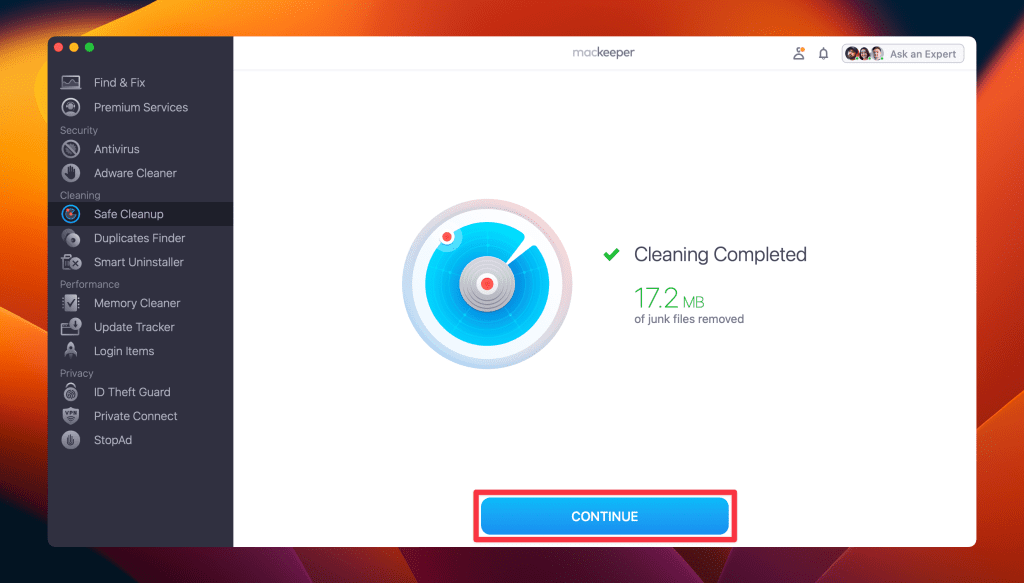
- Launch MacKeeper and go to the Safe Cleanup tab.

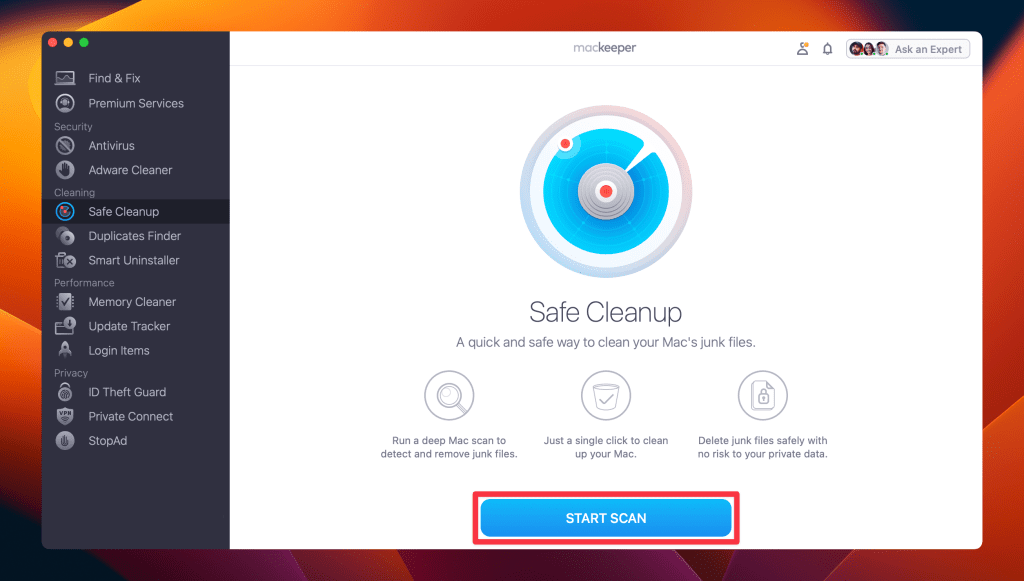
- Click Start Scan and wait for the results.

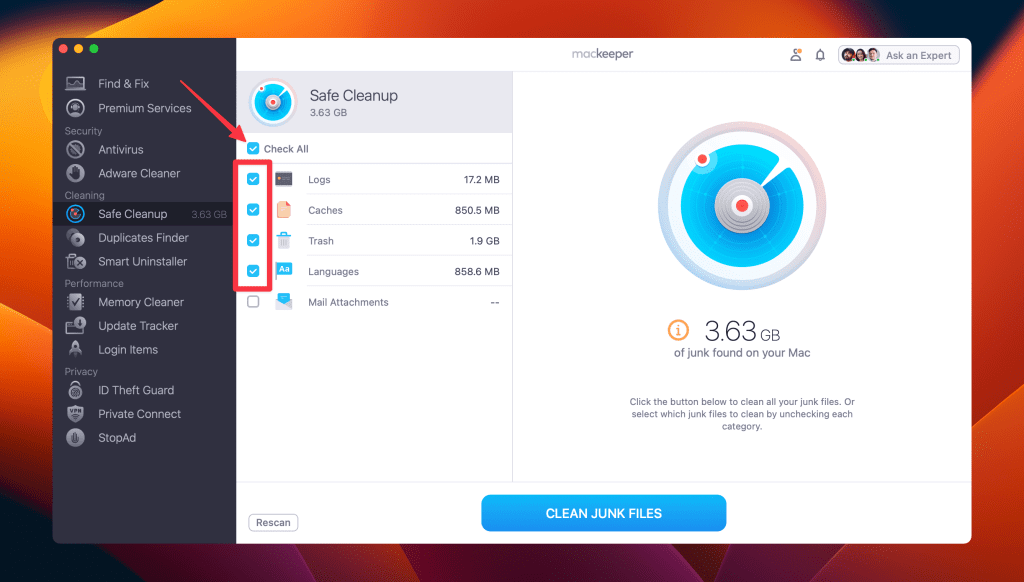
- Review the items you want to remove. Select them individually or click Check All.

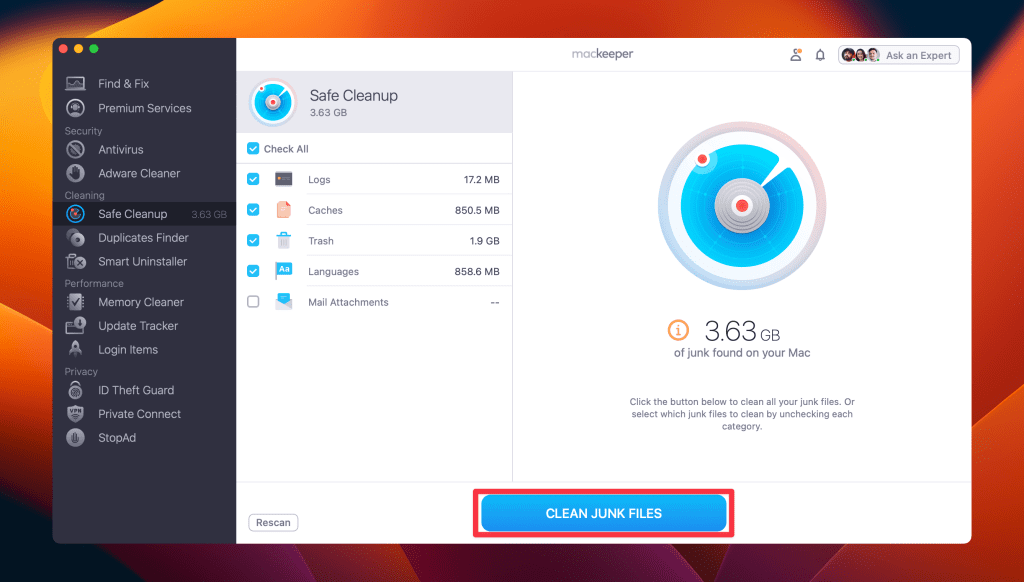
- Next, click Clean Junk Files.

- You’ll get a Cleaning Completed notification on your screen. Click Rescan to repeat the process.

What Are Temp Files on Mac?
Temp files (short for temporary files) are created whenever your Mac performs tasks or processes. They help apps, system services, and macOS store data for a short time, but can pile up if you don’t clear them regularly.
Some common temp files on Mac include the following:
| Type of Temp Files | Description |
|---|---|
| 🚀 Application Cache | Files saved by apps to speed up loading times and enhance the user experience. |
| 💾 System Cache | Files created by macOS and system processes to improve performance. |
| 🌐 Browser Cache | Images, cookies, and website files that help webpages load faster. |
| 📋 Log Files | Records of system and app events, errors, and diagnostics. |
| 📥 Downloaded Files | Files from apps, installers, or system updates that may no longer be needed. |
| 📧 Mail Attachments | Attachments your email client has downloaded and stored locally. |
| 📱 Old iOS Backup Files | Backups from previous iOS devices that may still be lurking on your Mac. |
| ⏬ Partial Downloads | Incomplete or interrupted downloads that can clutter your drive. |
How to Find the Main Temporary Folder on Your Mac
Here’s how to find the main temporary folder on your Mac:
- Launch Terminal via Spotlight search (Command ⌘ + Spacebar).

- In the Terminal, type the following command and press Enter:
open $TMPDIR
- This will open the main temporary folder on your Mac.

Besides the main temporary folder, your Mac contains additional temporary directories, which can be found at:
/tmp/private/var/tmp/private /var/at/tmp/private/var/spool/cups/tmpMoreover, caches, which are part of temporary files, are located in the Caches folder within the user directory. These caches store temporary files for your applications.
How to Clear Temp Files on Mac Automatically
Manually clearing temp files can free up space and speed up your Mac, but it can also disrupt some apps until they rebuild their caches. That’s where third-party apps shine. I recommend MacKeeper, because it clears temp files with one click—quickly, safely, and hassle-free.
Here’s how to clear temp files on Mac using mackeeper’s Safe Cleanup feature:
- Download and install MacKeeper on your Mac.
- Launch MacKeeper and go to the Safe Cleanup tab.
- Click Start Scan and wait for the results.
- Review the items you want to remove. Select them individually or click Check All.
- Next, click Clean Junk Files.
- This will clear temp files on Mac, and you’ll get a Cleaning Completed notification on your screen. Click Rescan to repeat the process.
How to Clear Temp Files on Mac Manually
Here is the step-by-step guide to clear temp files on Mac Manually:
1. Clear Web Cache Files
Web browsers store temporary data like images and cookies to speed up page loading. Over time, these files build up and can slow things down. Here is how to clear browser cache on Mac:
a. Clear Browser Cache Files on Chrome
To clear the cache on Google Chrome on Mac, you can follow these steps:
- Open Chrome and click the three vertical dots in the upper right-hand corner of the window.

- Select More Tools and then Clear browsing data from the drop-down menu.

- Select the time range you want to clear the cache in the Clear browsing data pop-up window. If you want to clear everything, select All time.

- Check the box next to Cached images and files and uncheck all other boxes unless you want to clear other types of browsing data.

- Click Clear data to clear the cache.

b. Clear Browser Cache Files on Safari
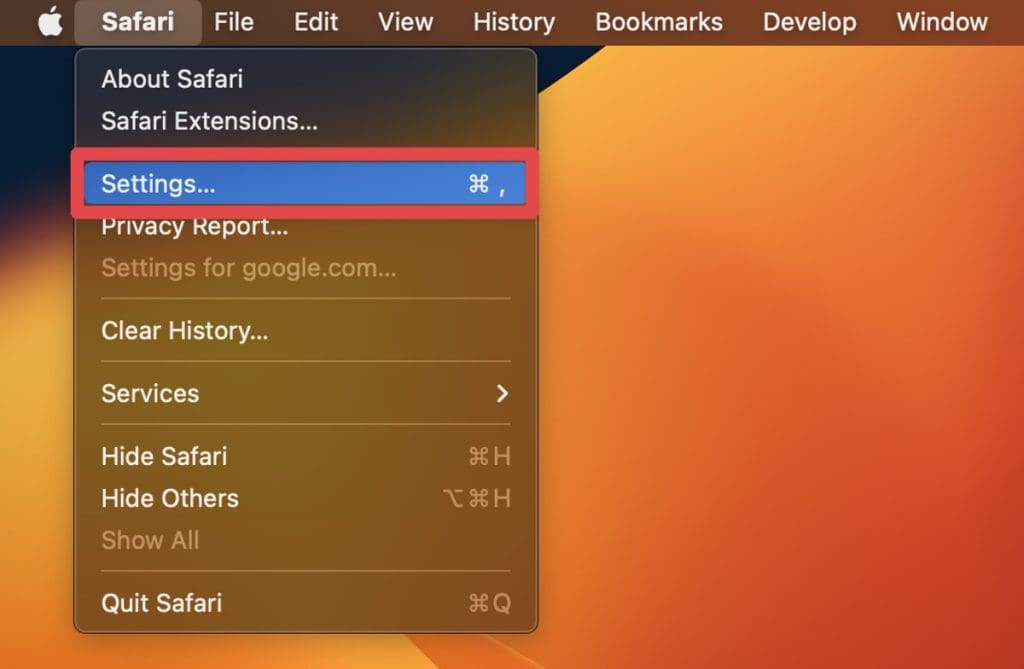
To clear Safari cache on Mac, follow these steps:
- Open Safari on your Mac, click Safari in the menu bar at the top, and select Settings from the drop-down menu.
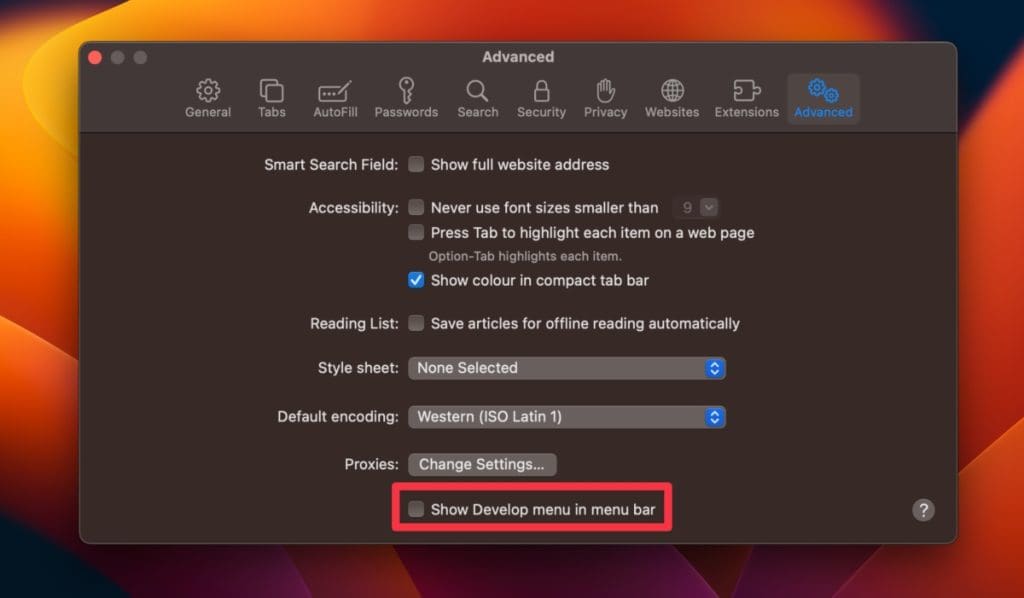
- In the Settings window, click the Advanced tab.

- At the bottom of the Advanced tab, check the box next to the Show Develop menu in menu bar.
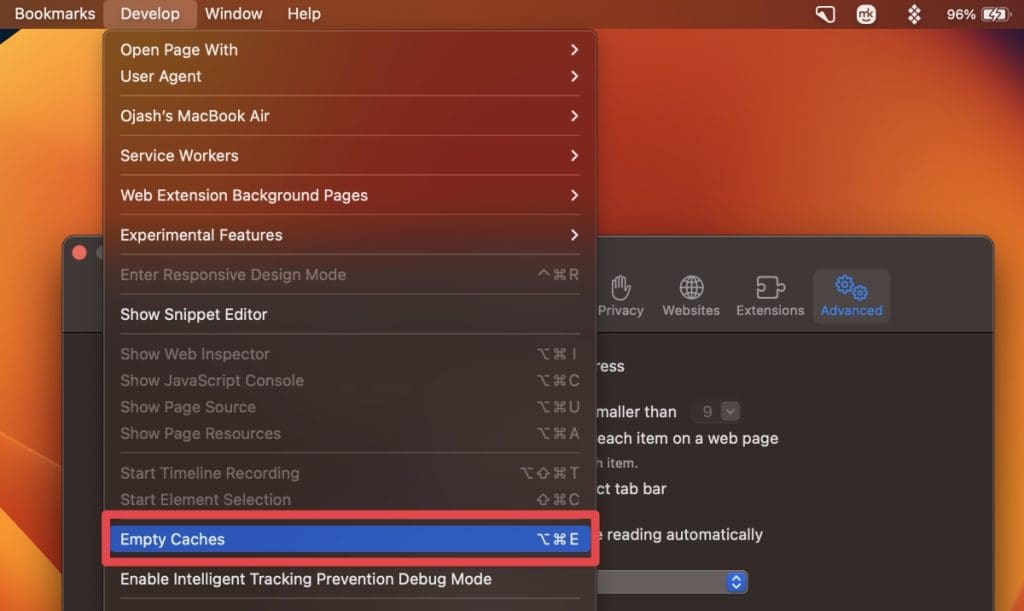
- You’ll see Develop in the menu bar. Click it and select Empty Caches from the drop-down menu.
c. Clear Browser Cache Files on Firefox
To clear the cache on Firefox on a Mac, follow these steps:
- Open the Firefox browser on your Mac and click the three horizontal lines (menu icon) in the top-right corner.
- Click Settings from the drop-down menu.
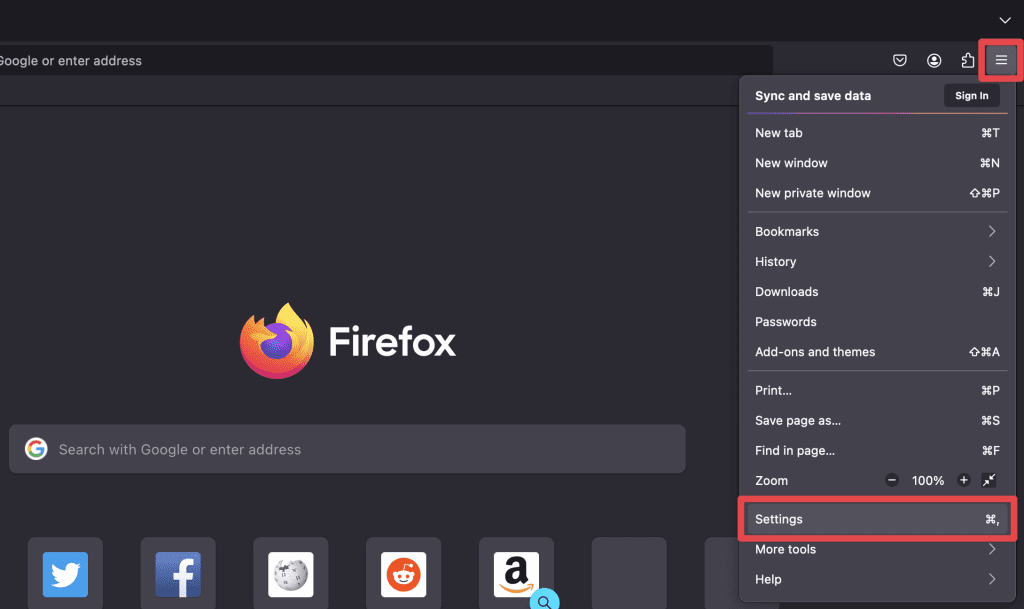
- In the left-hand menu, click Privacy & Security.

- Scroll to the Cookies and Site Data section and click the Clear Data button.

- In the pop-up window, check the box next to Cached Web Content. You can check the box next to Cookies and Site Data if you want to clear those as well. Then, click the Clear button to clear the cache.

2. Clear the App Cache Manually
Mac apps store temporary data to boost performance and load times. But if these files become cluttered, they can lead to freezing or crashing. To clear the app cache on a Mac, follow these steps:
Clearing the app cache may delete some of your settings or preferences. You may need to set them up again the next time you use the app.
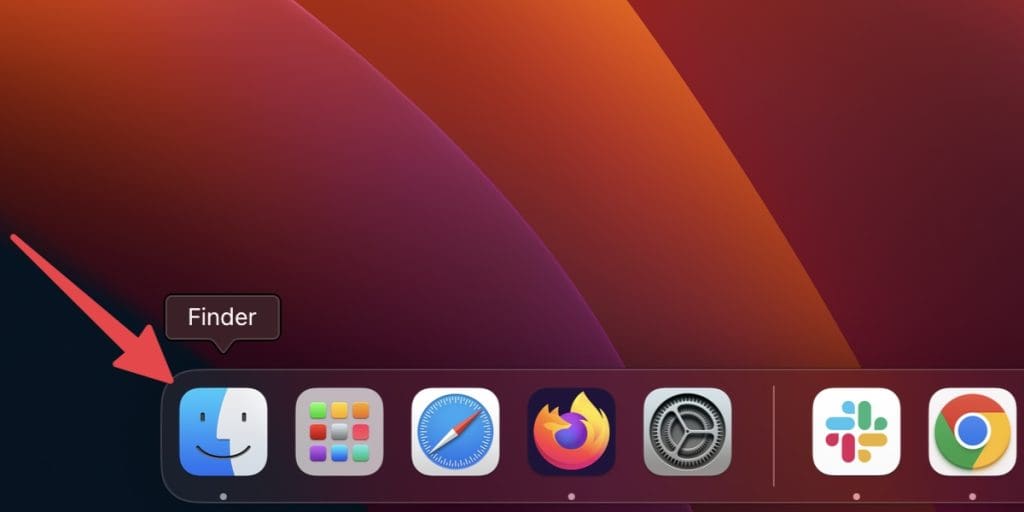
- Click the Finder icon in the Dock to open a Finder window.
- In the menu bar, click Go and then Go to Folder.
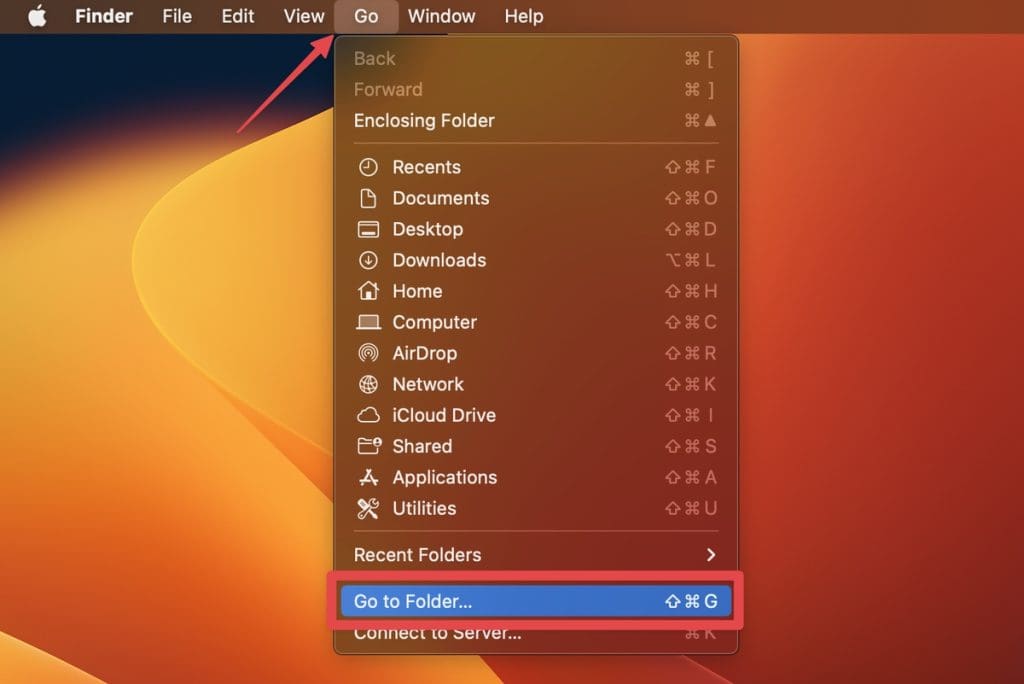
- In the Go to Folder window, type the following path:
~/Library/Caches/- Select the Caches folder from the options.

- Locate the folder for the application you want to clear the cache for. If you’re not sure which folder belongs to the app, look for folders with the same name as the app.
- Right-click the folder and select Move to Bin from the menu.

- Click Empty Bin to delete the folder permanently.

3. Remove System Log Files
System log files record important events on your Mac. If you don’t clear them regularly, they can hog space and reduce performance. There are two methods to do so:
a. Manually Deleting Log Files
You can manually delete log files by following these steps:
- Open Finder from your Dock.
- Click Go in the menu bar and select Go to Folder.
- Type the following path in the window and press Enter:
~/Library/Logs
- You’ll see a list of all your log files. To remove a file, delete the folder contents instead of dragging the folder to the Bin.

- Once you have moved the files to the Bin, right-click the Bin icon in your Dock and click Empty Bin to delete the log files permanently.
b. Using Terminal App
You can also use the Terminal app to remove system log files on your Mac. Follow the exact steps below:
Be cautious when using Terminal, as incorrect commands can cause issues with your system and always back up your data before using Terminal.
- Click the magnifying icon in the menu bar to open Spotlight search or press Command ⌘ + Spacebar.
- Type Terminal in the Spotlight search and press Enter.
- Now, enter this command and hit Enter:
sudo rm -rf /private/var/log/*
- Type your Mac’s password and let the command execute.

4. Reset System Settings
System settings can conflict with apps over time, causing slow performance or glitches. Resetting them can help, but it also erases all data—so back up first. To reset system settings on a Mac, follow these steps:
Erasing all content and settings will remove all data, settings, and user accounts from your Mac. So, I strongly suggest you back up your important Mac data before proceeding with this step.
- Click the Apple icon in the top-left corner of your screen and select System Settings.
- Click General in the left sidebar and select Transfer or Reset on the right.

- Click the Erase All Content and Settings button.

- Enter your MacBook password and click Unlock.

Keep Your Mac Free From Temp Files
Now that you know how to delete temp files in Mac, you may want to optimize your Mac further to improve its performance. Here are some steps to free up space on your Mac and enhance its speed:
- Monitor your Mac’s CPU, GPU, and RAM usage to keep everything in optimal condition.
- Clear the cache files on your Mac regularly to prevent junk from piling up and slowing down your system.
- Declutter your Mac regularly by deleting unwanted files, folders, apps, and photos.