TL;DR
To fix the frozen Mac cursor:
- Restart your Mac to fix cursor glitches.
- Force quit apps to stop freezes.
- Clean your trackpad or mouse to resolve hardware issues.
- Update macOS to fix cursor bugs.
Tried and Tested ✅: The methods and steps mentioned in this article have been tried and tested firsthand by Ojash Yadav on his MacBook Pro M3 and rechecked for errors on Hashir’s MacBook Air M2.
Stuck with a frozen Mac cursor? It’s annoying, but the fix is often easier than you think. In this post, you’ll learn a few quick methods to unfreeze your cursor and get back to work in no time.
Before We Begin
In most cases, the Mac cursor frozen issue is just be a minor hiccup. However, sometimes, malware could be the underlying cause, either by design or as an unintended consequence. In such cases, running an antivirus scan with MacKeeper could be helpful. It will remove any malware causing the trackpad to malfunction.
How to Fix the Frozen Mac Cursor
Why You Can Trust MacBook Journal ![]() We always conduct first-hand research and verify every method or solution we present, ensuring you receive reliable and effective advice. Learn more about our process.
We always conduct first-hand research and verify every method or solution we present, ensuring you receive reliable and effective advice. Learn more about our process.
Here is the step-by-step guide for the nine best methods to fix the frozen Mac cursor:
1. Disable Login Items
Some apps start up automatically when you log in, potentially leading to system conflicts, including cursor issues. Disabling unnecessary login items can reduce this risk. There are different ways to remove login items on Mac, but I suggest using a third-party app, like MacKeeper to do it for you.
Here’s how to remove login items on Mac using MacKeeper:
- Download MacKeeper and install it on your Mac.
- Open Login Items under Performance in MacKeeper.

- Click Start Scan.

- Select unnecessary items from the list and click Remove Selected Items.

- Tap the Remove button on the pop-up.

- It will remove your selected items from the system startup list. You can click Rescan to repeat the process.

Or, you can manually remove login items on Mac:
- Click the Apple icon in the top left corner of your screen and tap System Settings.
- Select General and click Login Items in the right menu.
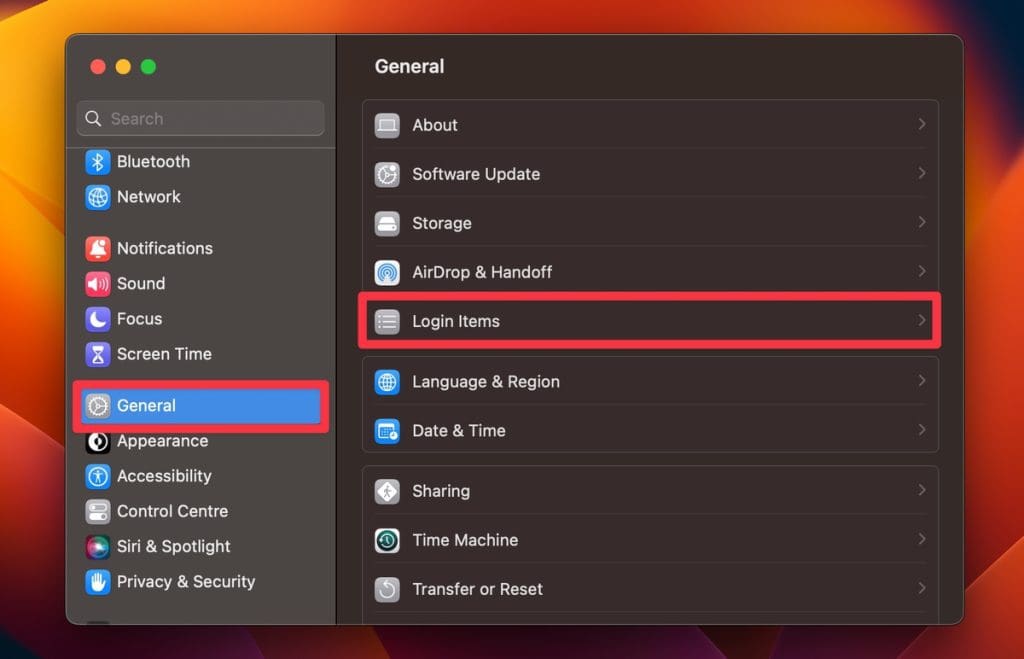
- Here, you’ll see the items that launch when you start up your Mac.
- Select the login item you want to remove and click the – button at the bottom of the list to remove the login item.
2. Update the Installed Apps
Outdated apps can conflict with newer macOS versions. Regularly updating apps can prevent such conflicts. I suggest using MacKeeper’s Update Tracker for this purpose to avoid the hassle of manually checking for updates.
Here’s how to use it:
- Download and install MacKeeper.
- Launch MacKeeper and click the Update Tracker tab in the left sidebar.
- Click Scan for Updates.
- MacKeeper will scan your Mac for outdated apps and display a list. To select an app, check the little box next to it or click Check All to select all apps.
- Click Update All.
- Wait for the updates to complete. This can take a while, depending on the number and size of updates.

- You’ll get an Update Completed notification. Click Rescan if you want to update more apps.
If you don’t have MacKeeper, you can update apps on your Mac manually. Follow these steps:
- Click the Apple menu in the top left corner of the screen and select App Store.
- Click the Updates tab in the App Store window.
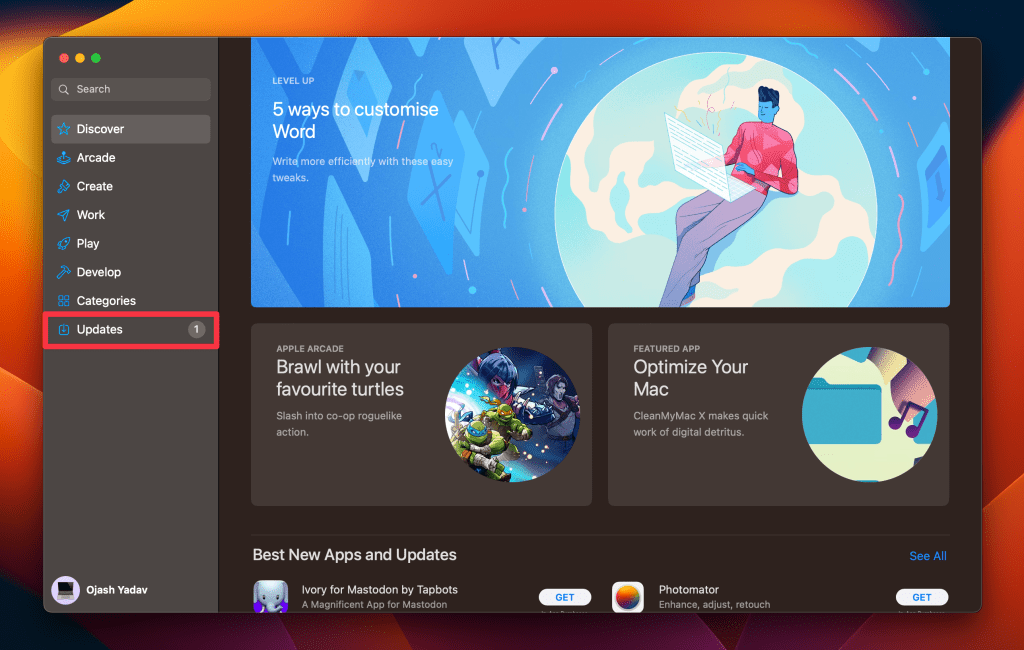
- You will see a list of apps with available updates.
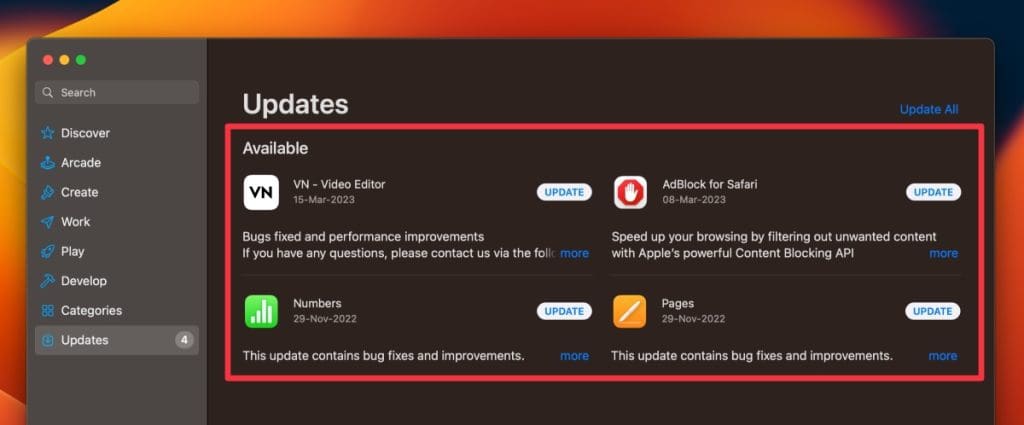
- Click the Update button next to each app that has an update available.

3. Free Up Disk Storage Space
Freeing up disk space improves system performance and prevents cursor issues caused by low storage. Here are some tips to help you free up disk storage space on a Mac:
- Empty Trash: Right-click the Trash Bin and select Empty Bin.
- Delete Unnecessary Files: Remove large or unused files from Documents, Downloads, and Desktop.
- Uninstall Unused Apps: Drag unused apps to the Trash and empty it.
- Use External Storage: Move large files, like videos, to an external drive.
- Remove Duplicate Files: There are apps that can help identify and remove duplicate files on your Mac, such as MacKeeper. Follow these steps to delete duplicate files on your Mac using MacKeeper:
- Download and install MacKeeper on your Mac.
- Open MacKeeper on your Mac and click Duplicates Finder in the left sidebar.

- Click Start Scan.

- Select a folder in the left menu to review duplicate files before deletion.

- Alternatively, you can click Check All and tap the Remove Selected button to remove all duplicate files at once.

- Tap the Remove button on the pop-up to confirm the deletion.

- This will remove the selected files, and you’ll get a Removal Completed message. Click Finish to end the process.

Clearing cache files and temporary files can also help. Cache and temporary files can accumulate over time and take up disk space. Use a tool like MacKeeper to help safely clear cache on your Mac. Here’s how:
- Download and install MacKeeper on your Mac.
- Once done, open MacKeeper and select Safe Cleanup in the left sidebar.

- Click Start Scan.

- Select files from the scan results to remove unnecessary cache items from your system. You can also click the Check All checkbox.

- Click Clean Junk Files.

- You will receive confirmation that the cleaning process has been completed successfully. Click Rescan to scan your Mac again.

Here is my detailed guide on how to free up disk storage space on Mac.
4. Run a Virus Scan
Malware or viruses can degrade system performance. Regularly scanning and removing them is crucial for optimal Mac health. While Mac has built-in antivirus features, its best to use a third-party software, like MacKeeper to keep your Mac protected 24/7.
Here’s how to run a virus scan on your Mac using MacKeeper:
- Download and install MacKeeper.
- Launch MacKeeper and navigate to the Antivirus tab in the left sidebar.

- Initiate an instant virus scan by clicking the Start Scan button.

- If any viruses are detected during the scan, click the Fix Items button to resolve the issues.
- If your system is threat-free, you’ll see a No threats found message. You can tap the Restart button to run the scan again.

- Enable real-time antivirus protection to safeguard your Mac from future threats by clicking the Enable button.

Once you have configured your security settings, MacKeeper will continue to operate in the background, diligently scanning for threats and actively blocking any malicious activity.
What Else Can MacKeeper Do?
Besides getting rid of duplicate file, deleting cache, running a virus scan, and removing login items, MacKeeper can help delete unwanted apps, optimize your Mac’s storage, and block websites on your Mac. Learn more about its features in my detailed Mackeeper review.
5. Restart the Mac
Restarting your Mac can fix minor system glitches that cause the cursor to freeze. Here’s how to force restart your Mac to fix a frozen cursor:
- Press and hold the power button (or the Touch ID button) until the screen goes blank.

- Release the button.
- Wait a few seconds, then press the Touch ID button again to restart your Mac.
6. Force Quit the Problematic App
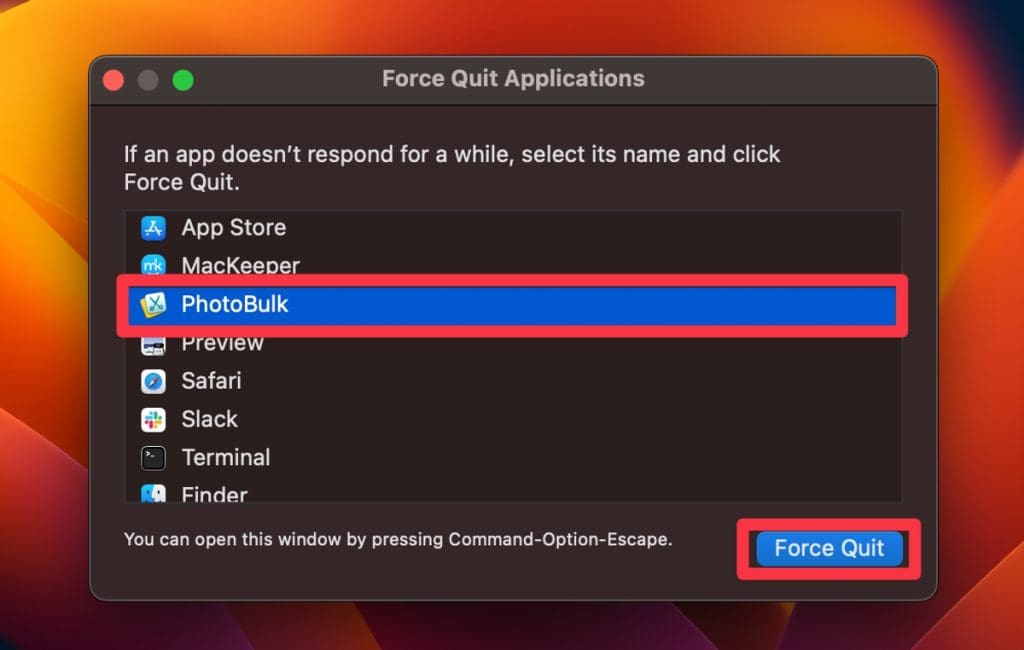
Force quitting an unresponsive app can resolve cursor freezes caused by app-related issues. Here’s how to close an app on Mac:
- Press Command ⌘ + Option ⌥ + Escape to open the Force Quit window.

- Select the unresponsive app from the list and click Force Quit.
7. Check and Clean Your Trackpad or Mouse
Ensure your mouse or trackpad is clean and working properly to avoid hardware-related cursor issues:
- Check Your Mouse: If using a mouse, make sure it’s properly connected. For wireless mice, check the battery and try it on another device to rule out hardware issues.
- Check the Trackpad: Ensure nothing is pressing on the trackpad and that your MacBook is on a flat surface.
- Clean the Trackpad: Turn off your MacBook and wipe the trackpad with a lint-free cloth. If needed, use a slightly damp cloth to remove any stubborn spots.
- Use an External Mouse: If the trackpad isn’t responding, try using an external mouse to see if it works.
8. Update macOS
Updating macOS can fix bugs that may be causing cursor freezes. Follow these steps to update macOS on your Mac:
- Before updating your macOS, back up your Mac’s data to avoid losing important files and documents.
- Click the Apple icon in the top left corner of your screen and tap System Settings.
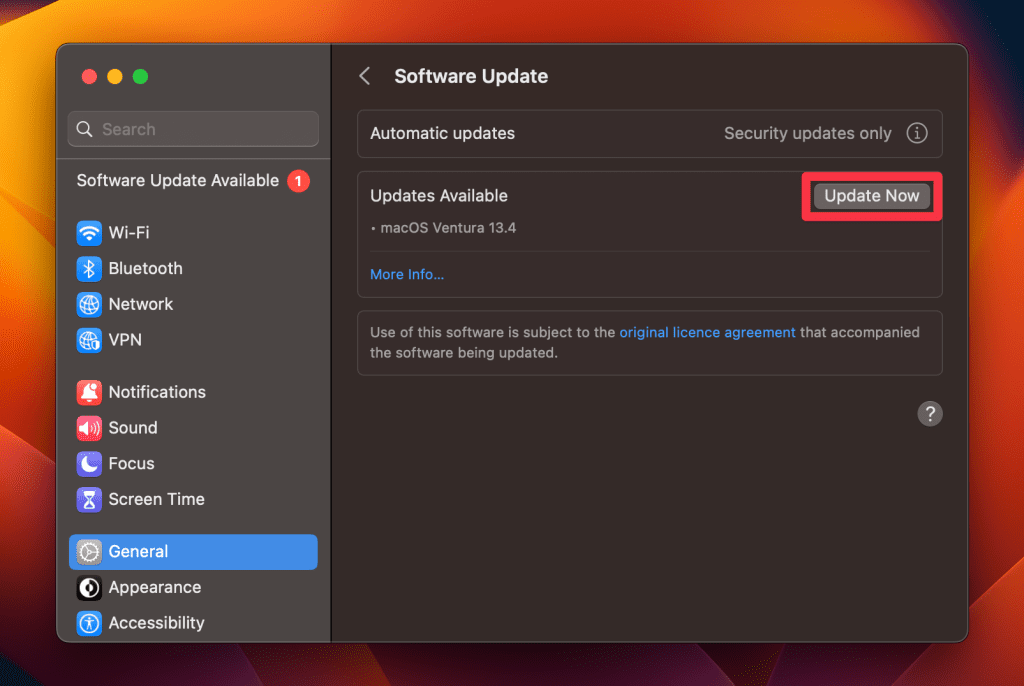
- Click General in the left sidebar and select Software Update.

- In the Software Update settings, if an update is available, you will see an option to download and install it. Typically, you will find a button labeled Update Now.
- Click the Update Now button to initiate the download process.
- Your Mac may restart multiple times during the installation.
- Once the installation is complete, your Mac will restart with the latest macOS version.
9. Reset SMC
The System Management Controller (SMC) manages key hardware functions on your Mac, including power and battery management. If you’re experiencing cursor or trackpad issues, resetting the SMC can help resolve these hardware-related glitches. Check out my detailed guide on resetting SMC to learn how.
SMC and NVRAM reset only apply only to Intel-based Macs.
10. Reset NVRAM
NVRAM stores important settings such as display resolution and sound preferences. If your Mac’s cursor is acting up, resetting the NVRAM can often resolve these issues by clearing out any problematic settings. Read this NVRAM reset guide for easy steps to fix these common system problems.
What to Do If Your MacBook Cursor Is Frozen on Startup?
Here are some steps you can take if your cursor is frozen on startup:
1. Boot Into Safe Mode
Starting your MacBook in Safe Mode can help you troubleshoot issues related to your system, including trackpad glitches. It loads only essential software, which can often bypass glitches causing the freeze.
Here’s how to boot your Mac into Safe Mode:
Apple Silicon Macs
- Click the Apple icon and choose Shut Down from the drop-down menu.
- Wait for your Mac to shut down completely, and press the Power button to turn it on.

- Keep holding the Power button until you see the Loading startup options screen.

- Select a volume from the options.
- Press and hold the Shift ⇧ key and click Continue in Safe Mode.

- Your Mac will restart automatically, and you will see Safe Boot in the menu bar when the login screen appears.

Intel-Based Macs
- Restart or turn on your Mac and press and hold the Shift ⇧ key immediately.
- Keep holding the Shift ⇧ key until you see the login screen.
- Release the Shift ⇧ key and log in to your Mac.
- You’ll see Safe Boot in the menu bar on your first or second login window.
2. Boot in Recovery Mode and Repair Disk
Sometimes disk errors can cause startup problems. Booting in Recovery Mode allows you to use Disk Utility to check and repair these errors.
Here’s how to boot your Mac into Recovery Mode:
Intel-Based Macs
- Make sure your Mac is turned off by clicking the Apple menu in the top-left corner of the screen and selecting Shut Down.
- Press the power button to turn on your Mac.
- Wait for the startup chime, then immediately press and hold the Command ⌘ + R keys on your keyboard until the Apple logo appears on the screen. It indicates your Mac is booting into Recovery Mode.

- The window provides a range of utilities to troubleshoot and repair your Mac. You can select the utility you want to use from the macOS Utilities window to troubleshoot and repair your Mac.
Apple Silicon Macs
- Shut down your Mac by choosing the Apple menu > Shut Down.
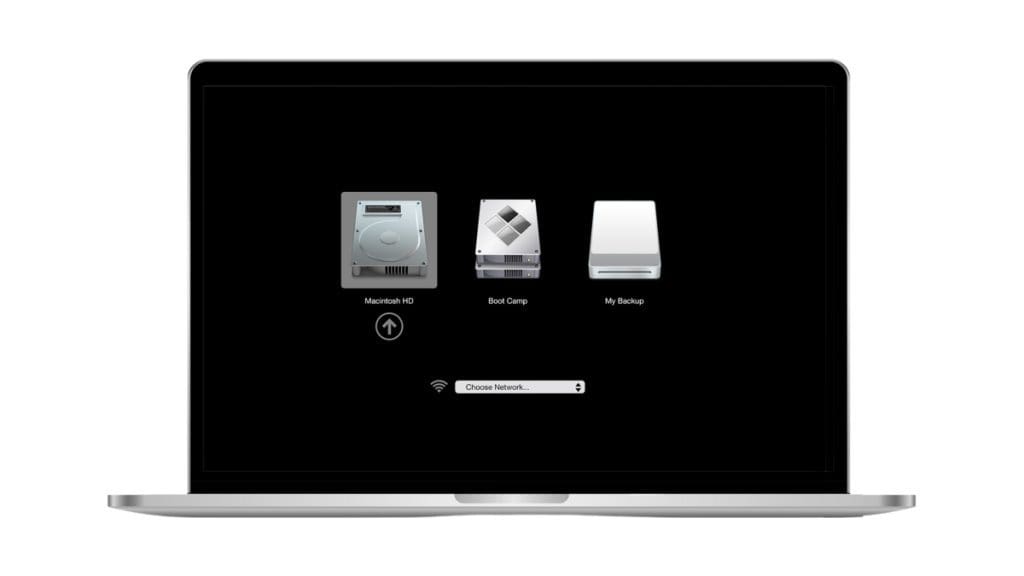
- Press the power button until you see Loading startup options.
- Click Options, then click Continue.

- Click Options, then click Continue to boot Mac into Recovery Mode.
- Select your language, then click Next.
- Click Utilities > Startup Security Utility.
- Enter your administrator password, and click OK.
- Select Full Security under Startup Security, then click Restart.
- Press the power button until you see Loading startup options again.
Fix Your Mac’s Frozen Cursor and Get Clicking
Now that you know how to fix a frozen Mac cursor, you can get back to typing and clicking without interference. If you want to learn more about cursors and trackpads, here are a few guides to get you started:
- Restart and clean your MacBook trackpad to fix issues.
- Fix abnormal mouse behavior by using a different port or re-pairing it.
- Properly using trackpad gestures can help prevent common issues.