TL;DR
To format a drive on Mac, follow these steps:
- Open Disk Utility via Spotlight Search.
- Select the drive you want to format.
- Click Erase and choose your preferred format.
- Click Erase again to start the formatting process.
Tried and Tested ✅: The methods and steps mentioned in this article have been tried and tested firsthand by Ojash Yadav on his MacBook Pro M3 and rechecked for errors on Hashir’s MacBook Air M2.
Dealing with a cluttered drive on your Mac can be frustrating. When I finally decided to format mine, I found it was easier than I expected. Now, I’m here to guide you through the process step by step, so you can do it easily too.
Which Drive Format Should You Choose?
Choosing the right format for your drive affects its performance and compatibility. Here’s a quick guide:
- 🌍 Cross-Platform Use: Choose ExFAT if you need to share files between Mac and Windows systems seamlessly.
- ⏳ Older Macs: Mac OS Extended (Journaled) or FAT32 are your best options. Note that FAT32 has a 4GB file size limit and less security.
- ⏰ Time Machine Backups: Use Mac OS Extended (Journaled) for dependable and secure Time Machine backups.
- 💾 Solid-State Drives (SSD): APFS (Apple File System) is ideal for SSDs, offering faster speeds and better security.
⚠️ Warning: Formatting a drive will erase all data on it. Make sure to back up any important files before proceeding.
How to Format a Drive on Mac
Why You Can Trust MacBook Journal ![]() We always conduct first-hand research and verify every method or solution we present, ensuring you receive reliable and effective advice. Learn more about our process.
We always conduct first-hand research and verify every method or solution we present, ensuring you receive reliable and effective advice. Learn more about our process.
There are two main ways to format a drive on Mac: Disk Utility or Terminal. Here I will discuss both methods in details:
1. Format a Drive On a Mac Using Disk Utility
Follow these simple steps to format a drive on Mac using Disk Utility:
- Launch the Disk Utility app on your Mac. You can do this by opening Spotlight Search (Command ⌘ + Space) and typing Disk Utility.

- Once you have Disk Utility open, select the drive you want to format from the list on the left-hand side of the window.

- Click the Erase button at the top of the window. It will bring up a new window where you can choose the format for your drive. As mentioned earlier, choose the format that best suits your needs.

- You can also give your drive a new name in the same window. It is optional but useful for multiple drives with the same format.
- Once you have selected the format and named the drive (if desired), click the Erase button. Depending on the drive size, it will begin the formatting process, which may take several minutes.

2. Format a Drive On Mac Using Terminal
Follow these steps to format a drive using Terminal:
Be careful and double-check the drive you’re formatting to avoid any irreversible mistakes.
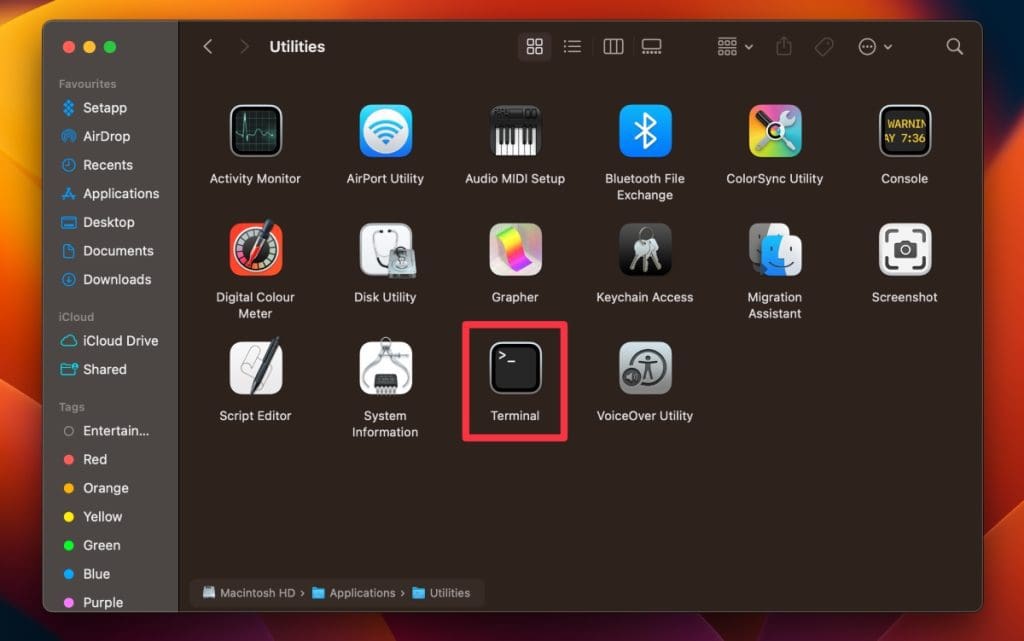
- Launch the Terminal app on your Mac.
- Type the following command and press Enter:
diskutil list
It will show you a list of all connected drives on your Mac. Identify the name of the drive you want to format.
- Type the following command and press Enter:
diskutil eraseDisk format name /dev/diskX
Here, format is the file system you want to use, name is the name you want to give your drive, and X is the disk number of the drive you want to format
- Choose the format that best suits your needs. You can also give your drive a new name in the same command.
A Fresh Start for Your Drive
Formatting a drive on Mac is a straightforward process you can complete in a few simple steps. However, to ensure a smooth experience, there are a few tips that users should keep in mind:
- Run a virus scan before formatting to prevent malware from spreading.
- Back up your Mac data with Time Machine, iCloud, or another service before formatting.
- If your external drive isn’t showing up, try checking the cable or switching USB ports.