TL;DR
To clear Recents folder on Mac, follow these steps:
- Click the Apple icon in the menu bar and select System Settings.
- Go to Siri & Spotlight.
- Scroll down and click Spotlight Privacy.
- Click the + button at the bottom left of the Privacy window.
- Select your startup disk (usually named Macintosh HD) and click Choose.
Tried and Tested ✅: The methods and steps mentioned in this article have been tried and tested firsthand by Ojash Yadav on his MacBook Pro M3 and rechecked for errors on Hashir’s MacBook Air M2.
Sensitive files showing in the Recents folder can be frustrating. I faced the same issue and found simple ways to clear and manage it. In this post, I’ll share what worked for me, so you can keep your Mac organized and your files out of sight.
Turning off Spotlight indexing for your startup disk will prevent Spotlight from searching for files on that disk. This can impact the speed and efficiency of file searches on your Mac. If you need to use Spotlight search frequently, keep indexing enabled.
How to Clear Recents Folder on Mac
Why You Can Trust MacBook Journal ![]() We always conduct first-hand research and verify every method or solution we present, ensuring you receive reliable and effective advice. Learn more about our process.
We always conduct first-hand research and verify every method or solution we present, ensuring you receive reliable and effective advice. Learn more about our process.
Here is the detailed step-by-step guide to clear Recents folder on Mac:
1. Turn off Spotlight Indexing
To turn off Spotlight indexing for your startup disk on macOS, you can follow these steps:
- Click the Apple icon in the menu bar and select System Settings.
- In the System Settings window, click Siri & Spotlight.

- Scroll down the right pane and click the Spotlight Privacy button.

- Click the + button at the bottom left of the Privacy window.

- A new window will appear, showing your file system. Select your startup disk (usually named Macintosh HD or similar) from the list, and click Choose.

- Once you have added your startup disk to the Privacy list, Spotlight will stop indexing its contents.
2. Hide Files from Appearing in Recents Folder
Instead of excluding the entire disk, you can create a specific folder and exclude it to appear in the Recents folder. To achieve this, follow these steps:
- Click the Apple icon in the menu bar and select System Settings.
- In the System Settings window, click Siri & Spotlight.
- Scroll down the right pane and click the Spotlight Privacy button.
- Click the + button at the bottom left of the Privacy window.
- Navigate to the destination where your folder is present. Select the folder and click Choose.

- By placing files in this designated folder, they will remain hidden from Spotlight Search and the Recents folder in the Finder.
This method only removes the files you moved (not copied) to the special folder, and it does not clear the entire Recents folder.
3. Rename Files Using Terminal
To rename files using the Terminal and hide them from the Recents folder to Hide Them from Recents Folder on macOS, you can follow these steps:
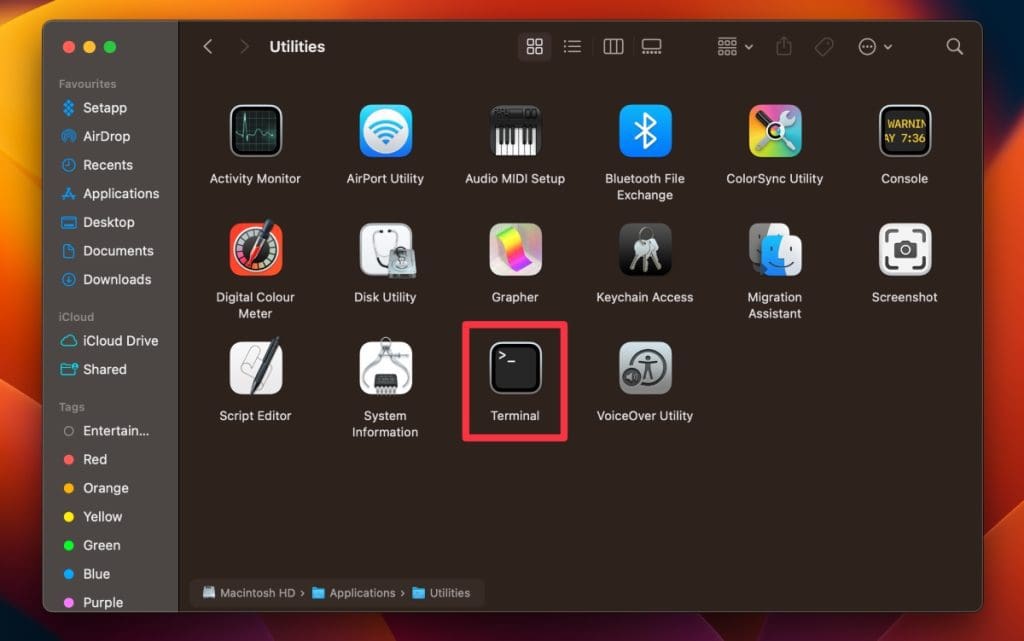
- Open the Terminal application.
- Navigate to the directory where the files you want to rename are located. Use the cd command followed by the path to the directory. For example, if your files are in the Documents folder, you can use the following command:
cd Documents/Excluded\ FilesUse a backslash before any spaces in your folder names.
- Once you’re in the desired directory, use the mv command to rename the files and add a dot to their names. The syntax for the mv command is as follows:
mv my\ hidden\ file.png .my\ hidden\ file.pngReplace my\ hidden\ file with the current name of the file you want to hide.
- Press Enter to execute the command. The file will be renamed accordingly.
4. Move Your Files to an Encrypted Drive
Move files to an Encrypted Drive to keep them secure and hidden from Spotlight indexing. Here’s how:
- Go to the Applications directory and locate the Utilities folder.

- Launch the Disk Utility application from the Utilities folder.

- Once you have opened Disk Utility, click the File option in the menu bar. Click New Image and select Blank Image…

- Fill in all the necessary information for the new image and save it.
- Make sure to set the Image Format option to read/write disk images.

You can use third-party apps like MacKeeper to easily clear recent items on your Mac. These tools help you remove unnecessary files quickly, keeping your system organized and efficient.
5. Remove the Recents Folder from Finder
Follow these steps to remove the Recents folder from your Finder on your Mac:
- Open the Finder app on your Mac and navigate to the Recents folder.

- Hold the Control ⌃ key and click the Recents folder.

- From the menu that appears, select Remove from Sidebar.

Wrap Up
Clearing recent items on Mac can protect your privacy and keep your system running smoothly. Here are some more tips to keep in mind for future use:
- Clear cache files on Mac and organize files regularly to keep your system clutter-free.
- You can use Mac keyboard shortcuts to quickly delete recent items in Finder and apps.
- You should install and activate MacKeeper to protect, manage, and optimize your Mac without any problem.