TL;DR
To monitor your Mac CPU, GPU, and RAM usage, open Activity Monitor via Spotlight:
- CPU Usage: Click the CPU tab and sort by % CPU to find high usage processes.
- GPU Usage: Click Window in the menu bar > GPU History and check the graphs.
- RAM Usage: Click the Memory tab and check the details at the bottom.
Tried and Tested ✅: The methods and steps mentioned in this article have been tried and tested firsthand by Ojash Yadav on his MacBook Pro M3 and rechecked for errors on Hashir’s MacBook Air M2.
Your Mac’s CPU handles processing, the GPU takes care of graphics, and RAM stores temporary data for quick task switching. By tracking these, you can catch and fix issues to keep your Mac at its best. In this guide, I’ll show you how you can monitor your Mac CPU, GPU, and RAM usage.
Before We Begin
Monitoring your Mac’s CPU, GPU, and RAM usage is crucial to maintaining the health and performance of your computer. MacKeeper can be your savior as you can monitor and optimize your Mac at a single stop. Download and install now to learn how to improve your Mac’s experience with MacKeeper.
Use MacKeeper to Monitor Your Mac’s CPU, GPU, and RAM
MacKeeper helps monitor your Mac’s CPU, GPU, and RAM usage because it provides real-time monitoring, system scanning and cleaning, memory optimization, and the ability to manage login items, all of which can improve your Mac’s performance. You have to download and install MacKeeper. Once you have installed , you can monitor and optimize it directly through MacKeeper by following methods:
1. Clearing Cache and Temporary Files
Clearing cache and temporary files can help improve your Mac’s performance but can also delete important data such as login credentials and website settings. Review the list carefully for all the important data you may need in the future. To clear cache and temporary files using MacKeeper, follow these steps:
- Download and install MacKeeper on your Mac.
- Launch MacKeeper and click the Safe Cleanup option from the left-hand menu.

- Click the Scan button to let MacKeeper scan your Mac for cache and temporary files.

- After the scan, MacKeeper will present you with a list of cache and temporary files. Review the list and select the cache and temporary files you want to remove.

- Click the Remove button to delete the selected cache and temporary files.

2. Removing Unused Applications
Unused applications and files can also take up valuable disk space and slow down your Mac. To remove unused applications using MacKeeper, follow these steps:
- Download and install MacKeeper from its official website.
- Launch MacKeeper and navigate to the Smart Uninstaller under Cleaning.

- Click Start Scan.

- Wait for the scan to complete and click Applications in the left panel and select unused apps from the list and click the Remove Selected button.

- Confirm the deletion by clicking Remove on the pop-up.

- This will remove Microsoft Office from your Mac, and you’ll get a Removal Completed message. Click Rescan if you want to scan your Mac again.

What Else Can MacKeeper Do?
Besides clearing cache and uninstalling apps, MacKeeper can scan and improve issues like junk files, duplicates, and malware and provide tools for recovering files, and encrypting data. MacKeeper aims to simplify Mac maintenance and enhance its overall functionality, making it a valuable tool for users who want to keep their Mac running smoothly. Check out my guide to know more about its features.
How to Monitor Your Mac CPU, GPU, and RAM Usage
Why You Can Trust MacBook Journal ![]() We always conduct first-hand research and verify every method or solution we present, ensuring you receive reliable and effective advice. Learn more about our process.
We always conduct first-hand research and verify every method or solution we present, ensuring you receive reliable and effective advice. Learn more about our process.
The simplest way to check your Mac’s performance is by using Activity Monitor. This built-in app provides a live overview of your Mac’s hard drive, RAM, processor, and network usage.
Here’s how to monitor your Mac CPU, GPU, and RAM usage via Activity Monitor:
1. How to Monitor Your Mac CPU Usage
Here’s how to use Activity Monitor to monitor your Mac CPU usage:
- Open Finder > Applications > Utilities > Activity Monitor.

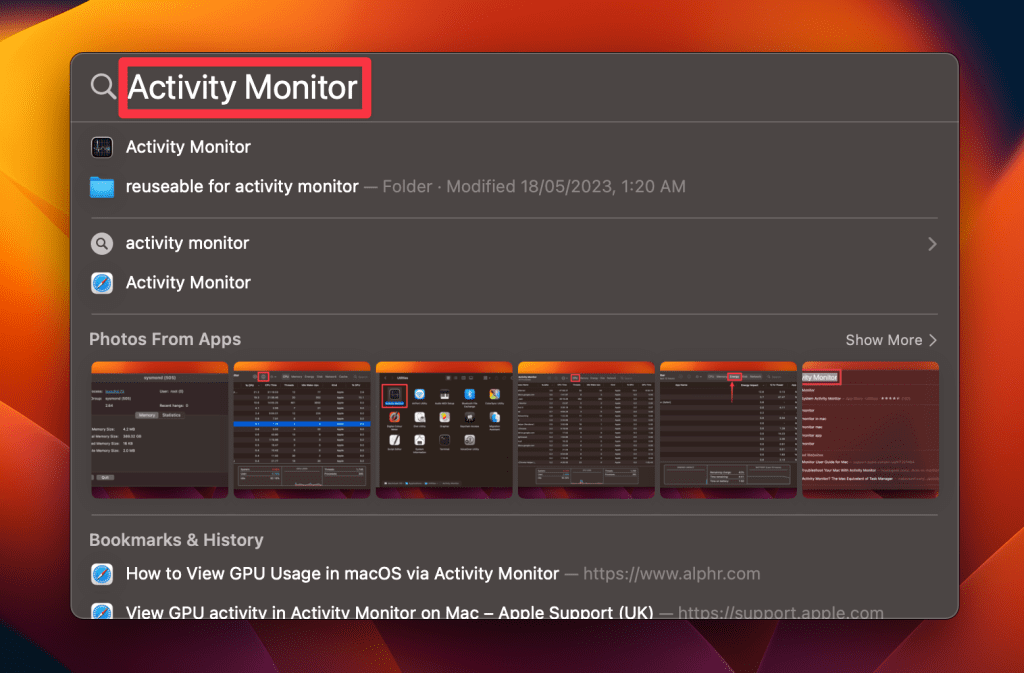
Quick Tip: You can also open Activity Monitor via Spotlight by pressing Command ⌘ + Spacebar or clicking the magnifying glass in the top right of your Mac screen.
- Click the CPU tab in Activity Monitor to view the processes using CPU power.

- Click the % CPU column to sort the processes by CPU usage, with the highest usage at the top.

- Find the process or app with high CPU usage on Mac, then quit, force quit, or adjust its settings to reduce usage.
- At the bottom, you’ll see total CPU load, a breakdown by system and user processes, and a usage graph over time.

How to Monitor Mac CPU on the Dock
If you want to check your Mac’s CPU usage in real-time, you can do it via your Dock. Here’s how to monitor your CPU usage directly from your Mac’s Dock:
- Open Finder > Applications > Utilities > Activity Monitor.
- Close the Activity Monitor window by clicking the red cross icon at the top left.

- Right-click the Activity Monitor icon in your Dock.

- Select Dock Icon from the menu.
- Choose Show CPU Usage.

Now, your CPU usage will be displayed as bars on the Dock icon. A single bar indicates low CPU usage, while full bars mean your CPU is working hard.
2. How to Monitor Mac GPU Usage
To monitor GPU usage on your Mac, follow the steps below:
- Open Activity Monitor via Spotlight (Command ⌘ + Spacebar).
- With the Activity Monitor open, click Window in the menu bar and select GPU History.

- This will launch the GPU History window, displaying the usage of all GPUs on your Mac.

- You can adjust the size of each graph by clicking and dragging the tiny dot between each one.
3. How to Monitor Your Mac’s RAM Usage
Here are steps to check memory usage on Mac through Activity Monitor:
- Open Finder > Applications > Utilities > Activity Monitor.
- Click the Memory tab in Activity Monitor.

- In the Memory tab, you’ll see information related to your RAM usage at the bottom.

- You can interpret this data as follows:
- Memory Pressure: Shows your Mac’s overall memory use: green means plenty of memory, yellow means it’s being managed more actively, and red means memory is low, with the drive being used as memory.
- Physical Memory: The total amount of RAM installed on your system.
- Memory Used: The total memory currently in use by your apps and macOS.
- App Memory: The total amount of memory being used by apps.
- Wired Memory: Memory that stays in RAM and can’t be compressed or moved to the drive.
- Compressed: Memory in RAM that’s compressed to free up space for other processes.
macOS manages memory well, so high RAM usage doesn’t always mean slow performance. But if you see high Swap Used or red Memory Pressure, it indicates your system lacks enough RAM for current tasks.
What Other Performance Measures to Check
Besides these primary performance indicators, you can also check a few other categories to make sure your Mac runs at full potential. Here’s what else you can check in Activity Monitor:
Energy Impact
- Energy Impact: The amount of energy a process is consuming, with higher numbers indicating higher energy usage.
- 12-Hour Power: The average energy impact of the process over the last 12 hours.
- Battery Level: The current battery level and whether your Mac is charging.
Disk Usage
- Data Written: The amount of data written to the disk by a process.
- Data Read: The amount of data read from the disk by a process.
- Read/Write Speed: The speed at which data is being read from or written to the disk.
Network Usage
- Data Sent: The amount of data sent over the network by a process.
- Data Received: The amount of data received over the network by a process.
- Packets In/Out: The number of network packets received or sent by a process.
Cache Usage
- Disk Cache: Disk space used to store frequently accessed data, reducing repeated disk access.
- Memory Cache: Memory used to store files and data for quick access, which can be freed up when needed.
Tips to Optimize Your Mac Performance
Here are some tips to optimize your Mac’s performance:
- 🛑 Close unused apps: Free up memory and CPU by closing inactive apps.
- 🔄 Update macOS and apps: Stay updated for better performance and bug fixes.
- 🚀 Reduce startup items: Remove unwanted login items to speed up boot times.
- 🧹 Clear cache files: Regularly clear cache on Mac to prevent slowdowns.
- 📑 Manage browser tabs: Keep fewer tabs open, especially with heavy content.
- 🌡️ Monitor temperature: Ensure good ventilation to stop your Mac from overheating.
- 🎨 Disable visual effects: Turn off animations in System Settings to ease GPU load.
If performance issues persist, contact Apple Support for expert advice and diagnostics.
Keep Your Mac’s Performance In Check
By now you must know how to monitor your Mac CPU and other components. Here are some more tips to help you improve your Mac’s performance:
- Clean junk files on your Mac regularly to prevent temp files from piling up.
- Regularly free up RAM on your Mac to have enough memory for current tasks.
- If your system keeps lagging, crashing, or getting stuck, you don’t have enough memory and need to upgrade your Mac RAM.