TL;DR
- Use the Photos app to delete manually, with shortcuts, or via right-click.
- Deleted photos go to Photos > Recently Deleted for 30 days or until you delete them there to free space immediately.
- To delete the entire library, use Finder and ensure backups.
- Unsync iCloud to prevent deleted photos from being restored or removed from other devices.
Too many photos crowding your Mac? Don’t worry! With built-in features, you can easily clean up your Mac, declutter, save space, and boost performance. Ready to delete photos on your Mac? Let’s get started!
Tried and Tested ✅: The methods and steps mentioned in this article have been tried and tested firsthand by Ojash Yadav on his MacBook Pro M3 and rechecked for errors on Hashir’s MacBook Air M2.
Before We Begin
Ending up with duplicates is quite common if you have hundreds of photos on your Mac. They can fill up space and slow things down. Looking for them one by one? That’s hard. But, MacKeeper‘s Duplicates Finder can find the duplicate photos in a single click and you can delete them in no time.
Why Delete Photos on Your Mac?
Curating and deleting photos improves organization, efficiency, and security. Here are a few reasons why you may want to delete photos on your Mac:
- 🚀 Free Space: Remove unnecessary photos to free up storage.
- ⚡ Boost Speed: Clear clutter to enhance Mac performance.
- 📸 Organize: Keep only the photos you care about.
- 🧹 Reduce Clutter: A tidy library promotes peace of mind.
- ☁️ Save Costs: Fewer photos mean cheaper, faster backups.
- 🔒 Increase Security: Minimize exposure of personal moments.
- 🔄 Streamline Syncing: Fewer photos speed up device syncing.
- 🗑️ Delete Duplicate Photos: Use MacKeeper’s Duplicates Finder
How to Use MacKeeper’s Duplicates Finder to Delete Duplicate Photos
MacKeeper’s Duplicates Finder is a handy tool designed to help you declutter your Mac by identifying and removing duplicate files, including photos. Here’s how to use MacKeeper’s Duplicates Finder to delete duplicate photos on your Mac:
- Download and install MacKeeper on your Mac.
- Open MacKeeper on your Mac and click Duplicates Finder in the left sidebar.

- Click Start Scan.

- Select a folder in the left menu to review duplicate files before deletion.

- Alternatively, you can click Check All and tap the Remove Selected button to remove all duplicate files at once.

- Tap the Remove button on the pop-up to confirm the deletion.

- This will remove the selected files, and you’ll get a Removal Completed message. Click Finish to end the process.

What Else Can MacKeeper Do?
Besides removing duplicate photos, MacKeeper offers valuable optimization tools to clear the cache, delete unwanted apps, and optimize your Mac’s storage. Read my detailed Mackeeper review to learn more about its features.
How to Delete Photos on Your Mac
With your Mac prepped, here’s a guide to safely delete photos, freeing space and organizing your memories.
Why You Can Trust MacBook Journal ![]() We always conduct first-hand research and verify every method or solution we present, ensuring you receive reliable and effective advice. Learn more about our process.
We always conduct first-hand research and verify every method or solution we present, ensuring you receive reliable and effective advice. Learn more about our process.
If you have iCloud Photos enabled, deleting a photo on your Mac deletes it across all devices using the same library. To delete only on this Mac, turn off iCloud Photos first, and if needed select Download Originals so you keep full-res copies locally.
1. How to Select All Photos on Mac
Selecting multiple photos simultaneously can be a great time-saver, especially when you’re looking to organize, move, or delete a large number of images.
Always double-check your selection before making any changes to ensure you don’t accidentally modify or delete cherished memories.
Here’s how to select all photos in your Photos app on Mac:
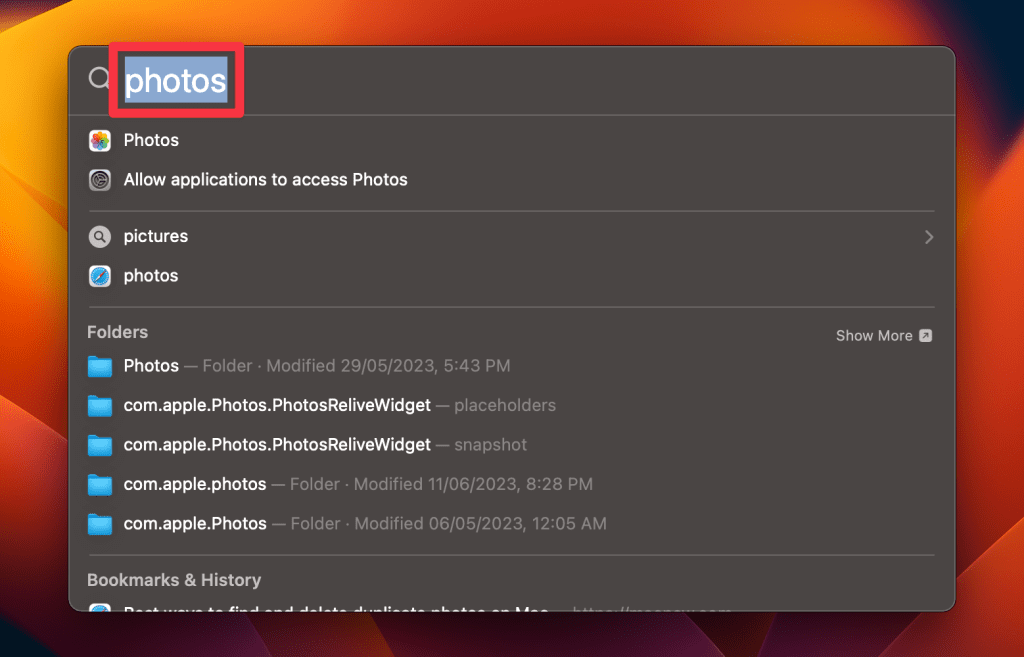
- Open the Photos app on your Mac by searching for it in Spotlight search.
- Inside the Photos app, click the Library tab in the left sidebar to display all the photos you’ve stored on your Mac.

- To select a specific group of photos, click the first photo you want to select. While holding down the mouse button, drag the cursor across multiple photos to select them.

- If you wish to select all the photos in the library at once, you can use the Mac keyboard shortcut Command ⌘ + A.

- Alternatively, navigate to the menu bar, click Edit, and choose Select All.

2. Delete Photos on macOS Manually
There are a few different ways to delete photos on your Mac manually. Below, I’ve shared all methods:
Before proceeding, make sure you’ve selected all the photos you wish to delete. If unsure, review the previous steps on how to select multiple photos.
a. Using the Right-Click Method
- With the photos selected, right-click (or Control ^ + click) any of the highlighted photos.
- A context menu will appear. Choose Delete X Photos from the options.

b. Using the Keyboard Shortcut
- With the photos selected, simply press the Delete button on your keyboard.
- This action will prompt the photos for deletion.
- Click Delete on the prompt to confirm deletion.

You can use the same methods to delete an entire album or folder in the Photos app. Just select the album or folder and follow the deletion steps mentioned above.
Deleted photos are moved to the Bin or Recently Deleted album. They aren’t permanently removed until Bin icon in the Dock and select Empty Bin.

Alternatively, in the Photos app, go to the Recently Deleted album, select the photos, and choose Delete All.

3. Delete Entire Photo Library
If you’ve moved your photos elsewhere, delete the original Photos library to free up Mac storage. Here’s how:
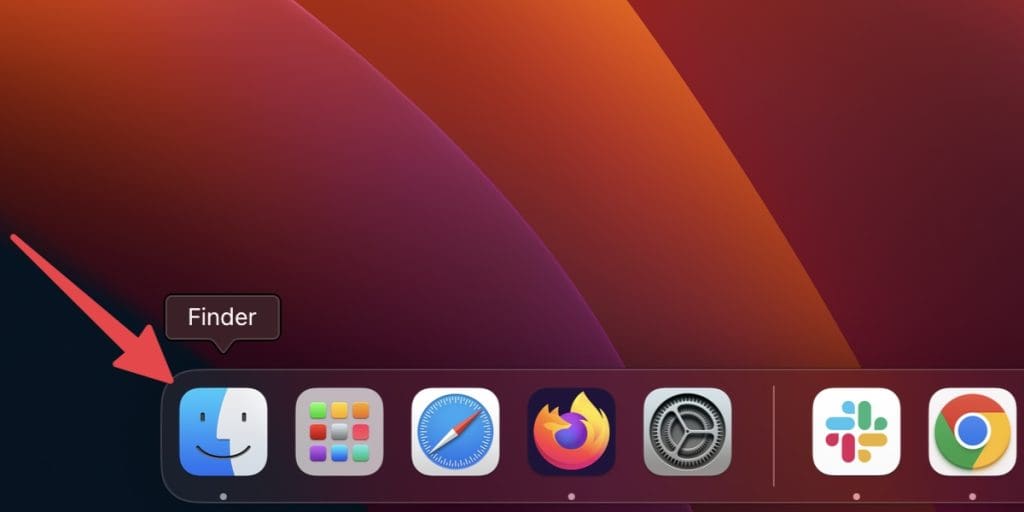
- Click the Finder icon, typically found in the Dock, to open a new Finder window.
- In the Finder menu bar at the top, click Go, and select Home. This will take you to your user’s home directory.

- Within the Home directory, find and open the Pictures folder.

- Inside the Pictures folder, you’ll see a file named Photos Library or something similar.
- Right-click the Photos Library and choose Move to Bin.

- Click the Photos Library to select it and press the Command ⌘ + Delete keys on your keyboard.
- To permanently delete the Photos Library and free up space, right-click the Bin icon in the Dock and select Empty Bin.
💡Pro Tip: Use MacKeeper’s Duplicates Finder to quickly scan and delete duplicate photos, freeing up space on your Mac.
4. Delete Photos Outside the Photos App
Photos scattered on your Mac? Use Smart Folders to organize them all in one place. Here’s how to organize and delete your photos using Smart Folders:
- Open Finder on your Mac.
- Click File in the menu bar and select New Smart Folder.

- Choose This Mac in the top toolbar.

- Click the plus (+) icon in the top-right corner.

- Use the dropdowns, pick Kind, and select Image. Then, click the Save button to save your Smart Folder.

Voila! Every pic on your Mac, all in one spot. Skim through, and toss out what you don’t want.
5. Delete an Entire Album in Photos App
The Photos app organizes your images into albums, accessible from the left sidebar. You can modify or remove any of these albums as needed. Here’s how:
- Open the Photos app on your Mac by searching for it in Spotlight search.
- In the Photos app, click the My Albums tab in the left sidebar.

- Scroll through your albums to find the album you wish to delete.
- Click the album you want to delete to select it. The album should now be highlighted.

- Right-click the selected album and choose Delete Album.

- A prompt will appear asking you to confirm the deletion. Click Delete to confirm.

Deleting an album will remove the album organization, but the photos in the album will remain in your main Library. If you wish to delete the photos themselves, you’ll need to delete them separately.
6. How to Delete Photos Permanently on Mac
Want to ensure your photos and videos are gone for good without waiting for the usual 30-day period? Here’s how to permanently erase photos on your Mac without delay:
- Open the Photos app on your Mac by searching for it in Spotlight search.
- Inside the Photos app, locate and click the Recently Deleted folder. This is where photos and videos are temporarily stored before they’re automatically deleted after 30 days.
- Browse through the folder and select all the photos and videos you want to permanently remove.
- Click and drag to select multiple files or use the Command ⌘ + Click method to select individual items.
- Click the Delete All button in the top-right corner.
- A prompt might appear asking you to confirm that you truly want to erase the selected items forever. Confirm your decision to finalize the deletion.
Once you’ve taken this action, those photos and videos are irretrievable. It’s always a good practice to double-check your selections to ensure you don’t permanently delete something important.
How to Recover Deleted Pictures on macOS
Accidentally deleted a photo? You have 30 days to recover it before it’s gone. Here’s how to retrieve it from the Photos app:
- Open the Photos app.
- Click the Recently Deleted folder in the left sidebar.

- Select the Photos you want to restore. Selected images will be highlighted with a blue checkmark.

- Once you’ve chosen your photos, click the Recover button, usually in the top right corner of the window.

- It will restore the photos to their original places.
Clear Out Your Photos Library on Mac
Managing photos on Mac is easy with the right tips. Backup your memories and double-check before deleting. Here’s how to keep your library organized:
- Learn how to find, merge, and delete duplicate photos on Mac to make sure you only have one copy of each photo on your system.
- You can access iCloud photos on your Mac to check which photos are being synced.
- By converting HEIC to JPG on Mac, you can save some space and make your photos more universally shareable.