TL;DR
To fix macOS kernel panic error, try the following steps:
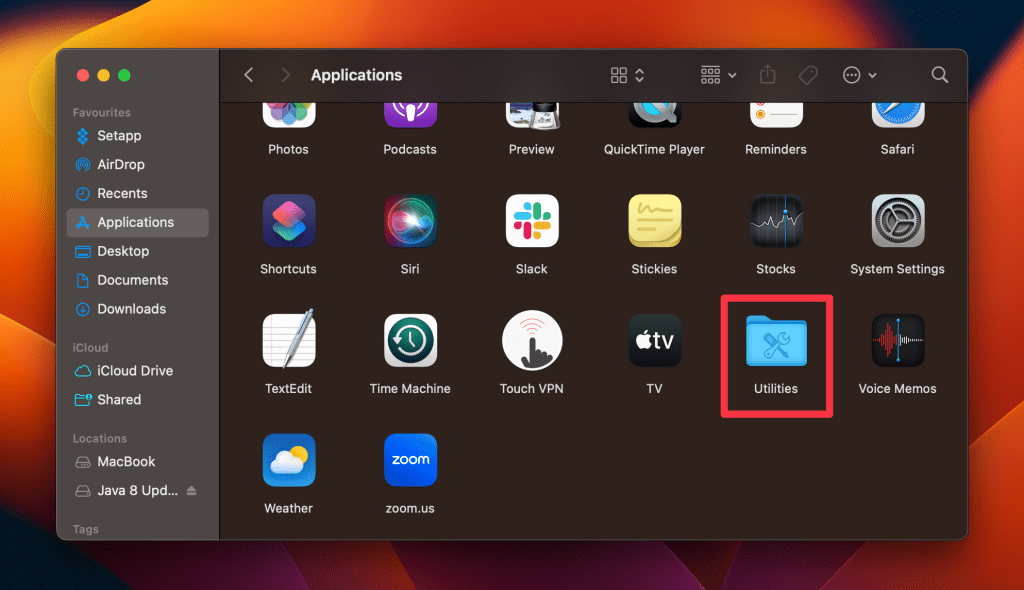
- Open Finder, click Applications in the left sidebar, and navigate to the Utilities folder.
- Open the Console app.
- In the left sidebar of the Console app, select Crash Reports.
- If there are any crash reports, click one. Look for terminated due to or reason: failed because to understand the cause of the crash.
Tried and Tested ✅: The methods and steps mentioned in this article have been tried and tested firsthand by Ojash Yadav on his MacBook Pro M3 and rechecked for errors on Hashir’s MacBook Air M2.
Seeing a grey screen on your Mac saying, “You need to restart your computer…”? That’s a kernel panic error. In this guide, I’m going to break down why these errors pop up and show you some practical ways to fix macOS kernel panic error on your Mac.
How to Fix macOS Kernel Panic Error
Why You Can Trust MacBook Journal ![]() We always conduct first-hand research and verify every method or solution we present, ensuring you receive reliable and effective advice. Learn more about our process.
We always conduct first-hand research and verify every method or solution we present, ensuring you receive reliable and effective advice. Learn more about our process.
If you experience kernel panics frequently, your best bet is to take your Mac to an Apple Authorized Service Provider or contact Apple Support for assistance. But Before that, try these solutions.
1. View Crash Reports
Crash reports log when and why a crash occurred, helping identify kernel panic causes. Here’s how to access them:
- Open Finder, click Applications in the left sidebar, and navigate to the Utilities folder.
- Open the Console app.

- In the left sidebar of the Console app, select Crash Reports.

- If there are any crash reports, click one. Look for terminated due to or reason: failed because to understand the cause of the crash.
The following section contains Exceptions details, specifically:
- EXC_BAD_ACCESS/KERN_INVALID_ADDRESS, caused by accessing unmapped memory
- EXC_BAD_ACCESS/KERN_PROTECTION_FAILURE, resulting from writing to read-only memory
2. Remove Login Items
If your Mac experiences kernel panic errors, these may be caused by startup apps. Removing unnecessary login items can help. Here’s how to remove login items on your Mac:
- Click the Apple icon in the top left corner of your screen and select System Settings.
- Select General and click Login Items.
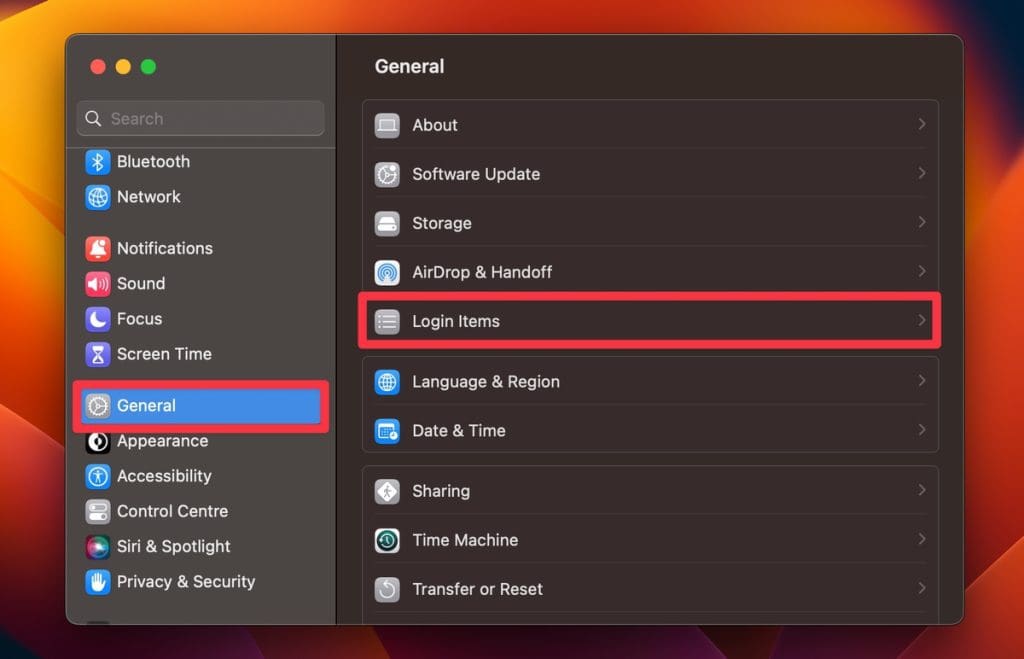
- You will see a list of applications that launch during startup. To remove an application, select it and click the minus (–) button at the bottom of the list.
- Once you have removed all unwanted login items, restart your Mac to see if the kernel panic error has been resolved.
💡Tip: You can also use MacKeeper to remove hidden processes. Download MacKeeper to use its Login Items feature to find and remove hidden startup processes on your Mac and reduce kernel panic errors.
3. Check for Software Updates
Outdated software often causes kernel panics. Updating your macOS to the latest version can fix macOS kernel panic errors. Here’s how to check for updates on Mac:
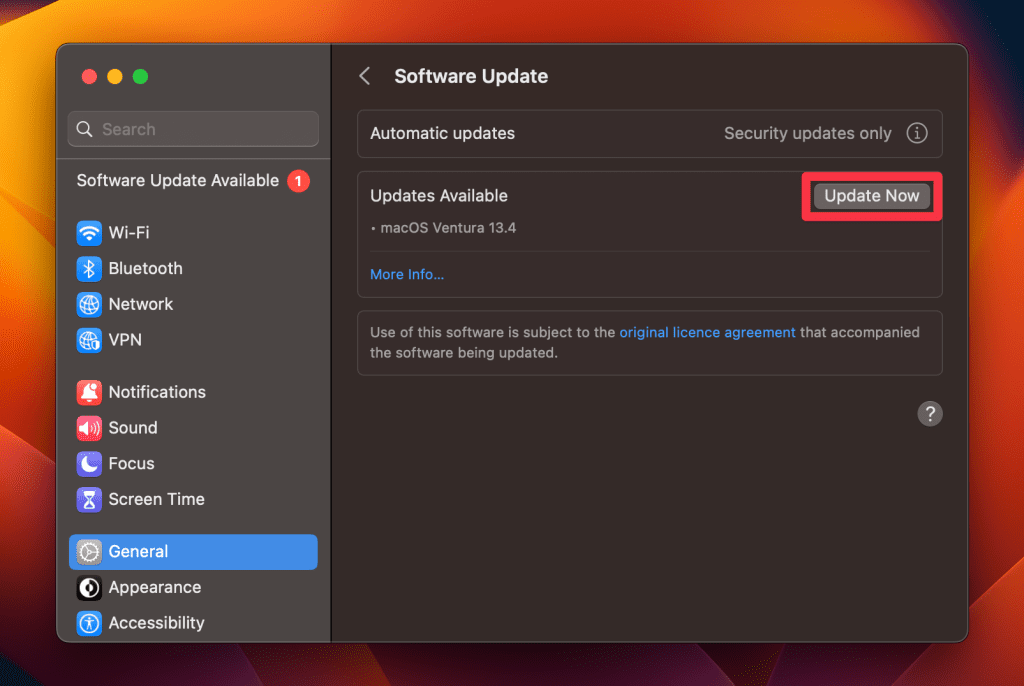
- Click the Apple icon in the top left corner of your screen and select System Settings.
- Click General and select Software Update to check for any available updates.

- If there are updates available, click Update Now to install them.
- Tap Agree on the Software License Agreement after reading it.

- Enter your MacBook password and tap OK.
- Now, wait for the update to download and install. You’ll see the size and duration of the update under the progress bar.
- If your Mac is up to date, you’ll see the following screen:

4. Reset NVRAM or PRAM
Resetting NVRAM/PRAM can fix kernel panics by restoring settings like display resolution and startup disk. Here’s how to reset PRAM and NVRAM on Mac:
On Intel-Based Macs
- Turn off your Mac.
- Press the Power button to turn on your Mac.

- Press and hold the Option ⌥ + Command ⌘ + P + R keys simultaneously on your Mac’s keyboard before the gray screen appears.

- Keep holding the keys until your Mac restarts, and you hear the startup chime twice. If you have a Mac with the T2 Security Chip, keep holding the keys until the Apple logo appears and disappears twice.
- Release the keys and let your Mac start up normally.
Apple Silicon Macs
Both M1 and M2 Macs have NVRAM, but it automatically resets when you restart your Mac. Unlike other Mac models, there is no key combination to start NVRAM reset on an M1 Mac during startup. To check the NVRAM on an M1 Mac, just power it off for a few seconds before powering it back on.
5. Run Disk Utility
A failing hard drive can cause kernel panics. Use Disk Utility to identify and repair disk issues. Here’s how to repair your Mac startup disk with Disk Utility:
- Open Disk Utility from the Utilities window.

- Click your system disk from the left sidebar and tap the First Aid button in the top bar.

- Click Run to start the scan.

- Click Continue to confirm.

- Wait for the scan to complete.
If any errors are found, the Disk Utility will attempt to fix them. Once the scan is complete, restart your computer, and it should fix macOS kernel panic error.
6. Run Apple Diagnostics
Apple Diagnostics identifies hardware issues causing kernel panics and provides a report to help fix them. Here are the steps to run Apple Diagnostics on your Mac:
On Intel Mac
- Turn off your Mac after disconnecting all external devices except the keyboard, mouse, Ethernet, display, and power cable.
- Turn on your Mac and immediately press and hold the D key along with the Power button.

- Release the D key when you see a progress bar or are prompted to select a language.

- When the checking process completes, you’ll see a report listing any issues detected. If you see an error message or reference code, note it and contact Apple Support or an authorized Apple service provider for further assistance.

- To re-run the test, click Run the Test Again or press Command ⌘ + R.

- If you don’t want to repeat the test, click Restart or Shut Down.

On M1 Mac
- Disconnect all peripheral devices except the keyboard, mouse, Ethernet, display, and power cable. Then, power off your Mac.
- Press and hold the Power button on your Mac.
- Release the Power button when the startup options appear.

- Press Command ⌘ + D on your keyboard.

7. Reinstall macOS
If other steps fail, reinstall macOS as a last resort. This replaces corrupt system files and can fix kernel panics. Here’s how to do it in Recovery Mode:
It’s essential to back up your Mac data before reinstalling macOS to avoid losing important files or documents.
- Turn off your Mac and turn it back on while holding down the Command ⌘ + R keys on your keyboard. Keep holding the keys until the Apple logo appears.
- This will boot your Mac into Recovery Mode. Once it loads, select Reinstall macOS and click Continue.

- Follow the on-screen instructions to select your startup disk and begin the reinstallation process.
- After the installation, your Mac will restart and display the Setup Assistant. Follow the on-screen instructions to set up your Mac, including selecting your language, creating a user account, and configuring settings.
- Once you’ve completed the setup process, you should have a fresh macOS installation.
Fix Kernel Panic on Mac
Kernel panic error is just one of the many errors you might see on your Mac. It’s important to take steps to prevent or fix other errors, too. Here are some tips to help you fix common errors on your Mac:
- If you see “This Mac Can’t Connect to iCloud Because of a Problem With Email” Error on your Mac, try to disable and enable iCloud, and restart your Mac.
- Fix WindowServer Mac high CPU usage issue by restarting your Mac, closing unnecessary programs, updating apps, and deleting the cache.
- Remove Windows Defender Security Warning on Mac by running a virus scan, removing browser extensions, and resetting your browser.