TL;DR
To free up RAM on your Mac:
- Restart your Mac to free up memory quickly.
- Use Activity Monitor to close RAM-heavy apps.
- Close or merge Finder windows to save memory.
- Remove unnecessary startup apps to free RAM.
- Clean your desktop to reduce memory usage.
- Delete cache files to free up space and RAM.
Tried and Tested ✅: The methods and steps mentioned in this article have been tried and tested firsthand by Ojash Yadav on his MacBook Pro M3 and rechecked for errors on Hashir’s MacBook Air M2.
I thought my Mac was slowing down with age, but it turned out to be a memory issue. I tried a few quick fixes, and they made a huge difference. In this post, I’ll share the simple steps that worked to speed up my Mac.
7 Best Ways to Free Up RAM on Your Mac
Why You Can Trust MacBook Journal ![]() We always conduct first-hand research and verify every method or solution we present, ensuring you receive reliable and effective advice. Learn more about our process.
We always conduct first-hand research and verify every method or solution we present, ensuring you receive reliable and effective advice. Learn more about our process.
Now I am going to share the seven best ways to free up RAM on your Mac:
1. Restart Your Mac
Restarting your Mac is a quick and effective way to free up memory and improve performance. Follow these steps to restart your Mac:
Before restarting your Mac, save unsaved work and close all applications to ensure your files are not lost or corrupted during the restart process.
- Click the Apple menu in the upper-left corner of the screen, and select Restart from the drop-down menu.
- If you have a frozen Mac and you can’t access the Apple menu or use the keyboard, you can force a restart by pressing and holding the Power button until your Mac turns off and turning it back on again.

- Use this Mac keyboard shortcut: Control ^ + Command ⌘ + Power. This will immediately restart your Mac without saving any open and unsaved documents.

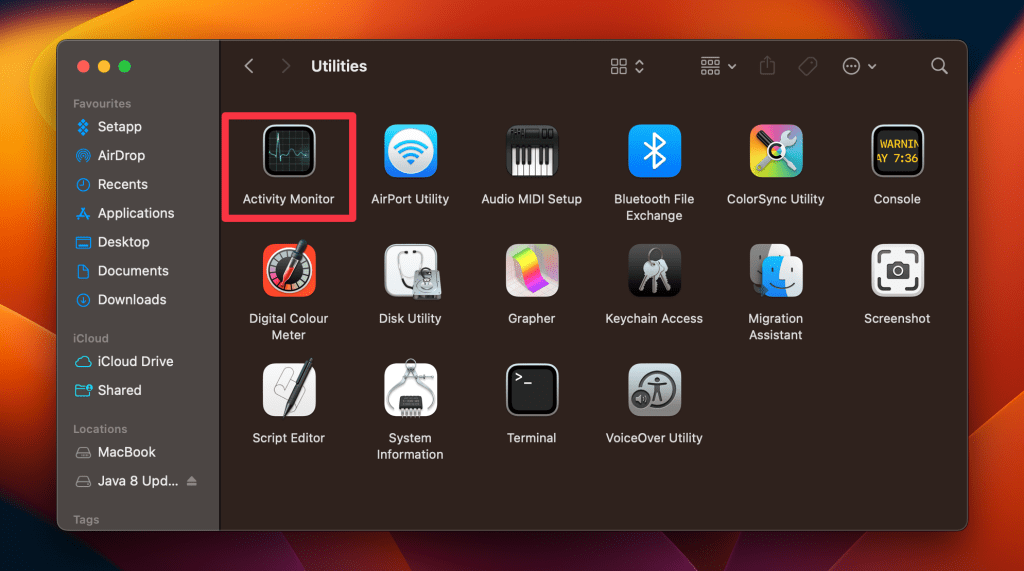
2. Examine the Activity Monitor
Examining the Activity Monitor can help you identify which apps are using the most RAM and free up memory on your Mac if necessary. Here are the steps you can follow:
- Open the Activity Monitor by navigating to Finder > Applications > Utilities > Activity Monitor.
- Click the Memory tab to see the current usage of memory by all running applications.

- By default, the processes are sorted by their memory usage. If not, you can sort the list by clicking the Memory column to see which applications use the most memory.

- If you see an application using a lot of memory you’re not currently using, you can force quit it by selecting it and clicking the X button in the top-left corner.

Freeing up memory may improve your Mac’s performance, but it causes apps to reload data from scratch, which may take some time.
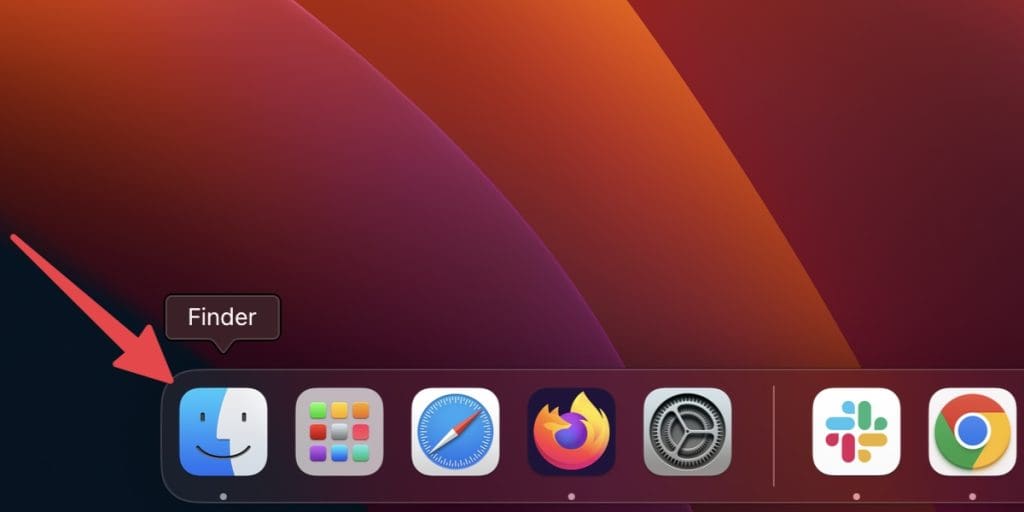
3. Close the Finder Windows
To free up memory on your Mac, close unnecessary Finder windows or merge them together. Here’s how you can do it:
- Click the Finder icon in the Dock to open a Finder window.
- Click Window in the menu bar and select Merge All Windows from the drop-down menu.

- This will close separate windows and merge them together. Each window will become a tab in a single window.

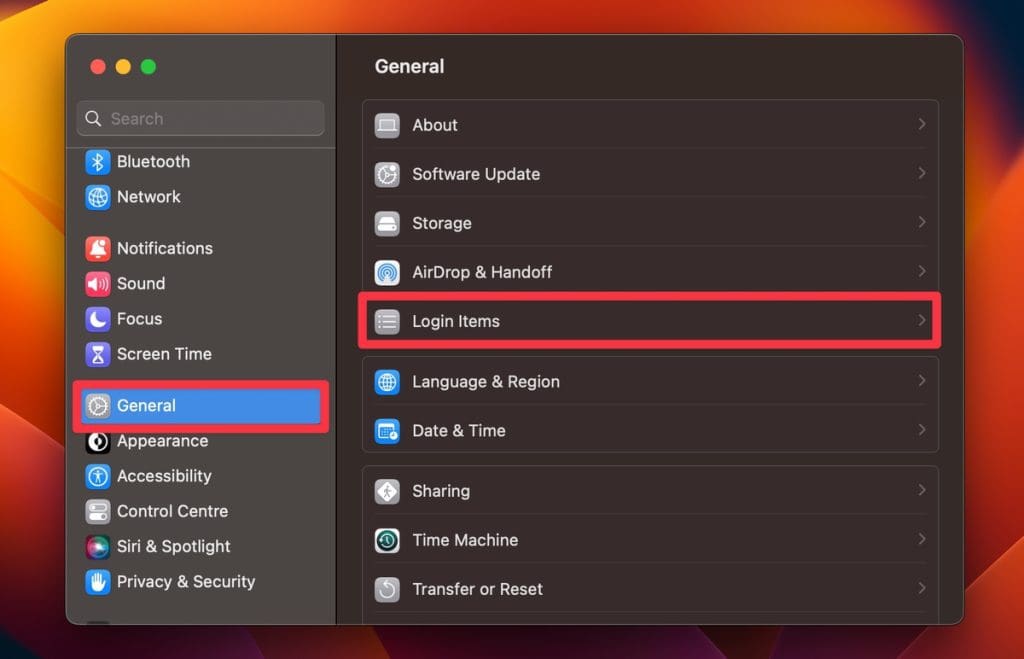
4. Remove Login Items
Removing unnecessary login items prevents apps from using RAM during startup. Follow these steps to remove your login items on your Mac via System Settings:
- Click the Apple icon in the top left corner of your screen and tap System Settings.
- Select General and click Login Items in the right menu.
- Here, you’ll see the items that launch when you start up your Mac. Select the items you want to remove and click the – button at the bottom of the list to remove them.
5. Clean Your Desktop
Organizing and decluttering your desktop can help free up memory used to display icons. So, here’s what I do to declutter the desktop and free up some of that precious RAM:
- 💻 Evaluate Each Item: Review each file and move rarely used ones to folders or an external drive.
- 📁 Organize with Folders: Group similar files into folders to clean up the desktop and improve access.
- 🗑️ Discard the Unnecessary: Delete large, old files to free up space and improve performance.
6. Delete Cache Files
Deleting accumulated cache files can help free up RAM but requires careful handling. Here’s how to delete cache files on your Mac:
Clearing cache files may cause issues with certain apps, so always back up your data on Mac before deleting any files.
- Close all the apps on your Mac, as some cache files may be in use and cannot be deleted until the associated app is closed.
- Click the Finder icon in your Dock to open a new Finder window.
- In the Finder menu, click Go and select Go to Folder.
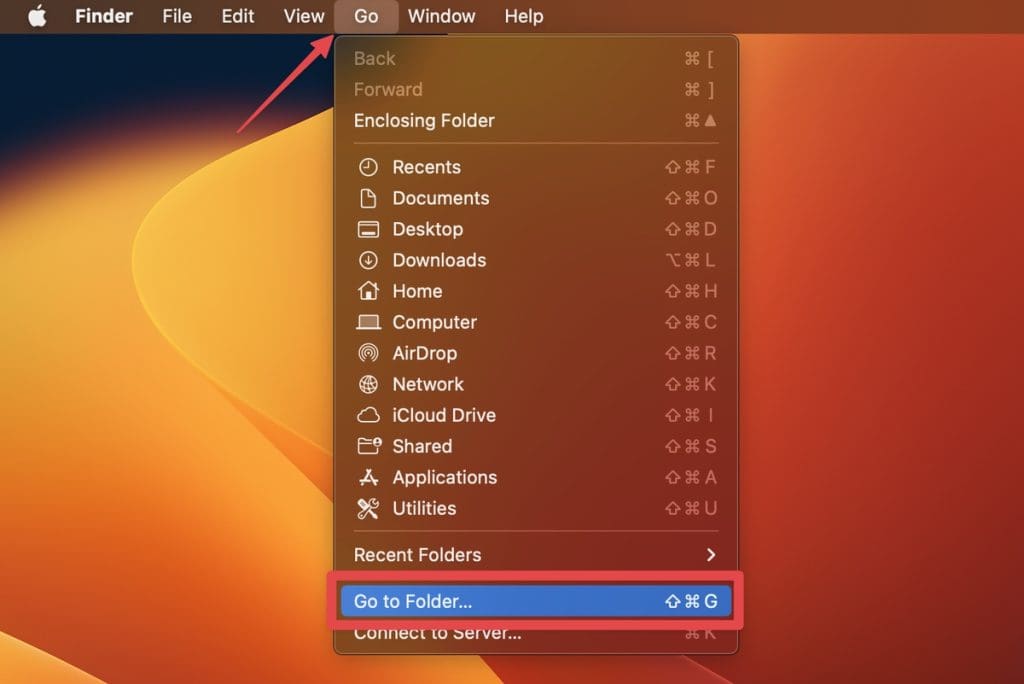
- Type the following directory path and press Go:
~/Library/Caches
- Once you are in the Caches folder, select the cache files you want to delete. You can delete all the files in the folder or select specific app cache files to delete.
- After selecting the cache files, press Command ⌘ + Delete or right-click and select Move to Bin.

- After deleting the cache files, empty the Bin to permanently delete the files.

- Restart your Mac to clear out any remaining cache files that may be taking up space in the RAM.
7. Free Up RAM Using a Third-Party App
Using a Mac memory cleaner can help you free up RAM on your Mac and improve its overall performance. I personally use MacKeeper and it works seamlessly with my system. Here’s how to use MacKeeper’s Memory Cleaner to free up memory on your Mac:
- Download and install MacKeeper on your Mac.
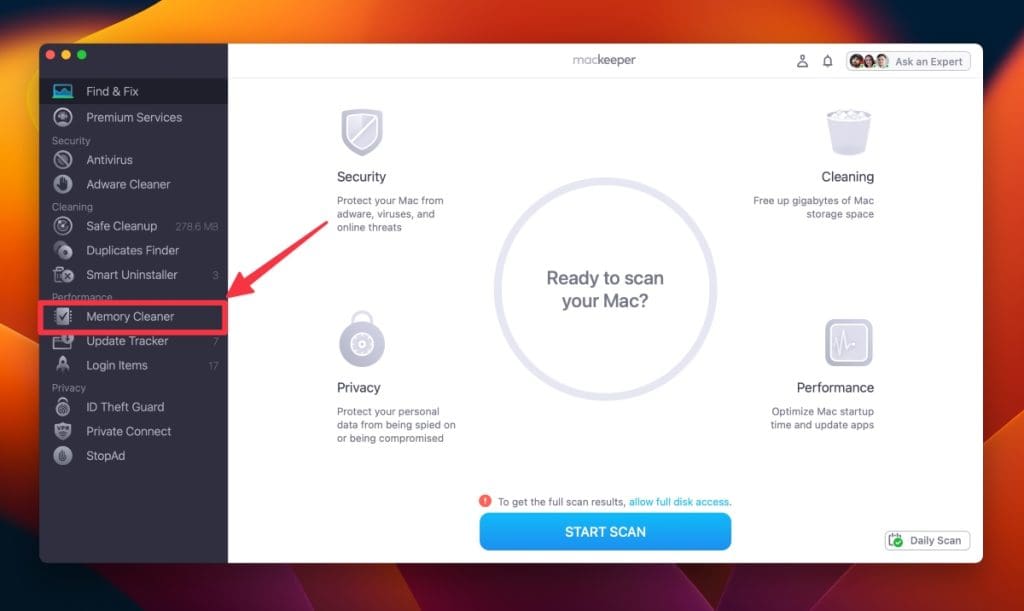
- Open MacKeeper and click Memory Cleaner under the Performance tab.
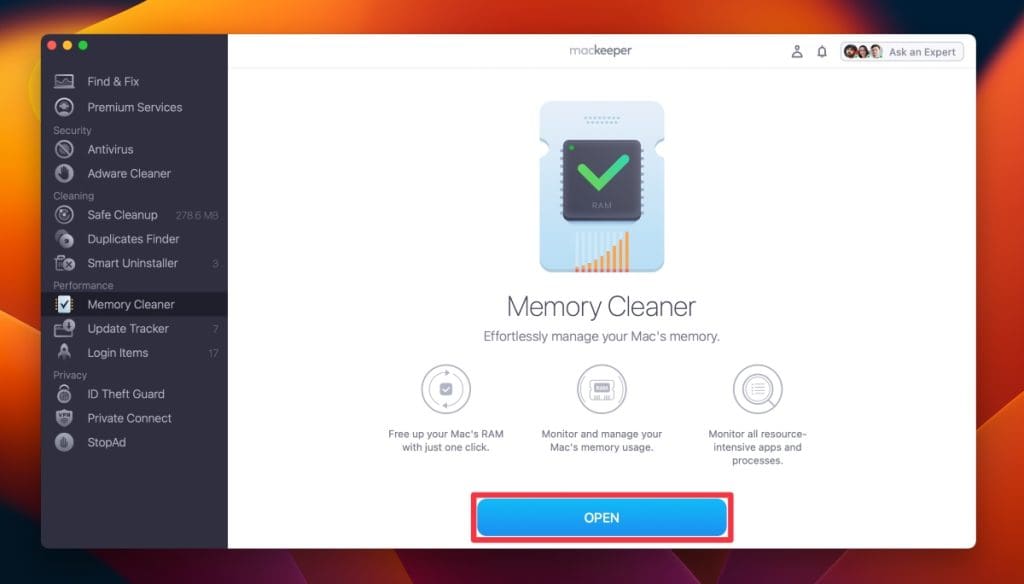
- Click Open.
- Click Clean Memory.
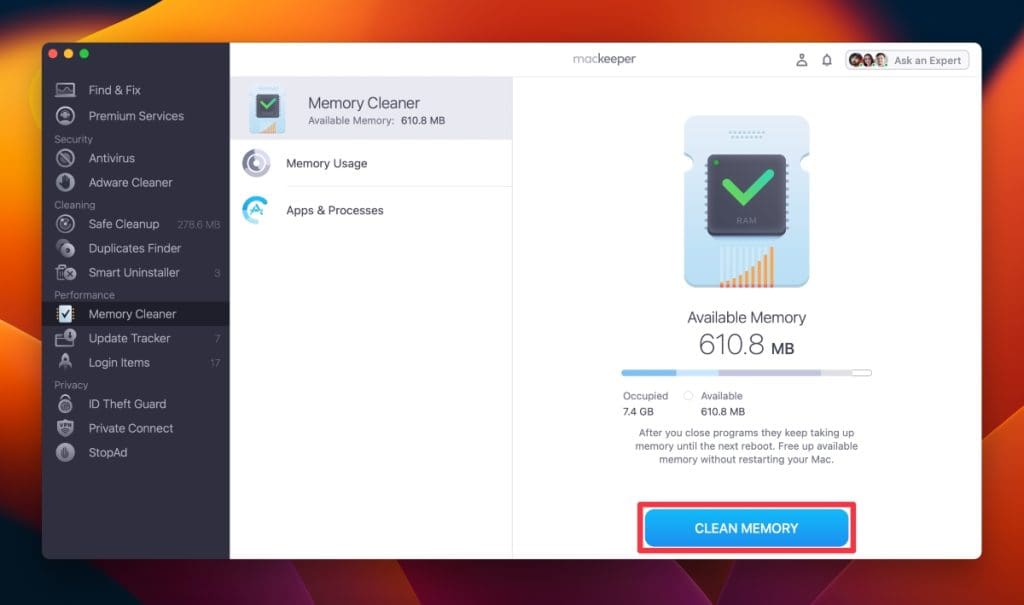
- It will clean your Mac and free up available memory. You can see how much memory it freed under Last Cleanup.

Free Up Memory on Mac
Now that you know how to identify memory hogs and free up RAM on your Mac to optimize its performance, here are some tips for maintaining your Mac’s memory health:
- Monitor your Mac’s CPU, GPU, and RAM usage regularly to idenify memory-related issues and improve performance.
- Update the apps on your Mac to prevent them from crashing and ensure smooth operation.
- If you’re running out of memory frequently, consider upgrading your Mac’s RAM.