TL;DR
To fix Mac Finder not responding issue:
- Force quit Finder to fix minor glitches.
- Restart your Mac to clear issues affecting Finder.
- Close unused apps to free up resources.
- Clear storage to prevent Finder crashes.
- Reset Finder preferences to fix crashes.
- Disconnect peripherals to troubleshoot issues.
Tried and Tested ✅: The methods and steps mentioned in this article have been tried and tested firsthand by Ojash Yadav on his MacBook Pro M3 and rechecked for errors on Hashir’s MacBook Air M2.
If Finder is being sluggish or unresponsive, it can really slow you down. Thankfully, there are several simple ways to fix it and get it running smoothly again.
How to Fix Mac Finder Not Responding
Why You Can Trust MacBook Journal ![]() We always conduct first-hand research and verify every method or solution we present, ensuring you receive reliable and effective advice. Learn more about our process.
We always conduct first-hand research and verify every method or solution we present, ensuring you receive reliable and effective advice. Learn more about our process.
Now I am going to share the 12 best methods to fix the Mac Finder not responding issue:
1. Force Quit the Finder App
Force quitting Finder can resolve minor glitches and unresponsiveness quickly. Here’s how to force-quit the Finder app on Mac:
- Press Option⌥ + Command ⌘ + Esc to open the Force Quit Applications window.
- Select Finder and click Relaunch.

Remember, forcing Finder to quit will close all Finder windows, so ensure you’ve saved any data you may be working on within those windows.
2. Restart Your Mac
Restarting your Mac clears out minor system issues that may be affecting Finder. Here’s how to restart your Mac:
- Click the Apple logo located in the upper-left corner of your screen.
- From the dropdown menu, choose Restart.
- Click Restart on the pop-up window.

Once your Mac restarts, check if Finder is functioning as expected.
3. Close Unneeded Programs
Closing unused apps frees up system resources, helping Finder run more smoothly.
- Right-click or control-click the application’s icon in the Dock and select Quit.

4. Clear Your Storage
Freeing up storage space can improve Finder’s performance and prevent crashes. Here’s how to clear your storage on Mac:
- Empty the Trash: Right-click the Bin icon in the Dock and choose Empty Bin to free up space.
- Delete Unnecessary Files: Browse through folders, drag unneeded files to the Bin, and empty it.
- Clear Junk Files: Use a tool like MacKeeper to scan and remove junk or temporary files.
- Move Files to External Storage: Transfer large, unnecessary files to an external drive to free up storage on your Mac.
5. Delete Finder Preferences
Resetting Finder preferences can resolve crashes or non-responsiveness caused by corrupted files. Here’s how to delete Finder preferences on Mac:
- Open a Finder window, click Go in the menu bar, and choose Go to Folder.
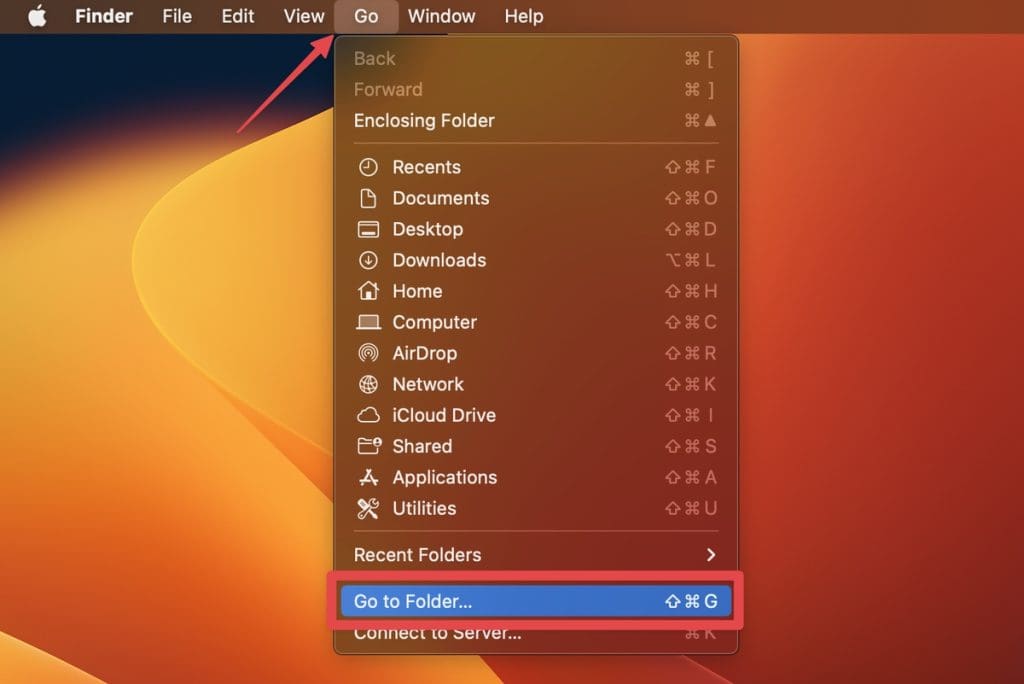
- Type the following path:
~/Library/Preferences/
- Look for files named com.apple.finder.plist and possibly com.apple.sidebarlists.plist.

- Drag the files to the Bin or right-click and choose Move to Bin.

- After the preference files have been deleted, restart Finder or your Mac to apply the changes.
Deleting Finder preference files will reset any custom settings you’ve made to Finder, so you may need to reconfigure those settings afterward.
6. Unplug Connected Peripherals
External devices may interfere with Finder, so disconnecting them can help troubleshoot the issue. Here is how you can check:
- Disconnect all external devices (USB drives, printers, external displays, etc.).
- Restart Finder and check if the issue is resolved.
- Reconnect devices one by one, testing Finder after each to find the problematic one.
7. Uninstall Unnecessary Apps
Removing unneeded apps helps free up space and reduces the chance of software conflicts with Finder. Here’s how to uninstall apps on your Mac:
- Click the Launchpad icon in the Dock, or use the Mac keyboard shortcut key: F4.
- Scroll through the apps in Launchpad until you find the app you want to uninstall.

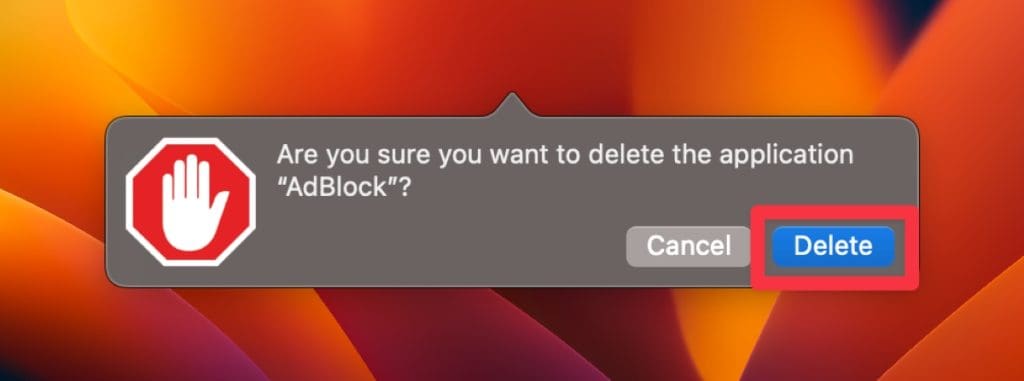
- Click and hold the app icon until it starts shaking and an X icon appears on the top-left corner of the app icon. Click the X icon to delete the app.
- Tap the Delete button on the confirmation dialog box, and it will move the app to the Bin in the Dock.
- After deleting the app, right-click the Bin icon in the Dock and select Empty Bin.

8. Rebuild the Spotlight Index
Rebuilding the Spotlight index can resolve Finder issues related to slow or inaccurate file searches. Here’s how:
- Click the Apple icon in the menu bar and select System Settings.
- In the System Settings window, click Siri & Spotlight.

- Scroll down the right pane and click the Spotlight Privacy button.

- Click the + button at the bottom left of the Privacy window.

- A new window will appear, showing your file system. Select your startup disk, usually named Macintosh HD, from the list, and click Choose.

- Once you have added your startup disk to the Privacy list, Spotlight will stop indexing its contents.
- After adding the drive, wait a few minutes and remove it by selecting it and clicking the – button. This will trigger Spotlight to rebuild its index.
9. Switch iCloud Off and On
Toggling iCloud off and on can resolve synchronization issues affecting Finder.
- Before changing iCloud settings, ensure your important data is backed up to avoid any potential loss.
- Click the Apple logo in the upper-left corner, then select System Settings.
- Navigate to Apple ID > iCloud.

- Click Sign Out at the bottom-left of the iCloud pane. Follow the prompts, choosing whether to keep a copy of iCloud data on your Mac.
- Once you’ve successfully signed out, restart your Mac.
- After rebooting your Mac, go back to System Settings > Apple ID > iCloud and sign back in.
- Open Finder to see if the issue has been resolved.
10. Boot Your Mac in Safe Mode
Booting in Safe Mode helps identify system and app-related issues by loading only essential software, disabling third-party applications and extensions. This can isolate problems affecting Finder. To boot in Safe Mode, shut down your Mac, press the Power button while holding the Shift key, and select Safe Mode from startup options.
For a detailed guide on using Safe Mode, read my guide on how to boot your Mac in Safe Mode.
11. Repair Your Disk Using Recovery Mode
Disk corruption can cause Finder to malfunction. Using Recovery Mode allows you to repair disk errors with Disk Utility. Boot your Mac into Recovery Mode by pressing Command + R during startup, then run First Aid to fix any disk issues. Restart your Mac once repairs are complete.
For a step-by-step guide on repairing your disk, click here.
12. Update Your macOS
Keeping macOS up-to-date ensures stability and can resolve Finder-related bugs. Backup important data, then navigate to System Settings > Software Update, and click “Update Now” to install the latest version. After the update, check if Finder’s issues are resolved.
For more details on updating macOS, click here.
🛠️ Factory Reset Your Mac (Last Resort)
A factory reset is a last resort when all other fixes fail. It erases all data and restores your Mac to its original state, which can resolve serious Finder issues. For a full guide on factory resetting your Mac, click here.
Get Your Mac Finder Back on Track
From simple steps like force-quitting Finder and restarting your Mac to more advanced measures like running Apple Diagnostics or even a factory reset, this guide provides robust tools for resolving almost any Finder-related issue.
Here are a few more tips to optimize your Mac and fix performance issues:
- Mac running slow? Try closing unnecessary apps, deleting cache, and updating your apps and macOS.
- If your Mac won’t shut down, there may be an issue with its software or third-party applications.
- If your Mac often freezes and you have to see the dreaded beachball of doom, learn how to fix a frozen Mac.