TL;DR
Follow these Mac maintenance tips for a smooth experience:
I’ve been using Macs for years and learned some great ways to keep them running smoothly. In this guide, I’ll share some of my go-to tips for Mac maintenance that have really worked for me. You’ll find simple, effective methods like regular cleaning and updating, plus a few tech-savvy tricks to boost your Mac’s performance. Let’s get started.
Before We Begin
Regular Mac maintenance can prevent performance issues, hardware failures, and data loss. Download MacKeeper and use its Mac optimization features to enhance your system performance and security.
Mac Maintenance In Just a Few Clicks With MacKeeper
Why You Can Trust MacBook Journal ![]() We always conduct first-hand research and verify every method or solution we present, ensuring you receive reliable and effective advice. Learn more about our process.
We always conduct first-hand research and verify every method or solution we present, ensuring you receive reliable and effective advice. Learn more about our process.
MacKeeper is a handy tool to keep your Mac in top shape. It clears out clutter like system logs, caches, and temporary files, making your Mac cleaner and faster. Plus, its real-time antivirus scanner protects against malware and viruses, keeping your Mac safe. MacKeeper can also speed up your Mac‘s startup by turning off unneeded programs.
Below, I’ll show you how MacKeeper can be a reliable helper for maintaining your Mac.
1. Remove Junk Files From Your Mac
MacKeeper can scan your Mac for unnecessary files, duplicates, and cache files that take up valuable space. You can safely remove these files to free up space and improve your Mac’s performance.
Follow these steps to clean up your Mac using MacKeeper:
- Download and install MacKeeper on your Mac.
- Launch MacKeeper and go to the Safe Cleanup tab under Cleaning.
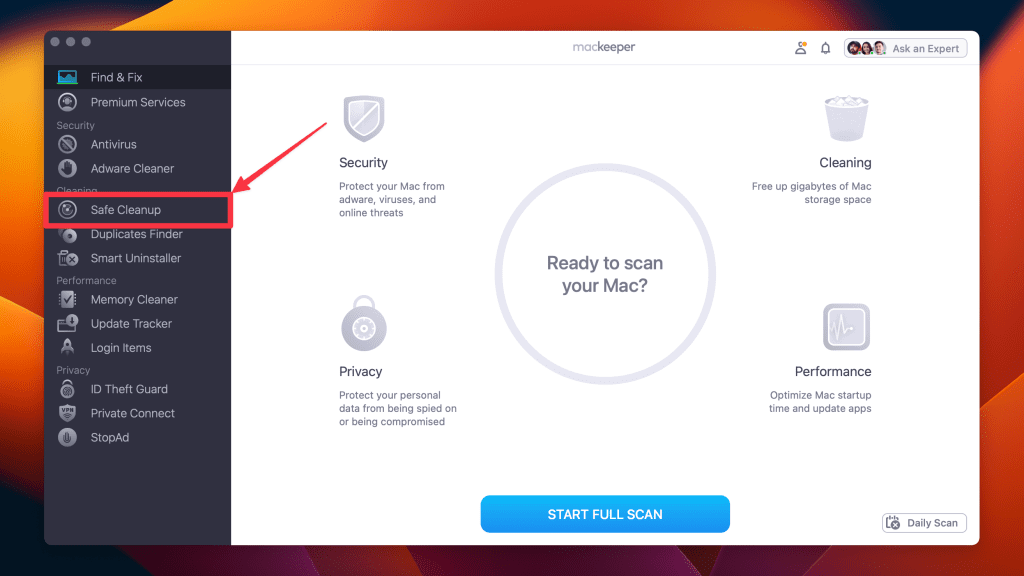
- Click Start Scan and wait for the results.
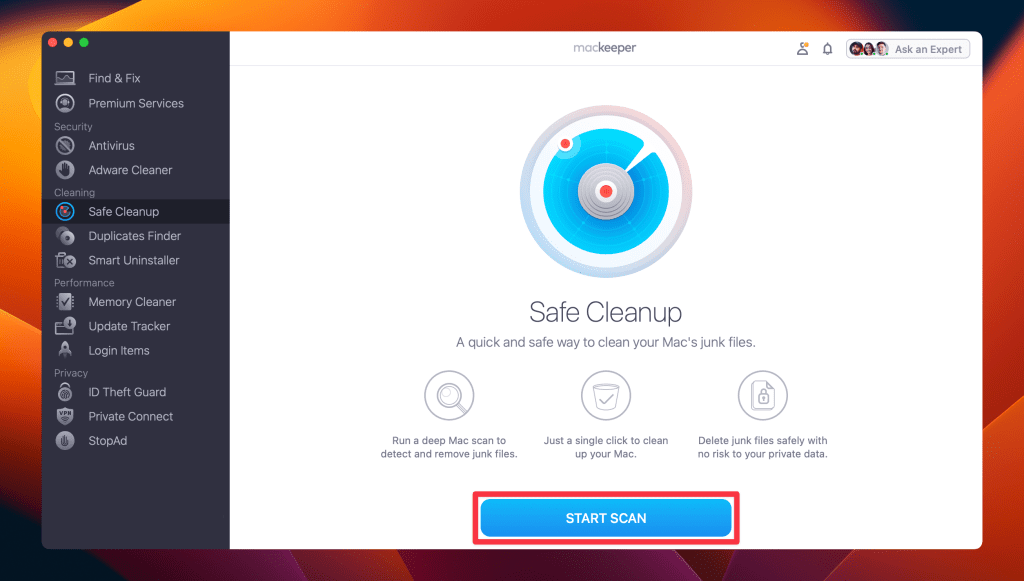
- Review the items you want to remove. Select them individually or click Check All.
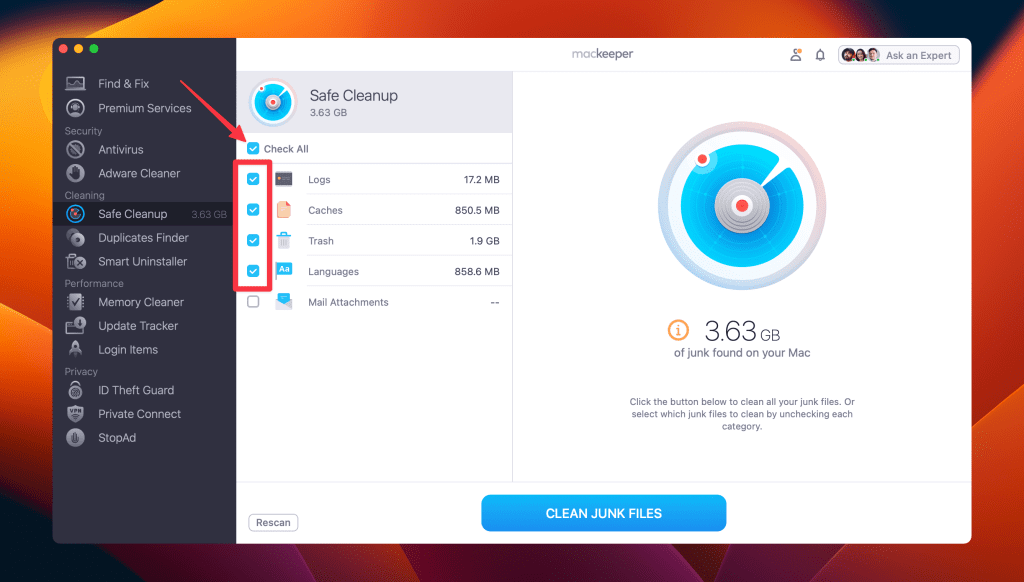
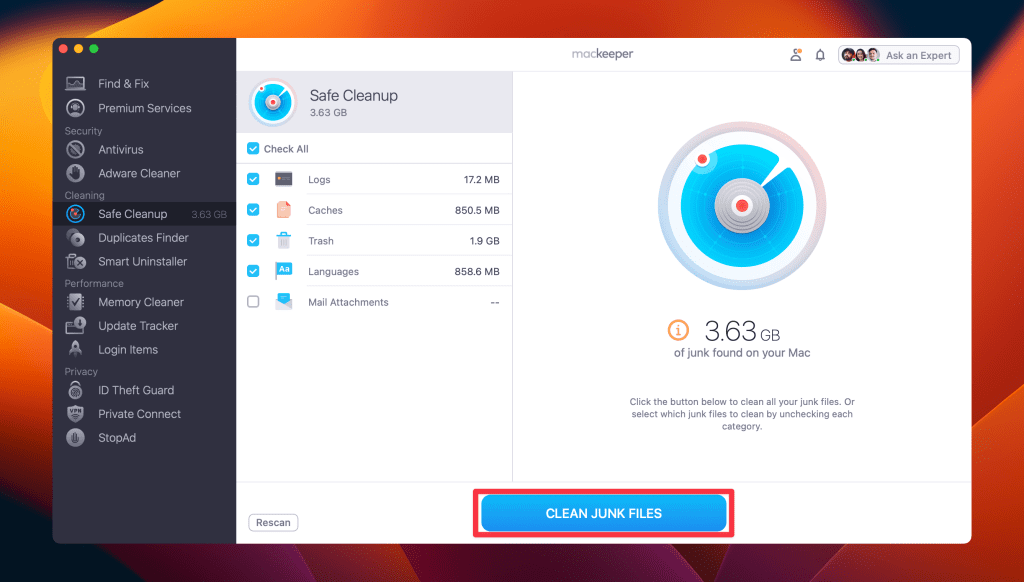
- Next, click Clean Junk Files.
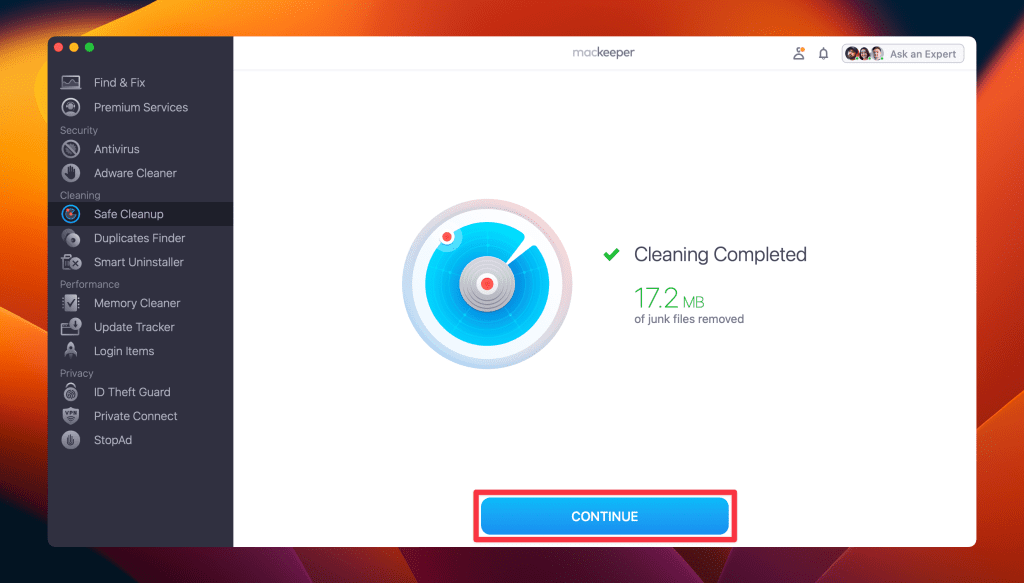
- You’ll get a Cleaning Completed notification on your screen. Click Continue to end the process.
2. Uninstall Unnecessary Applications
MacKeeper can also tidy up your Mac by removing apps you don’t use anymore, along with their extra files and settings. This frees up space and speeds up your Mac by getting rid of stuff you don’t need.
Here’s how to uninstall any app on Mac using MacKeeper:
- Download and install MacKeeper on your Mac.
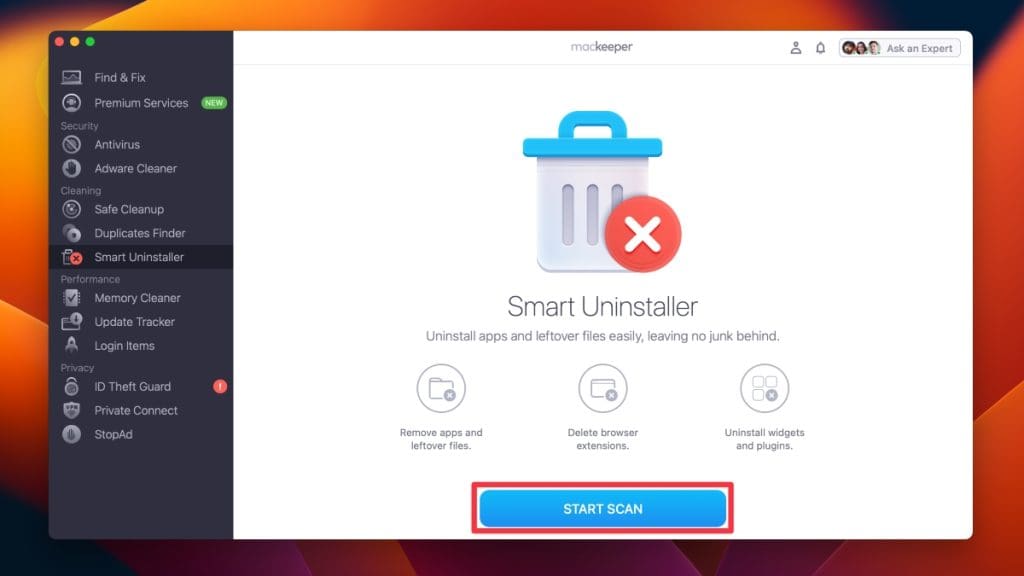
- Launch MacKeeper and navigate to the Smart Uninstaller under Cleaning.

- Click Start Scan.
- Wait for the scan to complete, click Applications in the left panel, and select the apps you want to delete from the list. Tap Remove Selected.

- Confirm the deletion by clicking Remove on the pop-up.

- This will remove unnecessary apps from your Mac, and you’ll get a Removal Completed message. Click Rescan if you want to scan your Mac again.

3. Secure Your Mac
Securing your system against malware is an essential Mac maintenance step, and MacKeeper can improve your Mac’s security by detecting and removing viruses and malware. It can also protect your online privacy by protecting your emails against data breaches.
Here’s how to use MacKeeper to run a virus scan on your Mac:
- Download and install MacKeeper on your Mac.
- Launch MacKeeper and click the Antivirus tab in the left sidebar.

- Select the features you want to use to secure your Mac. For example, you can enable real-time antivirus protection.

- Once you have configured your security settings, MacKeeper will continue to protect your Mac in the background, scanning for threats and blocking malicious activity.
- You can also run an instant virus scan by clicking the Start Scan button.

- If the scan finds any viruses, click the Fix Items button.
- If there are no issues in your system, click Restart to run the scan again or close the program.

12 Tips for a Smooth Experience on Mac
I’ve found that doing a few things like removing unneeded files, tweaking system settings, and clearing the cache really makes a difference in how it performs. Below, I’ll share some Mac maintenance tips that have worked well for me and can improve your experience too.
1. Keep Your Mac Up to Date
Keeping your Mac up-to-date with the latest software updates and security patches ensures optimal performance and security. macOS updates give you access to the latest features and improvements by fixing bugs and improving system performance.
To update your macOS, follow these steps:
- Click the Apple menu and select System Settings.
- Click General and select Software Update.

- If there is an update available, click Update Now.
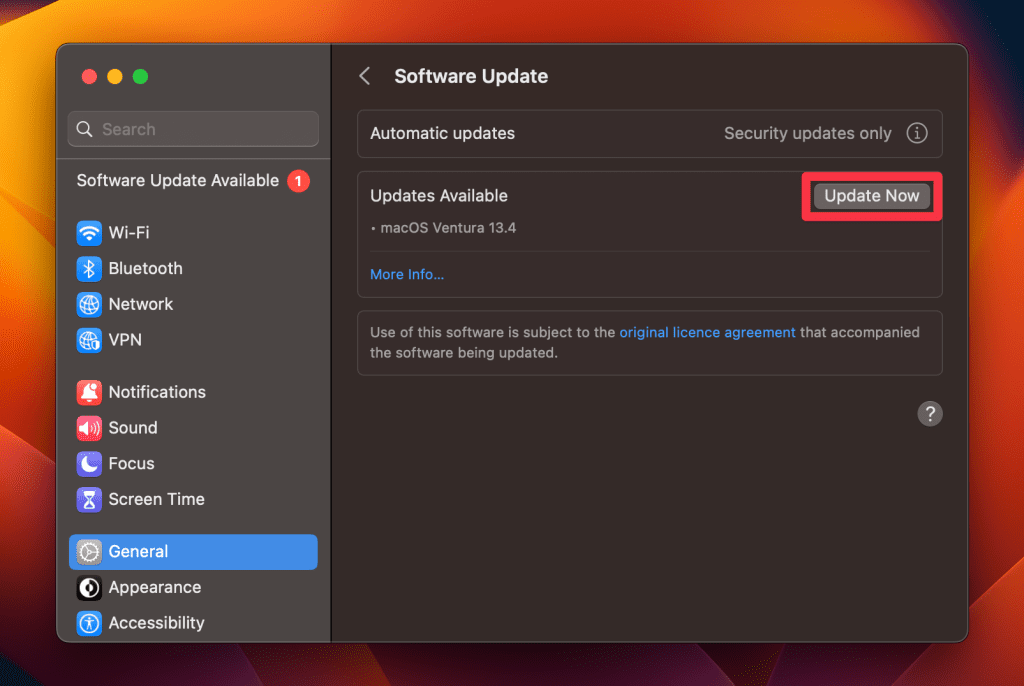
- Follow the on-screen instructions to complete the update process.
2. Clear the Cache Files
When you use your Mac, it stores temporary files and data in its cache to speed up certain processes. However, over time, the cache can become bloated and cause performance issues. Clearing the cache can free up space on your Mac and improve its performance.
Although I recommend using MacKeeper to clean your cache files quickly, you can also do it manually. Here’s how:
- Open Finder, click Go in the menu bar, and select Go to Folder.
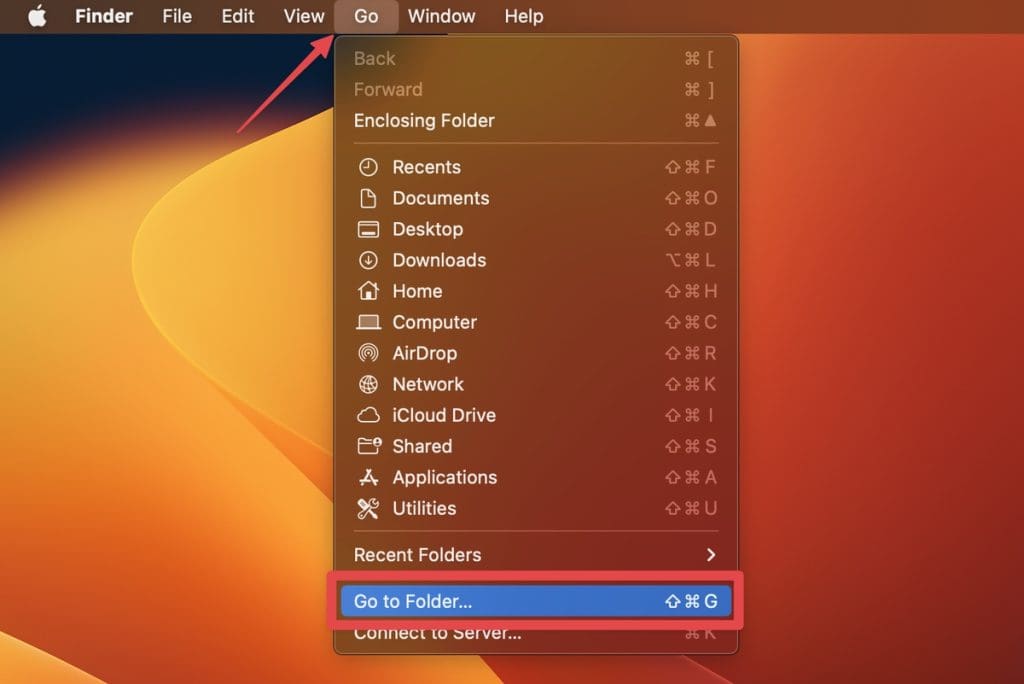
- Type the following path and press Enter:
~/Library/Caches/
- Select all the files in the folder and delete them. Alternatively, you can select specific files to delete if you know which apps they’re associated with.
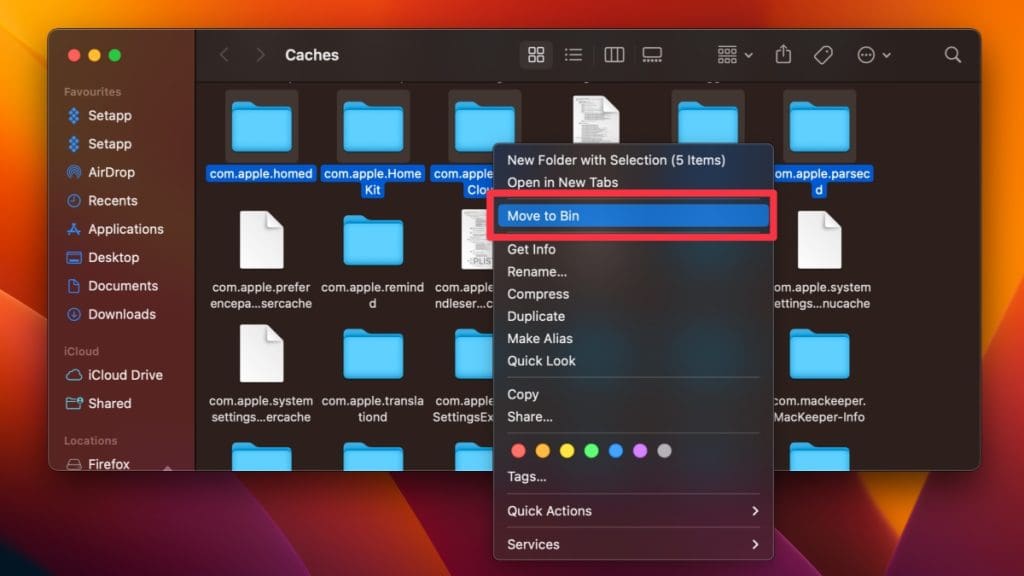
- Empty the Trash on your Mac to delete the files permanently.

3. Remove Unnecessary Files
Be careful not to delete essential system files, as this can cause serious issues with your Mac.
Over time, your Mac accumulates various types of files that can take up space and slow down your system. These files can include:
- 💾 Temporary Files: These files are created when you use an app or browse the web. They can accumulate over time and take up space on your hard drive.
- 📚 Duplicate Files: These files have the same content and can take up space on your hard drive. They can be created when you make copies of files, import photos or music, or sync data between devices.
- 📜 System Logs: These are files that record system events and errors. They can be useful for troubleshooting, but over time they can accumulate and take up space on your hard drive.
- 📲 Unused Applications: These are apps you no longer use but are still taking up space on your hard drive.
To clear unnecessary files on your Mac, you can follow these steps:
- Click the Apple menu and select About This Mac.
- Click General and select Storage.

- Review the categories of files listed and identify any large or unnecessary files by clicking the small i button.

- Select unnecessary files and click the Delete button.

- Empty the Trash to permanently delete the files.
4. Optimize General Settings on Mac
By adjusting Bluetooth, display, and video quality settings, you can control how much power your Mac uses. This can affect the speed and responsiveness of your Mac by reducing the workload on the system’s hardware.
Here’s how to optimize your Mac’s settings:
- Click the Apple menu and select System Settings.
- Click Lock Screen and set your Mac to automatically Turn display off on battery when inactive after a certain time or put it to sleep when it’s inactive for a while.

- Use the Automatic graphics switching feature, which allows your Mac to automatically switch between the integrated and dedicated graphics card based on the task. Go to Battery and click the Options button at the bottom.

- Toggle on the Optimise video streaming while on battery switch and click Done.

- Turn off Bluetooth from the Control Center as it can drain your Mac’s battery.

5. Keep System Resources in Check
Overloaded resources can lead to system slowdowns, app crashes, and reduced overall performance. Tools like Activity Monitor can help you identify and close resource-hungry apps or processes.
Here’s how to monitor your Mac CPU, GPU, and RAM usage using Activity Monitor:
- Launch Activity Monitor. You can find it in the Utilities folder in the Applications folder.

- Click the CPU tab to view the processes using CPU power.

- Click the % CPU column to sort the processes by CPU usage, with the highest usage at the top.

- Identify the process or application with high CPU usage on Mac, and take appropriate action to reduce its usage.
Now, follow the same steps for monitoring RAM in the Memory tab of Activity Monitor.
To monitor GPU usage on your Mac, follow these steps:
- Launch Activity Monitor. You can find it in the Utilities folder in the Applications folder.
- With the Activity Monitor open, click Window in the menu bar and select GPU History from the drop-down menu.

- This will launch a new window called GPU History, showcasing the utilization history of all GPUs presently accessible to your Mac.

- You can adjust the size of each graph by clicking and dragging the tiny dots between each one.
6. Delete Duplicate Photos
We often end up with multiple copies of the same picture, which takes up space and makes finding the photo you want harder. I always use MacKeeper’s Duplicates Finder to find and delete duplicate photos.
Here’s how to use MacKeeper’s Duplicates Finder to delete duplicate photos on your Mac:
- Download and install MacKeeper on your Mac.
- Open MacKeeper on your Mac and click Duplicates Finder in the left sidebar.

- Click Start Scan.

- Select a folder in the left menu to review duplicate files before deletion.

- Alternatively, you can click Check All and tap the Remove Selected button to remove all duplicate files at once.

- Tap the Remove button on the pop-up to confirm the deletion.

- This will remove the selected files, and you’ll get a Removal Completed message. Click Continue to end the process.

You can also use the Photos app to find and delete duplicate photos. Here’s how:
- Open the Photos app by searching for Photos in Spotlight search (Command ⌘ + Space).

- In the Photos app, navigate to the Duplicates tab in the sidebar to see all your pictures.

- Select the duplicate photos you wish to merge. You can pick photos from a single row or from multiple rows to merge them all at once.
- Then, click Merge Photos.
- By doing so, your Mac will retain the original image and remove the duplicates.
7. Manage Startup Items
Startup items can really slow down how quickly your Mac boots up and might even affect how well it runs overall. I recommend using MacKeeper to handle those hidden startup items on your Mac quickly. With just one click, you can clean up your login items and make your Mac start up faster.
Here’s how to remove login items on your Mac using MacKeeper:
- Download MacKeeper and install it on your Mac.
- Open Login Items under Performance in MacKeeper.

- Click Start Scan.

- Select unnecessary items from the list and click Remove Selected Items.

- Tap the Remove button on the pop-up.

- It will remove your selected items from the system startup list. You can click Rescan to repeat the process.

What Else Can MacKeeper Do?
Besides cleaning junk files, uninstalling unwanted apps, and running a virus scan, MacKeeper can delete duplicate files on Mac, update apps on Mac, and remove browser extensions on your Mac. Check out my detailed MacKeeper review to learn more about these features.
You can also use System Settings to manage your startup items. Follow these steps to change your startup items on Mac:
- Click the Apple icon and select System Settings.
- Select General and click Login Items in the right menu.

- Here, you’ll see the items that launch when you start up your Mac.
- Select the login item you want to remove and click the – button at the bottom of the list to remove the login item.
8. Empty Your Trash Regularly
Files in your Bin occupy disk space until permanently deleted. Not emptying your Trash can accumulate gigabytes of unnecessary data, which may consume space and potentially slow down your Mac.
To manage this, regularly empty your Trash folder. You can empty your Trash in a few ways:
- Right-click the Bin icon in the Dock and select Empty Bin.
- Double-click the Bin icon to open it. Press Command ⌘ + Shift ⇧ + Delete on your keyboard.
In both methods, confirm the action by clicking the Empty Bin button when prompted.

9. Restart Your Mac Occasionally
Many Mac users rarely shut down their computers, which is generally okay. However, I still recommend periodically restarting your Mac. Restarting helps clear temporary data and completes pending updates.
To restart your Mac, follow these steps:
- Click the Apple icon located at the top left corner of your screen.
- Choose Restart from the menu.
- Confirm by clicking the “Restart” button.

10. Declutter Your Desktop
To declutter your desktop as part of maintaining your Mac, follow these steps:
- 📁 Organize Files into Folders: Group similar files together into folders. For example, you can create folders for different types of documents, projects, images, etc.
- 🗑️ Delete Unnecessary Files: Remove any files you no longer need. This can include old documents, redundant downloads, and temporary files.
- 📚 Use Stacks on macOS Mojave or Later: Right-click the desktop and select Use Stacks. This feature automatically organizes files into neat stacks based on file type, date, or tags.
- 📦 Archive Old Files: If there are files you don’t frequently use but need to keep, consider moving them to an external hard drive or cloud storage.
- 🖼️ Use a Desktop Organizer Wallpaper: Consider using a wallpaper with designated areas for different types of files or tasks. This can keep your desktop organized visually.
11. Flush Your DNS Cache
Flushing your DNS cache on a Mac is a useful maintenance step, especially if you’re experiencing internet connectivity issues or updating your DNS settings. Here’s how to flush the DNS cache on your Mac:
- Open the Terminal application by navigating to Applications > Utilities > Terminal or by searching for it using Spotlight (Command ⌘ + Space).

- In the Terminal window, input the following command and then press Enter:
sudo dscacheutil -flushcache; sudo killall -HUP mDNSResponder
- You’ll be prompted to enter your Mac’s admin password to proceed. Do so and press Enter to execute the command.
After you enter the command and authenticate, your Mac’s DNS cache will be flushed. You’ll usually see no output if the operation was successful, which is standard for most Unix-based commands.
12. Run First Aid
Running First Aid through Disk Utility is an important maintenance task for your Mac. It checks for and fixes various file system issues, ensuring your disk is in good health. Here’s how to run First Aid on Mac:
- You can find Disk Utility in the Utilities folder inside the Applications folder.

- In Disk Utility, you’ll see a list of all available drives and volumes. Select the disk you want to run First Aid on. Typically, this would be your main drive, often labeled as Macintosh HD.

- With the disk selected, click the First Aid button at the top of the Disk Utility window.

- You’ll be asked if you want to run First Aid on the disk. Click Run to proceed.

- If you’re running First Aid on your boot drive, you may need to restart your Mac and boot into Recovery Mode (holding down Command ⌘ + R during startup) to perform the check.
- Disk Utility will check the disk and attempt to fix any errors it finds. This process can take some time, depending on the size of your disk and the number of issues it encounters.
- Once First Aid is complete, Disk Utility will display a summary of its findings. If any issues were found, run First Aid again to ensure all problems were addressed.
Why Is Mac Maintenance Important?
Mac maintenance is crucial to keep it running smoothly and prevent performance issues. Here are a few reasons why maintaining your Mac is essential:
- 🚀 Performance Optimization: Regular maintenance ensures your Mac runs smoothly and efficiently. This includes managing storage space, updating software, and running system optimizations to prevent slowdowns and crashes.
- 🔒 Security: Keeping macOS up to date is crucial for security. Updates often include patches for vulnerabilities that could be exploited by malware or hackers.
- 🕰️ Longevity: Proper maintenance can extend the lifespan of your Mac. By keeping the hardware and software in good condition, you reduce the need for costly repairs or early replacement.
- 🛡️ Data Protection: Regular backups and disk checks help protect your data from loss due to hardware failures, accidental deletion, or corruption.
- 🌟 Improved User Experience: A well-maintained Mac provides a better user experience. It boots up faster, runs applications more smoothly, and is less likely to encounter errors or issues that can disrupt your work or entertainment.
- 💰 Cost-Efficiency: By maintaining your Mac, you can avoid issues that might require professional repair services, thus saving money in the long run.
Keep Your Mac Optimized and Running Smoothly
Regular Mac maintenance is essential for a smooth experience. Here are some more tips for the future Mac maintenance:
- Organize your files on Mac to prevent them from piling up on your desktop and slowing down your system.
- Declutter your Mac regularly to make sure you only have the files, folders, and apps you need.
- Optimize storage on your Mac to make sure there’s enough for the important stuff.